Tuesday, December 6, 2011

Cute photo frames

I found another fun use for paint and mod podge.  Since I have so much of the stuff lying around my "workshop" lately, I keep messing with it on new projects.  I have been busy getting ready for a craft fair as of late, and I haven't had time to blog about stuff.  So, here is a small, simple project to kick things off again. :-)  These would make great holiday gifts, btw...

Materials:
Wood Photo Frame - preferably unfinished; check out local dollar stores
Paint(s) - can even be leftover wall paint for an economical craft
Paint brush
Stickers, scrapbooking paper, printed cliparts, rub on designs, or anything else you can think of
Mod Podge
Acrylic Sealer (optional)

1. Remove the backing and glass from the frame.  Set aside in a location it can stay for a while without getting lost or broken.  This project requires lots of dry time which can span a few days.

2. On some cardboard or newspaper, paint the front of the frame, the inside edge (near where the glass goes), and the outside edge, being careful not to smudge it with your fingers or paint it to your surface.  Let it dry for at least an hour, depending on the recommended dry time for your chosen paint.  Add a second and third coat as needed to get a good base coverage.  Don't skimp - you want vibrant colors!


3.  When the front is dry enough to flip the frame over without it sticking to the paper, paint a heavy coat on the back.  You don't really need to do this if you are crunched for time, but it will make your final product look more finished.  You shouldn't need to do additional coats on the back unless you really want it to look fancy from the back.

4.  Flip the frame over and add your decorations to the front.  Get creative and find images from old magazines, greeting cards, stickers (this is a great way to use up old stickers that are no longer sticky), bits of scrapbook paper, and print out cliparts from your printer.  I discovered when making baby blocks that inkjet printed paper does pretty well with mod podge - it doesn't run as much as people say.  I think the results are darn near perfect.  If decorations have their own adhesive, stick them right to the frame, otherwise use a thin layer of mod podge to glue them down.

The one on the left is a recycled greeting card!  Yay for eco friendly and FREE!  And cute, of course.
5.  Apply a generous coat (frame should look somewhat milky) of mod podge over the front and outside and inside edges of the frame.  Don't add too much to the edges or it will stick to the paper, but you want to wrap the layer of mod podge around more than the front panel alone so it seals completely and doesn't leave a visible line where you stopped applying it.  Set the frame somewhere to dry.

6. After about an hour or when the mod podge is no longer tacky, apply a second coat.  I recommend a third, but it is not imperative if you are on a time crunch.  Be careful not to leave deep brush strokes - the mod podge will dry clear, but you can still see some brush strokes in the final product, and careful application will help minimize this.

7.  You can also add an optional layer or 2 of acrylic sealer, but even I admittedly was in too much of a hurry to do it this time.  I will for next time, though!

Once the last layer of sealer or mod podge dries, you are done!  Pop a photo in, replace the glass and backing, and bask in your homemade beauty!


Bottom Line:
Frames: as little as $1 at the dollar tree, but Walmart has affordable ones for a bit more ($3-$5)
Paint: I used leftovers from other projects, but a small bottle averages $2
Mod podge: again, leftovers for me, but cost of a bottle is about $6
Decorations: Use what you have!  paint a design if nothing else!
Total cost = between $1-$13

Time = approx half an hour total work time, not including dry time; give yourself a full day to complete this if you plan to work straight through

Retail = starting at $8 for smaller ones, easily up to as much as $30!

Savings = $7-$17  Hooray!

Wednesday, November 16, 2011

Ordering fabrics and craft supplies online

This is not a how-to post, I know, but I feel like crafters everywhere are struggling with the move to web based shopping.  I know it is something that plagues me.  I have so many items I need for many of my projects, and inevitably, something is out of stock.  Brick and mortar stores used to be the only option, and getting rare or large quantity items was basically impossible.  Well, that is not the case so much with the interwebs, but what things are good to buy online and what things aren't?  Is it okay to buy cut yards, sight unseen?  What about trying to save money?  What if I hate what I have ordered?  What about coupons, sales, etc?  So many questions...  I have tried to tackle some of that here, and most of what I say applies to fabric specifically, but applies to other craft supplies, too.

Delving into the true unknown: internet based retailers.  There are lots of different flavors out there from amazon and ebay sellers that might actually be that crazy lady down the street selling the crap in her garage to true internet-only retailers without a store counterpart, to the website of common chains like Joann's.  Each handles things a little differently, and it is hard to lump them together, but I will do my best to represent all the above.

Pros:
1) Selection and availability.  There are so many options out there for things like fabric, where the quantity of items produced could never possibly be held in a store.  There are specialty fabrics made out of organic cotton, bamboo, and unbleached or untreated fibers, a variety of prints that would swamp any normal retailer, and uncommonly used notions like hook and eye tape, which I discovered a few months ago is basically unfindable.  I love the selection on the internet.  You can find darn near anything!

2) Cost.  Shopping around can really pay off.  Because they do not have the overhead of a brick and mortar store or the hassle of distributors (if you are buying wholesale), online shops can be a whole lot cheaper, and it is so easy to let your keyboard do the shopping.  Especially when you consider buying bulk (usually by the bolt or in large quantities of cut yards), the cost of fabric can come down substantially compared to in store purchases.  Many chain stores run the same sales online as in store, and you can capitalize on that, too.  Also, you can buy things on clearance at drastically reduced prices as they clear warehouses of a particular item that a manufacturer is no longer making or has a defect (usually a minor thing like selvages are messed up or something you can still use).  I have done this several times and been SO glad for it!

3) Quantity.  For large projects, finding an adequate amount of fabric is tough in stores.  Bolts are small, generally under 10 yards each, and rarely do you find a brand new bolt.  But online, you can find large, CONTINUOUS bolts of fabric that don't leave you with 9 yards in one piece and three in another.  I wanted to make 5 bridesmaids dresses.  I ended up getting the fabric at 7 Joann's locations over 4 months of time.  An online purchase of a few bolts of fabric would have been VASTLY easier, if only I had known then what I know now.

Cons:
1) Untouchables.  The most obvious drawback to buying anything online is that you cannot see what you are buying.  This is a major downfall for creative types.  Imagine trying to compare two pieces of lace trim without having them in front of you or being able to lay them across the fabric you are working with?  Tough call.  Many retailers (ones without a brick and mortar store in particular) do a great job combating this with item descriptions and photos, giving examples of projects that are suitable for that kind of fabric and showing a scale when displaying prints to give the buyer an idea of what it looks like in person.  Some even describe the drape and feel of the fabric and/or include a thread count or gram weight when referring to the fabrics.  A select few offer free swatches, and many others offer swatches for a fee that usually includes shipping cost, generally about $1 or so each.

2) Shipping.  Shipping costs can often eat up any sale or price incentive you found to buying online.  Because fabric is both bulky and heavy, it can be a bear to ship.  Some stores offer free shipping for orders over a certain dollar amount or flat rate shipping promotions, but that forces the shoppers hand on how much to buy and when, and if you want to take advantage of something on sale or clearance, well that pretty much NEVER lines up with a free shipping deal.  Also, the ecological impact of shipping has been cited many times in the argument for buying locally.  Now if it isn't manufactured locally, well, that kind of opens a whole new can of worms, but I am not really willing to get into that here... :-)  And of course, if it has to be shipped, you cannot have it immediately for a short deadline.

3) Couponing and promo codes.  Remember the crafter's creed, Never Pay Full Price!  Some stores never offer sales or coupons (most notably for me, dharma trading co.) which means you can never bring down your materials cost.  Others (like joann.com) only allow one coupon or promo code per transaction, which means you can't use a free shipping code with a percent off code.  What gives?!

4) Yardage increments.  Most sellers online will not sell less than 1 yard, and will only cut in increments of 1 yd.  This is hardly an issue for me, since garments almost always use more than 1 yd, but sometimes getting 6 instead of 5 1/8 is a little annoying, especially for those REALLY expensive items like faux furs or silks.  I am sure this is horrible for quilters, though, who commonly need only a fat quarter of something for a project.

5) Returns.  What do I do if I hate it?  Probably the scariest con when combined with #1, not being able to touch the item before you buy.  Return policies vary widely from store to store, as does the quality of the merchandise.  The biggest problem I have with returns is that the .com affiliates of the brick and mortar stores are actually separate entities entirely and I cannot return items to a store (such as joann's and joann.com).  That yanks the security net right out from under me.  (Why they chose that business model is beyond me).  I recently bought from hancockfabrics.com and they sent me 4 yards of defective flannel.  Even though it was their fault the fabric was defective, I had to pay shipping if I wanted to return it.  Shipping was around $11, and the cost of the fabric was about $14, so I opted to keep it so I didn't have to spend $11 and still have no fabric for my project.  I'm certainly not happy with the return policy there!


Bottom line: Buying craft supplies online is a great way to save money, price compare, and find exactly what you are looking for.  However, protect yourself the best you can as a consumer.

1) Do copious research on their return policies BEFORE you buy.  Some will not accept returns at all (especially for cut yardage), some will under certain circumstances but you pay shipping, some are great about returning items, and there is every other shade of grey in between.

2) Have a good idea of what you want before you buy, and if you can, scope it out in person somewhere.  If you are unsure about the look and feel or drape of a fabric, try going to a store and handling similar items.  You can always order a swatch, but make sure you allow yourself enough time to have the swatch shipped and then order the item.  And keep in mind that dye lots may change the appearance slightly from the swatch you receive.

3) Sign up for email coupons for chain stores and newsletters for the online-only retailers to keep up on sales and shipping promotions as well as new products.  Always take a look at the clearance bin before you place your order - you just may find something to love.

4) Only buy from reputable sources you trust.  There are lots of shops out there on the interwebs and not all of them are good.  If a site is questionable, place a small order to "try them out" before going $300 deep on that gorgeous satin you think you want.  Try not to learn costly lessons if you can avoid them!

Happy online shopping!

Monday, November 7, 2011

Baby block and Martha Stewart

Back story: Some friends of ours recently gave birth to a new baby boy.  They asked hubby and me to be godparents for the little bundle.  Needless to say, we were ecstatic!  When I was a baby, my Nana made me this awesome cross stitched picture that hung on my wall my whole childhood.  It had my full name, my birth date and time, and my weight at birth.  I loved that thing, because who else knew the exact time they were born?  I am sure records like that are filed away for every baby, but I had an easily accessible record of it that I looked at all the time.  In that spirit, I decided to make a record for our godson.  But cross stitching requires me to find a pattern, and I really wanted something unique.  Enter Martha Stewart.

Disclaimer: I loathe Martha Stewart.  She is irritating and self righteous and never shuts up.  As off-putting as she is, however, I love the creativity of the guests on her show.  If she ever actually let them talk, we may learn how to do something!  I cannot stand watching the show, but I recently discovered that all the projects they do on the show they have written instructions for on the website.  It even has video clips from the show so you can see it being done!  Which means I can FAST FORWARD through Martha, or even choose not to watch her at all, while still getting all the great craft tutorials!  Hooray!  A while back she had a guest who made baby blocks out of a block of wood, paint, paper, and mod podge.  Hers came out all vintage-y and in my opinion, hideous.  I loved the idea, however, and decided that was perfect for my baptism project.

In case you were unaware, blocks have 6 sides, so I needed 6 sides worth of content for the block.  I was certain I wanted 1. Baby's Full Name, 2. Baby's Birth Date (would have put time, too but the parents didn't know), and 3. Baby's Weight and Length at Birth.  I also had a few ideas for optional panels like 4. Baby's Parents' Full Names and Big Brother's Full Name, 5. Baby's Baptism Date (Since this is a godparent gift)
6. Godparents' names, 7. Bible verse for Baptism, 8. Birthplace, 9. Photo of him at birth or family photo.

So I have a lot of ideas...  Maybe I should make 2 blocks...

Items Needed:
1 (or 2!) Small Wooden Blocks - you can make them out of a 4x4 if you want, or buy at Michaels
Fine Sandpaper
Paint in a color(s) of your choice
Paint Brushes

Optional (you will need at least some of these, but which is up to you):
Paint Pens
Stickers
Scrapbooking or other decorative paper
Shellac spray
Mod Podge

Step 1:
Sand the edges and corners of the wooden block lightly with the sandpaper.  This helps keep sharp pointy things away from baby.  Rough up sides just a little if very smooth so paint will stick well.  Wipe off all sawdust with a rag (or on your jeans as I did...).

Step 2:
Paint the block.  You can paint each side a different color or paint the whole thing one color, or any combo thereof.  Just be aware that this step will take some time because you must let the block dry before painting the bottom.  You can skip this step or use a stain if you prefer the natural look of wood.  Just use shellac to topcoat to protect the wood.

Step 3:
Decorate the block however you like.  Use stickers, paper, draw with the paint pens, do what you feel!  I used a printer to print out all the info in a pretty font on some scrapbook paper which I cut to size.  I also cut out his initial in cool paper to put on the "top" of the block.  However, I had ideas to put on stickers, cutouts of animals, use paint pens to "doodle" on the sides, and many other things.

Step 4:
Coat the block with a clear shellac or mod podge to seal it. You can choose not to put a topcoat on the block depending on what you have decided to do to it (if all you did was paint, it probably doesn't need a top coat).  Just make sure whatever is used is NON TOXIC.  Although these aren't meant as toys necessarily, they will probably end up in baby's mouth just like everything else and not every sealant is safe for them (shellac and mod podge are both non toxic).  Make sure the surface you dry your block on is not made of paper or cardboard or it will end up with bits of paper stuck to it.  I put mine on the mod podge container to dry.  As with the paint, you can't do all sides at once so leave some extra time.

upside down and NOT touching the paper!  Its on the mod podge lid. I later realized I had to put the lid back on the container, which I did with some difficulty... :-)


Bottom Line:
1 4"x4" (or any size, really) wooden block (from Michael's) = $3.50
small bottle of craft paint (I reused from the fabric painting project) = ~$2
2 sheets of scrapbook paper (didn't use it all, also leftovers) = $.40
Pack of Paint pens = $5
Fine grain sandpaper = $2
Mod podge (I used what I already had) = $6
Shellac spray = $5

Total time = less than 2 hours, not including dry time
Total cost (will depend on which of the above things you use) = about $20 startup, but for just materials you need, about $5.

I loved this project and totally want to do more.  I think I will try ordering some smaller blocks from a shop I found on Etsy.  Those look easier to handle by little hands.  I want to do non personalized ones with alphabet themes or bright colors for learning.  Maybe I will make some to sell at an upcoming craft fair?

Monday, October 31, 2011

Simple Halloween Costume

I'm Pregnant.  About 7 months along now.  Halloween is hands down my favorite holiday.  Unfortunately for me, "Mean Girls" had it right - all Halloween is, for youngish women at least, is an excuse to wear a slutty outfit and some animal ears.  For years, I have not been above that.  I've been a sexy kitty, a playboy bunny, a tiger, catwoman...  And then some non animal things like a sexy vampire, or reusing my ren faire costume.  Don't worry, it was still sexy.  Corsets shove your boobs up. :-)

It looks like I will have to leave the sexy to the other women in the world this year.  I am too round to be classified as "sexy" I think.

I hate buying commercial costumes because they are so cheaply made and cost so much, but it doesn't matter this year anyway.  There is no such thing as a maternity costume.  Apparently my only option while preggers is to buy a plus sized costume.  Well, my belly may be round, but the rest of me is far from plus size and I doubt that is a viable option for me.  I did scope Target.com for some ideas about what to be, and I found a cute little number that will be empire waisted enough to flow over the curves.  A greek/roman goddess.  Yay for feminine and pretty and still a little sexy!

Since a pattern wont fit me without major modifications, I decided to wing it.  Its a simple enough silhouette, so I should be able to make it work, right?  Feel free to make it short and save on fabric.

Self-Faced Greek/Roman Goddess Dress Costume
You will need:
about 4-5 yards of white cotton fabric, either 45 or 60 inches wide is fine
a belt, pretty sash, chain, or ribbon to cinch the waist
a top (or dress) with a cowl neckline that fits you well
dressmaker's pencil, chalk, or fabric pen with disappearing ink for tracing lines
a good pair of shears - you will be cutting through 4 layers of fabric
sewing machine and thread
serger (optional)

Step 1: Lay out your fabric.  To make your outfit the most symmetrical possible, fold it in half long ways (if you bought it on a standard bolt, you can use the center fold line from that).  Place your top on the fabric.  The midline of the top should match up with the center fold of the fabric.  Leave some extra fabric sticking out above the top for the self facing.  For how much extra to leave, see step 5.

Mine is not centered over the fabric because this is a non maternity top and I needed it to go round the belly!
Step 2:  Trace around the outside of the top.  Leave a seam allowance of about 5/8" while you trace around, except for the top of the neckline which should stay straight across.


Step 3:  Measure how much skirt length you will need.  Measure from where the shirt ends on you to where you want the skirt to end and add just a little bit for a hem.  I made mine floor length and needed to add 35".  Mark the length and use a straight edge to draw a line across the whole width of the fabric.


Step 4:  Now you get to freehand the silhouette of the skirt.  Connect the line from tracing the top to the hemline.  Depending on how full you want the skirt and how wide your fabric is, you may want to run it all the way out to the selvage edge, but you may want to make it a little more tapered, depending on your preference.  I ran mine out all the way to the selvage edge.  I also didn't follow the line of the top very well since it doesn't actually fit me, but you get the idea.

Step 5:  Now that you have your outline drawn, you are ready to cut!  To create the self facing top, you will need to fold under the top edge of the fabric at the neckline so you are cutting an extra layer.  This actually means that you are cutting through 4 layers of fabric since it is already folded in half.  Make sure there is enough overlap to reach just below the armhole edges.


Cut along your traced lines.
 When you open out the facing, it will look like this:

Step 6:  Use your cutout as a template for the back of the dress.  I made mine a lot narrower since I am pregnant and it saves on fabric not to have so much extra width, but you can just reuse the same shape.  Cut an exact replica on the fold again so you have 2 of the same piece.

Step 7:  Now we get to the sewing part!  Unfold the two pieces.  Finish the top edge of the facing for both.  Either run it through a serger or create a narrow hem so the edge does not fray.  It doesn't have to be beautiful as it will be turned to the inside, but you don't want the facing falling apart.

Step 8:  With right sides together, fold the facing toward the dress along the neck edge.  Pin the facing and the dress together along the armhole edges.  Stitch the armhole edges together at the 5/8" seam allowance.  Stitch again, close to the stitching inside the seam allowance and trim the seam.  Repeat for both sides and for front and back.  Turn the facing right side out.

I pinned the extra down the side, but do not stitch there.  Only stitch the curved armhole edge!
double stitch to reinforce and then trim so you can turn the facing in.  If it still wont turn, clip the curve.

Step 9: Along the shoulder seams there will now be a kind of "pocket".  To stitch the shoulder seams, you will have to fold the seam allowance of the back piece into the pocket and slip the seam allowance of the front piece into the opening.  Make sure the shoulder widths of the two pieces are even by sliding the pieces together or apart as needed, then top stitch them together.  Repeat for both sides.


Edges are not yet even, slide them around until they match up!


Step 10:  Match up front and back side seams of dress and stitch along seam allowance from armhole edge to hem.  Make sure you catch the piece of facing that overlaps and stitch that along with the side seams to hold it down.

Step 11: Try on dress. If needed, trim the hem a little so it falls where you want it to fall, and to make it even.  The hem may not be perfectly straight since we did not curve the lower edge, but it should be close enough. If it really bugs you, feel free to tinker! :-)  Hem the lower edge and you are done!

Step 12:  Put dress on and use the belt or ribbon or whatever to tie around your waist or just under the bust for an empire waist.  Adjust the fullness of the neckline to suit you and admire your hard work!


Bottom Line:
5 yards fabric at $2/yd = $10 (Use muslin or bargain bin fabric for this!  I used some stash fabric I have had since 2005.  No cost to me! YAY!)
Total cost: $10
Total time: about 3 hours, including figuring out how to cut and assemble.  Should be less for you!

My neckline was a little too loose when I bent over, but I don't think hubby minded looking down my dress all day.  My armholes were a little snug, too, so I went back and made them a little larger.  If you don't have a cowl neck top to copy, just make a straight line across the top and try using the armhole outline from another sleeveless top.  Copy the general shape of my layout and you should be okay.  This isn't high fashion quality sewing... its meant to be an alternative to a bedsheet with eyes cut out!

A few general notes: the self facing may seem like a pain to cut and sew, but it will prevent you from having to bind all your edges, which I absolutely hate doing, as well as allow for a second layer of fabric along the bust which adds to modesty.  You choose which you prefer and roll with it.  If you are tracing a stretchy top, beware!  If it has to stretch to fit you, leave some extra in there otherwise the non stretchy cotton will not fit! Also, whcn choosing fabric, don't pick something so cheap that it is see thru!  Good Luck!

Happy Halloween!


Sunday, October 30, 2011

Giant Soft Pretzel Skeleton

I used to be a massage therapist (seems like another life, really).  In my course of study, I learned all the bones of the body.  Well, I actually learned them in high school and then learned way MORE about them in massage school, but that makes me sound like too much of a nerd...  So when hubby came home a few weeks ago and asked if I could make him a snack to take to his office Halloween party, I immediately longed for an anatomically correct skeleton.  I am so tired of seeing incorrectly formed skeletons casually on display.  And I love eating and making soft pretzels.  It seemed like a match made in heaven!

I am not a total idiot, and I know that I will have to make some compromises on the anatomical accuracy.  For example, I am not going to make a hyoid bone.  (Look it up.)  Or a crapload of tarsals and carpals.  No one would recognize them in dough form anyway... :-)  But I can do better than the leg bone is connected to the other leg bone. The skeleton at least deserves to have a tibia and a fibula and a femur separated by a patella, right?

To make the skeleton somewhat proportional, Hubby and I looked up some art charts to see what the ratios are between body parts.  We found that 8 heads is about right for height, and the shoulders are about 3 head heights across (although not anatomically correct, the 8 head height looks better to the human eye, so we ran with that.  In reality its more like 6.5-7 heads, or so I read).  We wanted to fit the skeleton on 2 large cookie sheets that were 16" long each, so we used 4" as our "head height" and then used that as the basis for everything else.  I drew up a quick sketch of what the bones should look like so I had something to follow, and went to town on the pretzel dough!


my foot looks lame, but I ran out of room and can't really draw worth a darn...
Soft Pretzels
2 1/4 t yeast (one packet/envelope)
1 1/2 c water at about 110 degrees
1 t salt
1T sugar
4c flour
1 egg
coarse salt
extra flour for kneading and dusting

Combine yeast, water, salt, and sugar in a small bowl or measuring cup.  Allow the yeast to activate (bubbles should form).  Add yeast mixture to flour and knead.  Add flour until dough is not sticky, but still is a little tacky.  Knead until dough is silky.  Put dough in a bowl or leave on counter, cover it with plastic wrap or a kitchen towel, and allow it to rest for 10-15 minutes.  If you do not let the dough rest, it will be harder to roll out and will spring back on itself a LOT, so don't skip this step unless you want to fight with your shapes.  It will puff up a little from the yeast, but knead it a little and it will deflate again.

Kneading dough is therapeutic!
For the regular bones, I rolled the dough into ropes and cut it up, then shaped it as I wanted.  To roll the dough into ropes, start with your hands in the middle and roll them outwards away from one another.  If the dough is not tacky, it will not stick to the counter and will not roll nicely.  If this is the case, dampen your hands and continue to roll it.  Make sure you do NOT flour the surface you are rolling on or it will not work, either. :-)  My counter still had flour on it from kneading, so don't be confused!


Some of the bones, like the femur and humerus, I left very thick and created knobby "dog bone" ends by splitting the ends with a knife about 1 cm in and shaping each bit into a knobby ball.  The other bones I made of varying thicknesses as was appropriate and shaped them as needed.  Tip: use a butter knife to cut off the tapered ends after you roll the dough into ropes to keep more uniform thickness to your pieces.  


For the solid bones of the hip and skull, I rolled the dough out with a rolling pin and cut out the shape with a butter knife.  Once it was on the cookie sheet I smoothed the shapes a little with my hands.
I traced one hip bone to make the other so they looked kind of symmetrical.


For the patella, the "carpals" and "tarsals" I pulled a piece of dough out, rolled it in my hands, and flattened it into an appropriately shaped disc.
 
most of the upper skeleton and the hips


hands!

feet... only marginally better than my drawing... if even that.
Brush the pieces with egg, sprinkle with salt (if you want salt) and bake at 425 for 12-15 minutes.  You may want to bake the larger bones together and the smaller bones together on separate sheets and then rearrange them later, so you do not over or underbake certain ones.  Keep in mind that your bones will puff a little in the oven so you may want to space them a little farther than you will in the fully assembled skeleton, and you may want to adjust your dough shapes to make sure the puffing doesn't affect the overall look.

Much puffier now than before baking.  But much more beautifully golden!
I wanted to make a spicy cheese dip to go with this, but I was too sick this weekend to mess with it.  I am sending hubby with mustard instead.  All in all, this took a whole afternoon, but it was totally worth it because it was so fun and looked so cool!  We had a bit of dough left, so I baked that up and snacked on it while making dinner.
Originally I wanted the hips on the top sheet, but the hands took up too much space so I added some vertebrae and moved it to the bottom.  The feet STILL look lame.  Oh well.  I tried.

Of course, you could just make pretzels and forget the whole skeleton thing... They still taste just as good!

Friday, October 21, 2011

Baked Apples

Fall is here.  As much as I hate to say goodbye to the warmth of the summer sun, seasons are real in Wisconsin, and I have chosen to live here.  I CHOSE to live here?  I am an idiot.  But I digress.  With fall comes cooler temps, gorgeous colors, and a great excuse to heat the house with the oven.  So I get to do a lot more baking!  Also with fall comes fall tastes in the home - soups, cream, cinnamon, apples, squash... So many great things we don't get at other times of the year, right?  Hey, I am trying to look on the bright side, here.

As a kid growing up in California, I never had to deal with the extreme cold that is the north/midwest/hinterlands.  However, as it cooled outside, my dad and I did do a few things differently, mainly cooking warm things.  One of those was baked apples.  My dad was pretty much a fly by the seat of your pants cook (read: no planning and no training).  If he couldn't "throw" it together, we didn't eat it.  There is a reason I took over in the cooking department at a young age.  One thing he did make that totally rocked, though, was baked apples.  We would alternately make them in the oven or in the microwave depending on our patience level, but either way, the results were fabulous and for a seriously minimal amount of effort.  I set out to recreate this childhood favorite the way I remember it...

Baked Apples:
4 Granny smith apples (if you prefer, try a spicy apple such as a Mcintosh.  This does NOT lend itself well to soft or sweet apples like red delicious, although some people would argue with me)
Cinnamon
Brown sugar
Butter

1) Core the apples.  Score the peel with a paring knife down the sides in quarters and across the middle.

Bad drawing, but act like you were going to cut the apple in quarters and then in half across the middle, but only just score the peel.  It will  allow the juices to get out a little and make the apple easier to eat later.

Place them in an 8x8 baking dish.  If the bottoms are not flat on the bottom of the baking dish, cut a small slice off to make them sit flat.  This will keep the yumminess from leaking out.
2)  In the center of each apple, put 1T of brown sugar, about 1/4t cinnamon and 1T of butter.
3)  Put in 350 degree oven.  After 15-20 minutes of baking, check the apples.  They should have released some juices in the bottom of the pan.  Baste the apples with their juices and continue to bake, basting occasionally until apples are tender but not mushy, about one hour total depending on the size of your apples.
4) Cool the apples for about 5 minutes.  Using a spoon or solid spatula so you don't loose all the goodies inside, scoop the apples into a bowl.  Enjoy!

There are lots of variations - baking the apples in a little bit (1c or so) of OJ (add more sugar to this one or they will come out tart - granulated sugar works well), adding raisins or other dried fruit and various nuts to the mix, adding spices like nutmeg... Explore what you like and what your family likes.  You can serve them as is, with ice cream, whipped cream, or in just about any iteration.  This is so simple and will heat up your kitchen nicely for the cool evenings.  Its also a great way to make your house SMELL fantastic! :-)

Wednesday, October 19, 2011

Glass Tile Coasters

This is a follow up post to the Ceramic tile coasters I posted previously.  After completing the ceramic tiles, I wondered if I could use etching cream to etch glass tiles.  The answer is a resounding YES!

I bought a smattering of colors to try it out on, and sure enough, they look great!  The nice thing about the glass tiles is that they don't have to be sealed with a top coat and there is nothing to let dry, so they are a much quicker and simpler project.

Etched Glass Tiles

Materials:
Etching Cream (if you look hard enough, most Michael's stores carry it, although the employees don't always know this... oh and you may need to be over 18 to buy it.  I was carded once)
latex or non latex gloves
paint brush (about 1/2" wide is best)
shelf/contact paper or special stenciling paper
masking tape
pencil or pen
scissors or exacto knife
Stencil (optional)
Access to a sink that will not be damaged by the etching cream (I wish I had a utility sink...)
paper towels
Felt or cork for backing
Glue to adhere backing to glass

1)  Clean the surface of the tile with soap and water and dry thoroughly (do not use glass cleaner!).  Cut a piece of shelf paper to the dimensions of the tile, or at least enough to cut your stencil from.


2)  Decide what pattern you would like to etch into the surface.  Remember that you will be etching the area that is cut out.  Use a stencil or freehand the pattern onto the shelf paper.  I usually draw on the paper backing because the vinyl surface is hard to mark.  If you use a felt tip pen or marker it is easier, but I prefer the thinner lines so I know exactly where to cut.


3)  Use scissors or an exacto knife (don't cut through your work surface!  put some cardboard behind...) to cut out the pattern.  If you have "floaters" you will have to adhere them separately.

4)  Peel off the backing, and stick the shelf paper to the surface of the tile.  Use  your fingers or something flat to rub any air bubbles out of the contact paper.  Make sure the edges are stuck down very well.  This will help make sharp lines instead of allowing bleed through once the etching cream is applied.  Place masking tape around the outer edges of the contact paper to cover any other exposed areas that you do not want to get etching cream on.  Having a wide barrier is beneficial, trust me!


5) Put on your gloves.  Shake the etching cream well.  Apply a moderately thick layer to the exposed areas of the tile.  Moderately thick means that you should not be able to see through the etching cream to the surface of your project easily.  It should be nearly opaque.  If the etching cream has lumps in it, don't worry.  That is normal.  Allow the etching cream to sit according to the directions on the bottle (I think it recommends about 1 minute - please read the instructions for your safety... This is a dangerously caustic chemical!).  Note: Etching cream is not meant to do large areas.  For the surface of the tile, it works fine, but use an etch bath or sandblast etching for larger projects.


6)  Go to the sink (keep your gloves on) and rinse the tile well.  Resist the urge to rub with your fingers, because it can cause streaks in the finished product.  Rinse out your brush, too.  Remove the masking tape and stencil/shelf paper.  Rinse some more.  Put the etched item on a paper towel and rinse out the sink thoroughly.  You can remove your gloves now!

7)  Wash your hands with soap and water.  (I am not kidding - this is a really nasty chemical!  You don't want to ingest it or touch your face with it on your hands!)  I usually wash the tile, too, just to make sure all the residue is off.  Towel off your project to see the etching come to life!


8)  Cut backing to fit tile.  Glue felt or cork to the back of the tile using a glue that will adhere to glass, or use the self-adhesive kind.  (for more details on the backing see the ceramic tile posting) Voila! You have coasters!

Project Notes:  If you want all 4 of your tiles to match exactly and you are not using a stencil, create a cardboard cutout of your design so you can easily trace and cut each piece of shelf paper.  This is a one time use item, so don't expect to salvage it.  Alternately, there are commercial products (available from sites like etchworld.com) that allow you to re-stick a handmade stencil (I think it is called over and over), but even those have limits on how many times you can reuse them.  So, if you want to make a lot of the same pattern, create a master copy!  Also, intricate or delicate patterns do not work very well with etching cream because it is so hard to cut out the shelf paper and it is hard to adhere a delicate stencil to the tile.  There will always be a little bleed through which is very noticeable with really intricate patterns that need a hard edge to look good.  Keep these in mind when designing so you aren't disappointed with your outcomes after putting in a lot of work on a complex stencil.

Bottom Line:
Etching cream (small bottle) ~$8
shelf paper ~$5
pair of gloves (buy a box instead of individually to save money; 50 pair ~$5) ~$1
paint brush ~ $.20
4 glass tiles @ $2 each = $8

Time spent: less than an hour, depending on the complexity of your pattern
Total cost per set of 4 tile coasters ~$21

Of course, the etching cream you can use over and over.  If you buy a box of gloves from the pharmacy dept at walgreens or walmart you will save a lot over time.  And keep your brush clean and reuse it, too!

Glass tiles are WAY more expensive than the ceramic ones ($2 a piece as opposed to $.11 at the cheapest), but this project is quick and easy and requires no dry time, no dedicated space to lay out tiles, and no sealing with acrylic spray to allow for heat tolerance.  I am not sure just HOW hot you can get these things, but since they are used in kitchens all the time, I would assume pretty hot!  And the edges are nice and finished on these guys...  Makes for a very professional look.  A word of warning, though.  The glass scratches easily, as does the backing on the actual tile.  Keep pieces of cardboard between your tiles during transport and storage and check them carefully in the store to make sure they are not damaged.  Once you get the backing on them, they should be fine, but it would suck to ruin such expensive materials!

Now I want to find these bigger and make trivets....

Thursday, October 13, 2011

Blogging Dilemmas

I love blogging.  I know no one reads it (yet?), but it makes me feel good that someday someone might, and I might help them create something special for themselves or for a gift.  I feel it is my passive way of protesting the vapid consumerism and lack of craftsmanship that has taken over the US.  However, I have recently found myself in a bit of a blogger's conundrum.

I kind of want to share my blog with friends and family.  As of right now it is a carefully guarded secret (that I accidentally let slip a little this weekend).  It was only then that I realized how secret I was keeping it, and how badly I wanted to spill said secret.  I hate shameless self promotion, and I fully expect my family/friends to look once (if that) and ignore my blog ever after.   The people I know don't get off on crafting the way I do. I only consistently read one blog posted by someone I know, and that is because it INTERESTS me (shocking!).  But sharing something that makes me happy and that gives a window into my life and what I am doing with myself is so tempting.  Its not totally altruistic - of course, there is always the possibility of increasing readership via word of mouth...  I would at some point like to know that someone made something from a post... that is in fact WHY I bother writing it all down...

But then of course I run the risk of them seeing something I have in the works to give them as a gift, as well as the obscure possibility that I mention someone in a light they see as "unredeeming" (why I don't let Hubby read it...you know, just in case).  And there is always the joy in seeing completely organic growth in a hit count... so very satisfying when you know you have done no promotion whatsoever, but what you have to say is uncrappy enough that people will still read it.  Hello, Ego.

So, on the gift-spoiling front, I could always delay my posts until after the event in question has passed, and avoid all personal references (yeah right) so as to not ruffle feathers, but for big things like Christmas I would have nothing to post about for months (although after I would have enough to post until June), now would I ?  And referring to people is how I work in the back story of my projects... not that it probably matters to anyone but me.  But I do write for my own satisfaction, so it still matters...

So, do I share my blog, share my life and my goings on with those closest to me, increase my chances of gaining an audience by spreading the word, giving the disclaimer that people may know their gifts (and exactly how much and how long I spent on each) ahead of time, or do I bask in anonymity until I am "discovered" by the web at large and sacrifice this opportunity to keep in touch with the people I love?  See? Quandary...

Tuesday, October 11, 2011

Ceramic tile coasters

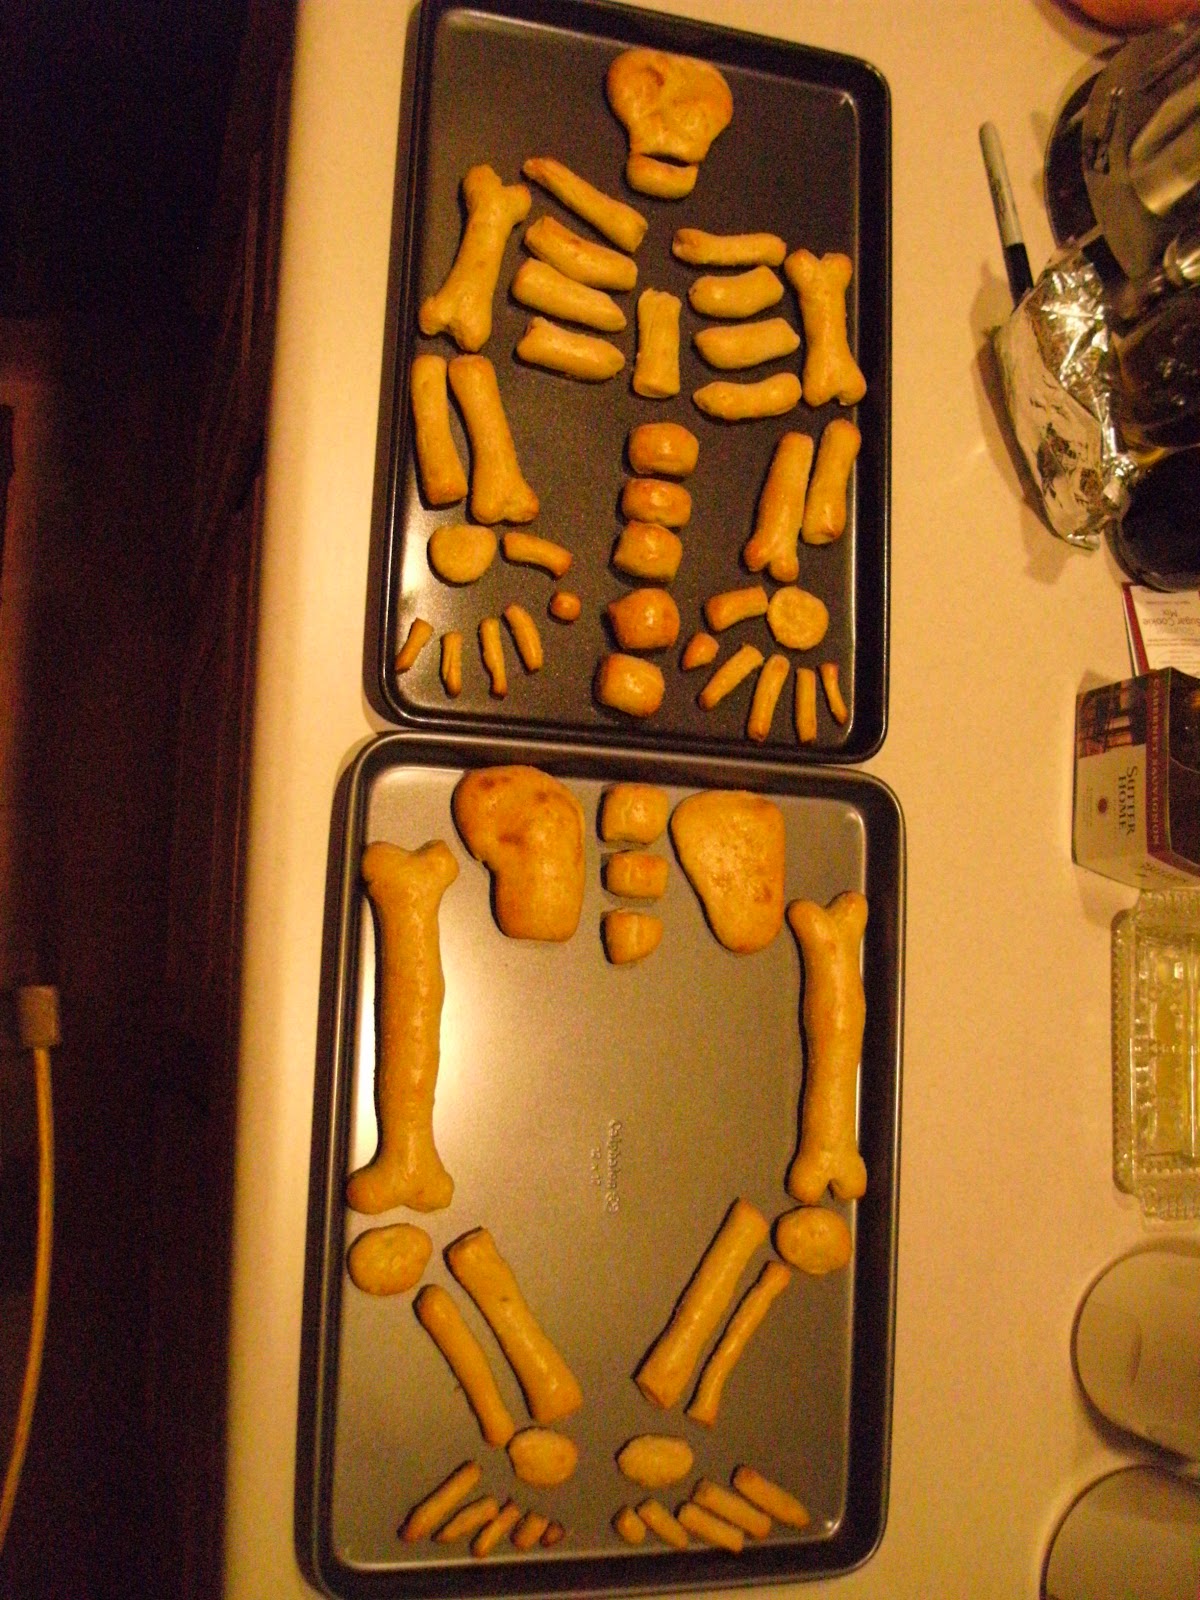
Update 10/18:  Finally adding photos.  I left my camera at the baby shower along with my memory card with the blog photos.  Oops!

I admittedly didn't come up with this idea. Yes, another unoriginal post from me.  For SHAME lazy crafter.  But I thought it was another great gift idea, so here we are.  I am giving out 2 sets of these for hostess gifts for my "family" shower later this month.  I had to start them early to allow adequate drying and curing time.  I tried to put together the best tips and procedures from other tutorials, so hopefully this is a comprehensive and fool proof post for you!

Supplies needed:
a set of 4, 6, or 8 Clean Ceramic Tiles (get from local hardware store), about 4"x4" (the small size)
Mod Podge
scrapbook paper in a pattern (or patterns) you like
1 Paint brush (can use sponge brush, but I didn't and it came out fine)
Acrylic sealant spray (I used Krylon triple thick acrylic coating)
a shallow dish with a little water in it
paper towels
regular or adhesive backed felt or corkboard
a strong adhesive like rubber cement

Step 0 (oops an afterthought):
Cover your work surface with cardboard.  Paper will stick mercilessly to the tiles (you can pick off the pieces but its a pain), so avoid that if you can.  I used some cut open cereal boxes because they were handy and provided lots of surface area.  Thicker cardboard will allow you to move the tiles to another area while you are waiting for them to dry, unless you have dedicated craft space you are willing to tie up for a few days.  The cereal boxes worked okay for moving the tiles, but I had to be really careful.

Step 1:
Cut the paper into a square slightly smaller than the surface of the tile.  I made mine 1/8" smaller so there would be very little white showing through, but if you want a nice border, more is totally fine.  For a more creative approach, play with this step.  It doesn't have to be a square - try circles, triangles, or stripes.  The sky is the limit.  Also, you do not have to use scrapbook paper.  Try using fabric, photos, wrapping paper, old books, stickers, or other media.  I know that inkjet printed paper has a tendency to run or smear when wet, so that may not be the best idea, but maybe a little water spotting is good!  Its all about your preferences here.  Just make sure that the item is thin enough to adhere well using glorified glue (that is all Mod Podge really is, imo).


Step 2:
Take your paper square and dunk it in the water bowl for a second or two until softened.  Gently pull it out and lay it on the paper towel (double or triple up to prevent soak through).  You can lay out a few at a time to save time for each tile.  Try to get most of the water out so its not dripping wet for the next step.

Step 3:
With the paint brush, spread a thin coat of Mod Podge onto the surface of the tile (do this one at a time).  Take the dampened paper and gently lay it across the tile.  Working from the middle out, run your fingers across the paper to squeeze out excess water and air bubbles.

Step 4:
Paint another thin coat of Mod Podge over the top of the paper, being sure to cover the edges well.  My tile had rough sides, so I coated them with Mod Podge as well to seal out moisture and make them a little less rough to the touch.  Be careful as the Mod Podge can stick the tile to the surface you are working on if you let it drip. The Mod Podge will have a slightly milky color to it, but it will dry clear.  Any brush strokes, however, will show once it dries.  Allow this coat to dry.


Step 5:
Add as many top coats of Mod Podge as you would like.  I used 3 total, including the one in step 4, and it came out great, but they looked pretty good after 2 if you are strapped for time.  Make sure to allow the tiles to dry thoroughly between coats.


Step 6:
After the tiles have thoroughly dried, place them in a large box (so you don't spray all over) or take them outside and place them on cardboard or newspaper.  Spray them with the acrylic spray, according to the can instructions.  They should look wet, usually, so don't be shy!  Allow them to dry according to the can instructions.  Two coats will ensure good coverage, but I was lazy and only did 1.


Step 7:
Once the tiles are completely dry, adhere the felt or cork to the backside.  You can use self adhesive felt, regular felt and some hot glue, super glue, or other strong adhesive, or try cork backing.  I used whatever was lying around the craft room, and got a mix of regular felt and adhesive felt.  Just cut the felt to the correct size and glue/peel and stick.  Let them dry felt side up.  I accidentally stacked a few and ended up with double decker coasters...  I peeled them apart, but there was a nice layer of fuzz left behind on the surface of one of my favorites.  Bummer.


I have seen some blogs recommend buying those little round dots you put on furniture legs and sticking one on each corner.  Doesn't get any easier than THAT!  I do worry that they will not stay on permanently because after a while they always fall off my chair legs, but I am guessing the coasters will not end up sliding around the dining room with several hundred pounds of party guests on them.  That may contribute to a longer life :-)  I would just be mortified if I gave them as a gift and they crapped out...

Step 8:
Once the glue has dried or the self adhesive backing is on, you are done!  I stacked mine and tied them with organza ribbon for presentation as gifts.  I have read that you can buy sets of ceramic tiles at craft stores that come with little storage boxes, but for the price (about $7 for 4 tiles), I was unenthusiastic about even looking for them.

Project Notes:
I used the method of dunking the paper in water before adhering it to the tile.  This is not mandatory, but I found it slid around less as I brushed across it, had less bubbles, and was easier to contour to the slightly rounded surface of the tile.  It does increase the drying time for that first coat and can make the paper easier to tear, so use your discretion as to what you want to do.

Also, Mod Podge is a self sealing product, but many bloggers found that it took a month to fully cure, and until that time, the tiles could not be used for hot drinks (the tile sticks to the bottom of the mug).  I used a clear acrylic sealer to avoid this problem as I have not waited the requisite 1 month to see if it will ruin a cup or not after that.  If you would like to gamble, go for it!  Otherwise, spend the extra $6 and get some Krylon coating.  Bonus - you don't have to make them a month in advance of when you want to use them, or end up with a set of "cold drink only" coasters.

Some posters opted to paint the tiles (or at least the edges) first to match the paper or other medium they were using.  I opted to skip this step as I like the white, but feel free to play with paint as well.  You could presumably just paint a design on the tile and spray with acrylic sealer and have yourself a coaster that way, too.  Knock yourself out - the variations on this project are endless...

Bottom Line:
8 small ceramic tiles @ $0.11/ea = $0.88
1 small bottle Mod Podge = $6
8 scrapbook paper sheets @ $0.20/ea = $1.60

1 Paint brush = $0.40
Acrylic coating spray = $6
2 sheets of felt @ $0.25/ea = $0.50
adhesive for felt < $3

Total time (not counting drying time) = about 2.5 hours
Total cost (for a set of 8 coasters) < $19

The cost sounds high, but the reusable items like the acrylic spray and Mod Podge cost $15, so the cost of the materials to make another set is only about $4 (less if you do a set of 4).  Now THAT makes it worthwhile!  I am doing a bunch of these for Christmas gifts... look out family!

I have a few ideas for variations on this project I thought I would share. There are also glass tiles at the hardware store and I am dying to see if etching cream will work on them.  I imagine snowflakes on a pretty blue tile... oooohhhhh.  If the heat tolerance does turn out to be adequate, I may head back to the store for big tiles and try my hand at a trivet or two.  But there is a HUGE temp difference between a 450 degree casserole and a 110 degree cup of tea... We shall see if I am brave enough to risk one of my baking dishes for science. :-)  The possibilities are soooo enticing...

Thursday, October 6, 2011

Freezer paper stenciling

Wow.  So I just bought my first roll of freezer paper the other night to play with.  I decided to do some online sleuthing to check out the craft possibilities and holy cow.  There are a lot of blog posts out there on how to do freezer paper crafts!  Pattern making, printing on fabric, appliques, and my item of choice for a first timer, stenciling.  A lot of projects I post are not that easy - I admit that.  But this really is.  I promise.

A little background: My baby shower is Saturday, and I needed 2 great hostess gifts for my two friends throwing it.  I am tired of giving tired gifts.  Every woman has about a billion little bottles of hand lotion in a myriad of scents that disgust her.  I wanted something useful (a key ingredient in gift giving for me), something pretty, something unique, and something personal.  Is that SO much to ask?  So after hours of crawling boards and blogs and ask.com, I finally found a suggestion that struck a chord - aprons!  Its easy to personalize and unique, and since one of my hostesses is my gardening partner and the other has a food blog, I thought it fitting.  But, since its a coed shower and the guys are helping out too, I decided to do items for the whole family.  The menfolk are getting large pocket aprons for grilling, the mommies are getting sleek black aprons, the older child is getting a kid sized apron, and the two younger kids are getting a tee and a onesie respectively.  All personalized with fabric paint.  All using freezer paper stencils. YAY!  Off to Michaels...

This was not the most economical project I ever started, but it wasn't too bad when you consider how many things I made and how much I would traditionally spend on gifts.  Initially I had hoped to make the aprons myself, cutting out a significant portion of the cost.  But I was really short on time and have a billion other things to do, so I took the pricey shortcut and bought them.  For paint, I tried the little bottles of the martha stewart all purpose paints - they can be used on pretty much any medium including glass and fabric, so I was stoked about that, and they are the same price as other specialty paints, like glass paint.  I tried the pearlized colors cuz they looked pretty :-)  I got purple for girls, red for men, and blue for boys.

For the freezer paper stencils... Pretty basic.  There are tons of great in-depth tutorials out there, so I'll just briefly go over the basics.  Pick your pattern. I picked a font I liked on the computer since I was doing all words.  Either print it directly on the freezer paper or print it on regular paper and trace it onto the freezer paper.  There are two sides to the freezer paper - a waxy side and a papery side.  Make sure the printing or tracing goes on the papery side.  I opted to trace since my printer has trouble feeding oddly textured papers.  Then, cut out the pattern with an exacto knife.  Make sure you save the "floaters" - the pieces like the inside of an "o" that aren't attached to the sides.  You can iron them in place once you get the large stencil on.  Take a hot, dry iron (no steam) and press the paper, waxy side down, onto the fabric.  It only takes a few seconds to adhere and you want to make sure to press, not slide the iron.  Also, be careful not to scorch your fabric.

To paint, take a sponge brush and a little of your paint and, well, sponge it on there.  I used two coats (separated by about 20-40 minutes of dry time) to make sure the coverage and color was good.  I cut out the next stencil between coats to maximize my time.  If you are using thin material, put cardboard behind the fabric to prevent it from bleeding.  The aprons were fine, but the onesie and tee I needed a barrier.  When the paint has dried to the touch, peel off the stencil.  Take your exacto knife, pin, or other sharp edge and peel up the floaters, if any.  BOOM!  You are done!


It can be a little time consuming cutting out all those stencils, and blank aprons and shirts are kind of expensive. If you are looking for perfection, this is not the medium for you - lines can end up a little smudgy and blurred up close.  But it is cheap, throw away (read: quick clean up) and really REALLY easy.

Bottom Line:
4 adult aprons @ $6 each = $24
1 Child apron = $5
3 paints @ $2 each: $6
1 toddler tee = $6
Freezer paper = $2.50/150 ft. roll
1 onesie = $3
3 sponge brushes @ .39 each = $1.20

Total cost < $48
Total number of items made = 7
Total cost per item < $7
Total time = about 6 hours for everything

More than I usually try to spend on craft projects, but not bad for gifts.  Besides, I will use all that paint and freezer paper on future projects.  Maybe next time I will stencil something I made!  You can also add embellishments to your existing wardrobe to spice things up.  Tees at Walmart are cheap.  Go nuts!

Monday, October 3, 2011

Simple curtain panel with hanging tabs

I know I have been doing lots of baby stuff lately.  I promise I will not keep it up forever, but I make what I need for my life as it comes... So bear with me :-).  To offer a gesture of good faith, here is a post on making curtains.  Not baby-specific curtains (yay), but a general curtain panel.  This can be adapted to a shower curtain or in this case, a cover for a closet.  Backstory: a friend in med school recently moved into an ADORABLE little place to do her internship, but it is just that.  Little.  To get her dresser in her room, she had to remove the closet door (or just never use her closet. Umm, no).  Since then she has had this gaping hole in front of the closet, and being a med student/intern, lets just say she doesn't want to waste a lot of time making sure her CLOSET of all things is presentable.  So, she asked me to make a plain little cover she can hang from a tension rod.  Granted, that was like 2 months ago, but hey, I'm a procrastinator.  The fact it got done at all is a near miracle.

Warning: the instructions are quite lengthy.  You may want to read through them all before starting to make sure you understand completely!

Curtain panel with tabs for hanging:
This style of curtain panel uses tabs for hanging.  If you prefer to make a casing and scrunch the fabric over the rod, make the top like the bottom and be sure to add enough length to accommodate the wider hem.

What you need:

  • Enough fabric for your window (add a little length for hems and seam allowances, but the width should be at least double to make it hang nicely and give that cute bunchy look)  Make sure you have washed and dried it ahead of time so your project doesn't shrink or warp.
  • cloth belting or extra fabric to make tabs
  • sewing machine
Step 1: Cut the panel from the piece of material you are using.  Try to get the edges as straight as possible.  This will make hemming easier.


Step 2: Press up the raw edge on the "bottom" of the panel.  Press up another 1 1/2" or so to make a nice wide hem.
Pressing up about 1/2" of raw edge.


Step 3: Press in the raw edges of the sides (I used the full width of the fabric and had to deal with hiding the ugly selvage edge so I pressed in 5/8" which is way more than normal.  I would stick to 1/4"-1/2" normally).  Press in another 5/8" or so to enclose the raw edge.  NOTE: the finishing of edges can be done with a serger, but for this project I much prefer the look of fully hemmed edges.
SO much selvage to hide.  Ick.

Step 4: Stitch the side edges of the panel close to the inside edge.  

When you get close to the bottom edge, fold under the raw edge along the pressing mark and tuck it in so you sew over the folded piece and the end is now enclosed.  You can skip this step if you like, but it will keep any threads from escaping and makes the final product look more "finished".  This is especially important with thin materials like chiffon, organza, or light breezy cottons that could fray in the wash.
Stop stitching and lift the presser foot with the needle all the way down when you get to the first pressed mark.
Tuck up the section of raw edge you pressed up.

Fold it under the presser foot along the whole length of the bottom.  You will stitch through all thicknesses.

It should look like this when done correctly.
Step 5: Stitch the bottom hem of the panel close to the top fold.  This will leave open sides which you can choose to sew shut or leave open.  The choice is purely cosmetic and is up to you.  I left mine open.


Step 6: Press up the raw edge of the top of the panel.  Press up another 5/8" or so to match the width of the sides.  


Leave sides open to accommodate the curtain rod
NOTE: If you do not want to use tabs to hang your curtain, press up enough fabric to go over the rod. This will depend on the diameter of the rod.  Measure around the circumference of the pole and divide that number in half.  Add extra for ease and for seam allowance.  Press up that measurement and finish as you did the bottom hem. Alternately, you can enclose the raw edge before making the casing (press up a small amount once more and stitch across before pressing up the casing).  This is important if using a fabric that ravels easily.  You are now done and may disregard the rest of the instructions.


Step 7: Decide how many hanging tabs you would like.  For the tabs, I used Wright's belting, I think.  It was an open package without a label, but was just a flat piece of trim with no decorations or folds in it (seemed like belting to me, but really soft like cotton instead of polyester nastiness I think of when I think belting.  I don't pretend to know everything, and the names of notions is one of those things that escape me constantly).  You could also use double fold bias tape or seam binding as long as you enclose the raw edges with a line of stitching first.  You could also use grosgrain ribbon or some other sturdy type of ribbon.  Just pick something strong enough to handle sliding and being in the sun!  I used 7 for my 40" ish wide panel.  Decide how long you would like the tabs to be, based on the diameter of the hanging rod and how low you want the curtain to hang.  Add 2" to that measurement and cut the number of tabs desired. 


NOTE: If you want to make tabs from fabric, cut a strip of fabric twice as wide as you want the tabs and long enough to cut all the tabs.  You may need 2 strips to get the necessary length.  Press the strip in half with wrong sides together.  Open up the fold and press the long raw edges in to the center fold mark, again, with wrong sides together.  Refold the first fold, enclosing those raw edges and stitch along both long sides of the strip.  You only have to stitch the open side to encase everything, but for strength and to prevent stretching and warping, I do both.  Cut your tabs to the appropriate length.


Step 8: Pin the top of the curtain where you want your tabs so they are evenly spaced.  This can be some tricky math depending on the width of your curtain (measure it - you lost a little width with hem allowances) and how many tabs you chose to use.  If you are using 7 as I did, here is the no-math method I used to evenly space the tabs.  I used one for each end (easy enough to find), then folded the curtain in half and pinned the center.  I then took one side and folded the edge in about 1/3 of the way to the center pin and then folded it over again, the rest of the way to the center pin.  By tugging, you can get an even thirds fold.  Pin both thirds marks.  Fold the curtain in half again, and use the same thirds marks on the other side.  Voila! 7 tab markings!
One
Two

Three!
Step 8: Open up the hem on the top of the curtain and at each marking, pin a tab.  The raw ends of the tab should face in to the fold, and the loop of the tab should be sticking out beyond the fabric edge.

Stitch over the ends of the tabs to hold them in place.

Sew the top hem for the curtain.  "Oh no!" you say.  "My tabs are now sticking down. How awful!"  Before you reach for the seam ripper, read on.  This is how it is supposed to go. :-)


Step 9: For each tab, do the following:


a) Fold the tab up so the loop extends beyond the edge of the curtain.  Make sure it is going straight up and not at an angle.  Press if necessary/desired.  


b) To reinforce each tab, stitch a rectangle with an x in it inside the tab part that is in the hem allowance.  I call this a "barn door" because it looks like the x on a barn door to me. Stitch across the top of the tab, down the side, across the bottom, up the side, diagonally to the bottom corner, across the bottom again, and diagonally to the top and off the fabric (see illustration).  Do all this without breaking stitching.  To avoid breaking stitching, when you get close to the end of a line of stitching, use the hand wheel to advance the needle all the way down in the last stitch.  Lift the presser foot and rotate the fabric to stitch the next line.  Put the presser foot back down and stitch the line. At the end of that line, repeat the process.  Be sure to keep excess fabric out of the way of the needle.  Remember that you can rotate the fabric in any direction.  Sounds silly, but I catch myself doing it all the time and bunching up the fabric for no reason!   

c) Clip the thread ends and move on to the next tab.  When all tabs are complete, you are done!

You are now finished!  Your tabs are reinforced and strong and should not rip out of the fabric this way.  It may seem like a little overkill, and it kind of is, but I am obsessed with the durability of things I make and I hate repairing items.  Just ask Hubby.  I have a whole box of things that need mending that have been sitting there for months.  Okay, years.  Some only need a button sewn on.  Seriously.  The lazy crafter that I am...  

Anyway, there you have it!  A simple yet elegant solution to all your window covering needs (and shower curtains and closet covers).  And all it costs is the yardage of fabric.  The one I made came from bargain bin stuff at Walmart.  You know, the 5 yds for $5 bolts of stuff?  Yeah.  Nasty to wear, great to curtain with!  I think this thing cost me $2 to make.  Wow....

One last note - if you really are making a shower curtain, consider not using tabs.  Instead, finish the top edge with a wide hem and put in large eyelets.  That way you can clip it on to your shower curtain rings along with the liner.  Hmm... another how to perhaps... Happy Sewing!