Showing posts with label holidays. Show all posts

Saturday, February 9, 2013

Tee Shirt Nightie

In honor of St. Valentines day, I am posting a totally frivolous project!  On the plus side, it is super simple.  On the down side, it is fussy, which is something I hate in projects.  I like quick and clean and neat and exact... But making over something into something else usually comes with some fudging that you have to clean up later, so deal. Haha.  But seriously.

I have been seeing all these tutorials all over Pinterest on how to make over a tee shirt into something else: a cowl neck tee, a slouchy shirt, a ruffled something, a multi layered maxi skirt, a portable jungle shanty... okay maybe not that last one.  So instead of hating, I joined in the fun.  I wanted to make something SEXY.  A sultry nightie comfy enough to sleep in, but hot enough to make Gisele and Heidi beg to slip it on.  And because I used lace I already had and an old tee shirts that belonged to hubby it was COMPLETELY FREE.  I am totally using this as his V-day present.  How nice to me to give him something that already belonged to him.

Oh Yeah!
Tee Shirt to Nightie Makeover
Materials:
One Tee Shirt
Pins
Scissors
Sewing machine and thread
Edge lace in a fun color (optional)

Step 1: Make sure your tee shirt is large enough.  I know this sounds stupid, but I am a small or x-small and I used a large and it was only just barely long enough.  I would have rather cut off the bottom hem of the shirt, but I had to leave it on to leave a little something to the imagination. That is the point of lingerie after all...


Step 2: Remove the sleeves and the neck hole binding.


Step 3: Slip on the tee and stand in front of a mirror.  Pin the sides of the shirt to match the sides of your body.  Pin under your arms first, and make sure the armholes are small/large enough, as well just fitting your bustline. Next, pin the bottom and the natural waist.  If you are unlike me and actually have hips, you may want to put in a pin at the widest point of your hips as well to make sure the curve of the tee hugs yours.  Repeat on both sides.  Make sure that you keep the sides perfectly centered and that you are not tugging the center of the shirt to one side or the other.


All pinned in place.
Step 4: Pin the shoulders where you want to cut the straps to.  You may want to put in more than one to get the right shape.  I used a v neck tee so it gave me an awesome neckline automatically, but this is when you would want to pin the neckline, too.  Just as a warning, if you do choose to use a v, the point of the v is a weak point and may tear... not that mine did... yeah.  That is what that pin in the middle is doing...


Step 5: CAREFULLY take off the shirt without unpinning it.  Lay it out flat and cut away the excess to the outside of the pins leaving about 1/2" as a seam allowance.


Step 6: Fold the tee shirt in half long ways so the left and right sides are matching up.  Line up the bottom edges of the tee and fold it so the front and back are overlapping.  Round off the corners.


Step 7:  Unfold the tee shirt and line up the side seams, right sides together (it should be inside out).  Pin them together, easing them together and trimming them as needed to even them out... this is the fussy part I hate.  But stick with it.  Perfection isn't imperative. That's what I kept telling myself and it turned out fine... :-)

Step 8: Stitch the side seams.  Try on your creation.  If you like, you can end here.


Step 9: Pin the lace to the bottom edge and the neckline and stitch.  You will have to miter the edge at the v in the neck (if you have one) and at the point where the side seams meet.


Mitred edge on the side seam
Step 10: Now you have a truly hot little number.  Wow your man.

Thursday, November 29, 2012

Chalkboard wine glasses

This is my first post on a Christmas gift project idea for the year.  I am okay with posting this one because it is for a family member, not a friend.  You see, my family DOESN'T read my blog ;-)

My dad and his wife love hosting parties and they love wine, as does much of my family.  However, they always have the problem of who set their glass where, and am I drinking someone else's wine?  There have been many solutions to this problem, like wine glass charms, different glass styles, and the like, but when you are at a particularly GOOD party, and are half in the bag, its hard to remember if you were blue or green or if yours had that funny flourish thingy on the stem.  One thing you are unlikely to forget is your name, regardless of how drunk you are.  You get that at keggers with those little red cups and a sharpie, but that doesn't translate well to the world of wine.  I needed a real wine glass that was writable, preferably rewritable, and elegant.

So I set about making some glasses with chalkboard paint on them.  I was kind of unconvinced that it would come out well, but I figured with some goodwill glasses and the multi-surface paint I already had, it was worth a shot.  They came out pretty well!


I will say that I don't think the chalkboard paint will last forever, but I can totally scrape it off and reapply.  It wasn't a terribly labor intensive process, so I wouldn't mind spiffing them up every now and again.  I wouldn't recommend washing them in the dishwasher or leaving them to soak, but a gentle hand washing and drying seems like it wouldn't be a problem.

Supplies needed:
all surface or glass Chalkboard paint (I used Martha Stewart paint, available at Michael's)
paint brush
Wine glasses - go to the dollar store or goodwill and save yourself some money!
Xacto knife
contact paper (the kind you use to line shelves)
a nice pretty template (I used 2 for fun, found here and here)

Step 1:
Find your template and print it out.  Cut it out and use the inside piece to trace onto the contact paper as many times as needed for the number of glasses you are making. Make sure to leave enough space between tracings for a good solid border.  You will need at least half an inch (preferably more) around each template to mask off the glass.  Cut them out into individually rectangles.


Step 2:
Carefully cut out the middle of each template using your exacto knife.  Gently peel off the backing and adhere each one to the glasses, trying to keep the top aligned with the upper edge of the glass.  I found that using four fingers one on each corner, and pulling taut was the best way to keep the shape even.


Step 3:
Carefully apply the paint to the glass.  I used a natural bristle brush because it was what I had, but it royally sucked.  I think a synthetic brush would have worked better.  Mine left awful streaks.  Let it dry thoroughly between coats (at least an hour according to the bottle).  I used 4 coats.  I think a good rule of thumb is holding the glass up to the light with the painted part facing away from you.  When you can no longer see light through the painted part, you have sufficient coverage.


Step 4:
After letting the paint dry thoroughly overnight, its time to peel off the contact paper.  BE CAREFUL!  If you have ever painted anything and left the masking tape on, you know that the paint will peel up just as easily as the masking.  First, take your exacto knife and score around the edge of the shape.  Then, use the edge of the blade to gently push away the contact paper from one edge.  Cut out to the edge of the contact paper, and use that point to start peeling up the masking.

Score around the edge,

Pull away one small section and cut the template to the outside edge.

Then peel off carefully.


Step 5:
There will be some small spots where the paint bled under the masking.  Use the exacto blade to scrape off any excess and clean up the edges (sorry for the REALLY bad photo).  Next, rub chalk over the surface of the painted portion (to prime it and make it easier to write on), smooth it out with your finger, and write something clever.  Voila!  You're finished!


Pretty simple, right?  And at a dollar a glass and about $4 for the paint, its a pretty cheap gift, too!  I will stress, be careful about the scoring and peeling part.  I botched one of the glasses, but I figure its not that big a deal since they wont last forever anyway.  But just to make you feel better in case one of yours don't turn out either, here it is :-)


Crap.  Well, lesson learned.  Be careful. :-)


Saturday, October 6, 2012

Holiday gift giving to charity

My birthday was yesterday, which of course spawns the question: what do you want?  While most people are not yet Christmas ready, I have vowed to begin my preparations early this year in an attempt to not screw up like I have the last 2 years and confirm everyone's assumptions that I am a schmuck... :-) (hmm am I allowed to use a Jewish term to describe my lack of Christmas gift giving?)
All this birthday Q and A got me to thinking about my charitable gift requests.  I am the typical American adult: If I want or need something, I go buy it (or in my case, possibly make it).  I love giving handmade gifts because it is something that people would not or could not get for themselves.  However, in the spirit of Christmas in particular, we are inspired and expected to help out fellow man.  So what better to give someone than the gift of helping others?  I want to both give and recieve this way, at least in part, this Christmas.  With any luck, everyone on my list will get a small home made gift AND a charitable gift.  The best of both worlds!  Well, wish me luck!

My list of charitable gifts:

Donate blood.
I can't donate blood (weight restrictions) so this is something I always ask my husband and close family to do.  It saves lives and it takes a little planning which makes it really special to me.

Heifer international
I LOVE LOVE LOVE this organization.  They have a shopping catalog where you can choose animals to send to countries in need.  My family has done this at Christmas for years.  We pool the money in the center of the table (so no one can brag about how much they gave versus anyone else), one of the kids adds it all up (bonus: math skills) and then we thumb through the catalog and choose what to buy as a family. Its a wonderful way to help others, and make charitable giving part of your ritual.


Meals on wheels/Food pantry volunteering or donations
I have always had a soft spot for the hungry.  As a kid, things were not always easy with my mother, who did her best.  Lucky for me, my parents had shared custody and my dad actually paid my mom child support, so things were not SO bad, but we still had some tough times.  Thinking of the millions of hungry people right outside my door breaks my heart, and since I love to cook, this one is near and dear.  I always want to feed the world!  Donating is a great and simple way to help others, and you can pick out stuff in the grocery store with your kids to teach them how to give.  Or even better, give your time on a holiday or just on a weekend to package or sort canned goods or serve at a shelter.  There are TONS of places out there to do this, so don't be limited by the ones I linked to above.  The best part: this way of giving directly impacts YOUR community, making your neighbors and friends happier and healthier, even if you don't know they are in need.

Adopt a child - World Vision
My dad did this with me as a child from about 5 years old - I had a sponsored child that was about my age and we exchanged letters and school progress reports as we both grew.  Over time, her letters went from being written by someone else, to being translated, to being written in English.  It was amazing to see her grow and learn and I was inspired to be as good a student and as strong as her.  What a great gift for a kid!

Time!
There is no specific organization for giving your time.  But local churches, soup kitchens, animal shelters, thrift stores, or any number of charitable organizations are ALWAYS strapped for volunteers.  Ask at your church (if you have one) for a list of shut ins, and go have tea with someone who could use the company.  Since I don't have a car, I write letters to two of our church shut ins once a month.  I hardly break a sweat (and I brag about my baby; win-win!)!  Gift someone a scrapbook of photos from the day(s) and a handwritten note about what happened and what you did, and dedicate your donation of time in their honor.  This is especially good for parents or grandparents.  Take your kids and have them write about what they learned and how giving made them feel - a guaranteed tear jerker!

Give used items like coats and toys
When little man gets older, I plan to have him donate old clothes and toys that are in good shape to local charities on birthdays and Christmas to remind him of how little others have.  We are so consumed with greed in this country and to remind us of the true reason for the season, I plan to both shop for a new toy together for something like Toys for Tots, and give away some of our favorites that we have outgrown.  Just make sure nothing is broken or recalled and that the items are in good shape so they can be used.

Habitat for Humanity
Thus far I have not gone on a build, but I did donate to them a few years back in honor of my dad.  He is a handyman/contractor, and he often donates his time to this organization since he has that particular skill set.  I am all thumbs with a hammer, but I hear they are GREAT at teaching, as a friend of mine (also a girl) said she discovered she was a natural with a table saw!  This idea would be great for adults and teens, where the real meaning of community involvement hits home.  This organization does more than just sell people affordable homes.  It helps to turn questionable neighborhoods into lovely communities by making residents have pride in their property and take action when sketchy stuff happens where they live.  Home ownership does something to people... its almost like magic.  We don't want weeds in OUR flower bed!  Another great opportunity to help improve your immediate community!

Rescue an animal
Lots of people get a pet during the holidays.  Instead of buying an animal at a pet store, try your local shelter or humane society.  Don't let the cost deter you.  Pet store animals are often mistreated and come from puppy or kitten mills where the parents are treated like money makers, not pets, and purebred animals are often inbred and result in genetic defects that will create lifelong problems like hearing and vision issues, hip problems, and a shortened life span (read: higher vet bills).  Also, pet store animals usually are not spayed or neutered and don't have their shots.  Rescue animals will be put down if not adopted in a reasonable amount of time (except at no kill shelters) and are fixed, up to date on all shots, and will not be adopted out until they are completely healthy (no eye, respiratory, or urinary tract infections, which are common in pet store animals).  Typically, they are already housebroken as well.  If you have your heart set on a particular breed, most have organizations specific to finding homes for that breed, both purebred and mixed (Google search!). If you don't want to get a pet, or want to see how your family does around animals first, volunteer your time and walk or play with the dogs, or pet the cats in the cat rooms.  Its SO much fun and doesn't even feel like charity!  I volunteered to play with the cats as a teen, and I begged to stay every time!

These are just a few of the causes nearest and dearest to my heart.  Of course there are TONS out there.  Find a cause that means something to you and ask for donations of time or money as a gift, or find something you think a friend or relative would like and make a donation in their honor.  Many places will send a card to your recipient saying that you made a monetary donation in their name, and you can donate online in most cases.  Doesn't get any easier than that!  No fighting lines at the mall! And you can do it at 11:59 on December 24th with no issues!  And of course, for those interested, there are tax benefits to donating to charity.

SO, fight the commercialism of the holidays this year and inspire yourself and your family to be more giving-centered and less getting-centered.

Saturday, June 23, 2012

Cheap and easy party favors

I have an etsy shop, and one of my most popular items are wedding veils, which I just love to make. However, veils are round and I end up with tons of leftover tulle "corners" that are fairly large bits of fabric, but that I have little to no use for. As a crafty person, throwing it out is tantamount to throwing dollar bills away- except that it has no immediate use... And I have a craft room full of things like that. Bits of ribbon, old bras, torn jeans... You get the idea.

Well every now and again it comes in handy to not throw stuff out, and I finally found a use for all those unused corners of bridal illusion tulle! Of course, you can always just buy a yard for about 2 bucks... Oh and did I mention I didn't use ALL my corners? Darn.

Sorry for the lack of photos. I didn't have the presence of mind to take them while making the stuff and I was too lazy to recreate it... Oh well. You get what you pay for ;) I'd be happy to answer questions if things are unclear.

Materials:
Bridal illusion or other tulle (How much you need depends on how big you want your favors and how many you want)
Ribbon (fabric or curling ribbon is fine, just make sure it's fairly narrow)
Card stock
Printer paper
Scissors
Bulk wildflower seed
Plastic baggies (the fold top sandwich kind) or other barrier to keep seeds inside the tulle
Glue
Hole punch

1) lay out your tulle. Cut into squares about 10x10 inches or as big as you want them. Just eyeball this. No one can tell if they aren't perfect once you tie them up. You can cut circles if you really want, but it is WAY more work and doesn't look any cooler, trust me.
2) fill the 2 bottom corners of the sandwich baggies with seeds. Cut the bag in half, leaving enough on each side to hold the seed. Tape them around the top to hold in the seeds. Trim the excess Baggie off the top.
3) To make tags, cut the cardstock into 2x3 inch rectangles. Cut the paper into 1.5x2.5 inch rectangles. Glue the paper onto the cardstock. Write any sayings you wish on them. Mine were for a baby shower so I put things like "watch our family grow" and "we love our little sprout" on them and on the back wrote "plant me" like the "drink me" from Alice in Wonderland although I don't think the guests caught the reference. Oh well. I tried! Finally, hole punch the tags so you can thread the ribbon through them.
4) Take the tulle squares and place a bag if seeds in the middle. Grab up the sides and tie with the ribbon. I just knotted mine a few times, but you can leave enough to tie a bow if you like. Take a tag and loop it through the ribbon and tie another knot or two or tie your bow. Boom you're done!!

These went really fast and were pretty cheap. The tulle, paper, and ribbon I just had lying around. The seed I bought for about $8 and it made around 30 favors worth. If I shopped around I could have gotten it cheaper but I was too busy to go running around to garden stores so I just a large packet of wildflower and cut flower seeds from Walmart. Still, it comes out to about $.27 per favor.

They are pretty small though, so it's not super dramatic if you are looking for a centerpiece type favor. Although I am sure you could make them larger if you wanted. I initially wanted to make seed bombs, which would be bigger, instead but I didn't have the time to dedicate to it. Maybe next time!!

Friday, May 4, 2012

Easter photos... Finally!!

So I had to wait on my father in law to get these photos so I swear it's not my fault they are a month tardy... I swear. I mean, I've only had them for a week and didn't post. He had them like three! :). So anyway, lesson learned: don't forget your own camera on major crafting holidays :)

I did actually finish most of my Easter crafting stuff. I didn't have little man with me while sewing so the tie and pants were too small (I may make the tie a clip on as it is plenty long for that and I don't relish the idea of strangling my baby anyway...), I didn't have time to make an Easter hat for him, and I selfishly made one for myself (a hat) that I didn't have the energy to decorate. But it was still fun and I think a great success. I learned a lot and drafted some new patterns I will share over time.

I did some pretty major alterations to the men's dress shirt onesie since the first thing I did was screw up, and I created 2 patterns I will share, but for now just the visuals will do.

Btw, the ONLY photo of my Easter bonnet was awful so I'll have to take one later to share...

Thursday, April 5, 2012

My Easter outfit for Little Man

I like holidays.  I especially like Halloween because I get to dress up as something else.  However, normal holidays are nice because I still get to dress up!  Unfortunately for me, the world thinks that little boys should run around in onesies with a tie silkscreened onto the front of it while little girls run around in fluffy little dresses. I humbly disagree, so I went a-questing for some nice baby boy clothes.  I found precisely zip.  Sure there were a few outfits on Amazon that would have done the trick, but it looked more like resort wear for a baby on a golf vacation with his parents than a truly formal outfit for Easter.  Now I am not a fashion Nazi and I will not make my son wear a suitcoat, but I will have him wear a dress shirt with an actual pointed collar, a vest, some dressy slacks, and possibly a tie.  Shoes and an Easter hat will be gravy.  And of course, since I cannot locate them anywhere in the known world, I went a-questing on the interwebs for passable patterns.  This is what I found:

(Note: I do plan to make all these, but I want to share the wealth of knowledge BEFORE easter, and the way it is looking I will be finishing this stuff up at 5:59AM for 6 o'clock sunrise service... I will post pictures of my journey or at least the outcomes after easter in another post.

Tutorial on how to make a baby dress onesie out of an old dress shirt:


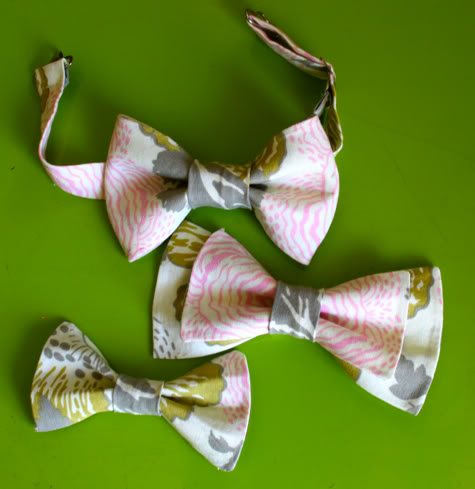
How to make a matching bow tie (I am going to try for a straight tie so as not to look like a physics professor, but this is still cute):


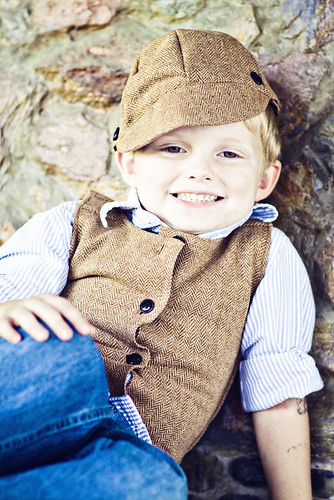
Make a vest and hat from an old skirt (not using this tute for the vest, but may for the hat):
vest3proof

More like the hat I want, but don't have time to go to the store for the pattern (from McCall's):

M6575

And to top it off, booties.  I mean, no shoes, no shirt, no 6 AM service, right? Obviously, I will leave off the frilly bits...

IMG_6595


So there you have it.  My piecemeal Easter outfit.  God help me to finish it all in time.  I have the shirt cut out... That's a good start for being Thursday night, right?  RIGHT???  I guess I'd better stop procrastinating by blogging about what I plan to do and actually go do it...