I love Pinterest. It is an amazing way to share and bookmark ideas. Or I should say, that is what it is at its best. Its also another way to spam me, annoy me with pointless and meaningless sayings and memes, and waste my time with things that aren't helpful or useful. But with a little concerted effort, its a great way to share and and find revolutionary ideas. Well, this may not be exactly revolutionary, but man did it help me out tonight.
A long time ago in a blog post far far away, I made a diaper pail liner using PUL as well as a wet bag. PUL is difficult to sew on because it is a plastic-y, sticky material. The presser foot snags on the fabric rather than gliding over it, creating an endless source of problems ranging from puckers in the stitching, missed stitches, bunched stitches, bent and broken needles, messed up timing, and even damage to your machine. A way to avoid having this problem is to place something between the presser foot and the fabric, such as tissue paper, or even regular old printer paper. While this really does help, it doesn't completely fix the problem and can open a whole multitude of its own issues, like getting it torn off and all those little bits stuck under the thread out without damaging your stitching, loose stitches because of the extra material being sewn over, and not being able to see the line you are stitching very clearly.
Enter Pinterest.
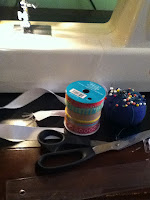
I saw a pin about a trick for sewing on vinyl and thought I would give it a try with PUL. My foray into sewing stuff for my son's cloth diapers led me to use Joann's PUL which met with mixed results. I had to replace some of the items I made after the PUL self destructed, but other items made with a different bolt of fabric is still going strong! Anyway, This method recommended taking a small piece of scotch tape and taping the bottom of your presser foot to make it slippery. I was pretty skeptical, but I figured I would do half the new project with paper and compare the experience and the stitching to the tape. You do have to make a hole for the needle to avoid gunking up your needle and subsequently your machine and make a slit down the middle in the front for the thread to slide through, but it worked pretty darn well! The presser foot slid nicely over the fabric, with only a fraction of the friction. WORLDS BETTER than using paper or tissue paper or any other method I have found thus far.
So now we know. Scotch tape for sewing on sticky fabrics works! Not only do you not have to deal with paper, you can see what you are doing and it leaves your hands free for removing pins, keeping your fabric aligned, and all those other things you do NORMALLY. Go Pinterest.
Saturday, June 30, 2012
Saturday, June 23, 2012
Cheap and easy party favors
I have an etsy shop, and one of my most popular items are wedding veils, which I just love to make. However, veils are round and I end up with tons of leftover tulle "corners" that are fairly large bits of fabric, but that I have little to no use for. As a crafty person, throwing it out is tantamount to throwing dollar bills away- except that it has no immediate use... And I have a craft room full of things like that. Bits of ribbon, old bras, torn jeans... You get the idea.
Well every now and again it comes in handy to not throw stuff out, and I finally found a use for all those unused corners of bridal illusion tulle! Of course, you can always just buy a yard for about 2 bucks... Oh and did I mention I didn't use ALL my corners? Darn.
Sorry for the lack of photos. I didn't have the presence of mind to take them while making the stuff and I was too lazy to recreate it... Oh well. You get what you pay for ;) I'd be happy to answer questions if things are unclear.
Materials:
Bridal illusion or other tulle (How much you need depends on how big you want your favors and how many you want)
Ribbon (fabric or curling ribbon is fine, just make sure it's fairly narrow)
Card stock
Printer paper
Scissors
Bulk wildflower seed
Plastic baggies (the fold top sandwich kind) or other barrier to keep seeds inside the tulle
Glue
Hole punch
1) lay out your tulle. Cut into squares about 10x10 inches or as big as you want them. Just eyeball this. No one can tell if they aren't perfect once you tie them up. You can cut circles if you really want, but it is WAY more work and doesn't look any cooler, trust me.
2) fill the 2 bottom corners of the sandwich baggies with seeds. Cut the bag in half, leaving enough on each side to hold the seed. Tape them around the top to hold in the seeds. Trim the excess Baggie off the top.
3) To make tags, cut the cardstock into 2x3 inch rectangles. Cut the paper into 1.5x2.5 inch rectangles. Glue the paper onto the cardstock. Write any sayings you wish on them. Mine were for a baby shower so I put things like "watch our family grow" and "we love our little sprout" on them and on the back wrote "plant me" like the "drink me" from Alice in Wonderland although I don't think the guests caught the reference. Oh well. I tried! Finally, hole punch the tags so you can thread the ribbon through them.
4) Take the tulle squares and place a bag if seeds in the middle. Grab up the sides and tie with the ribbon. I just knotted mine a few times, but you can leave enough to tie a bow if you like. Take a tag and loop it through the ribbon and tie another knot or two or tie your bow. Boom you're done!!
These went really fast and were pretty cheap. The tulle, paper, and ribbon I just had lying around. The seed I bought for about $8 and it made around 30 favors worth. If I shopped around I could have gotten it cheaper but I was too busy to go running around to garden stores so I just a large packet of wildflower and cut flower seeds from Walmart. Still, it comes out to about $.27 per favor.
They are pretty small though, so it's not super dramatic if you are looking for a centerpiece type favor. Although I am sure you could make them larger if you wanted. I initially wanted to make seed bombs, which would be bigger, instead but I didn't have the time to dedicate to it. Maybe next time!!
Monday, June 18, 2012
Pacifier Clips
I recently discovered a cool new craft website for supplies: KAMsnaps.com. Not only is it an inexpensive site, it offers FREE SHIPPING on orders over $28. Why $28 and not $25 or $30? Who knows... but its an easy number to hit once you see how much awesomeness there is! They also do a %5 back rewards program as well as offer incentives for referring friends (you will all cite me as your referring friend so I get free stuff, right?) I got snap pliers from them for future diapering ventures as well as the plastic snaps to go with, but I also found pacifier clips. PLASTIC ONES! That are specifically designed to be pacifier clips! And they are really cheap compared to Joann's suspender clips which is what I had been using. At $0.33 a piece instead of $1.50, it is easier than ever to make affordable stuff for yourself or to sell and still make a profit. Not to mention plastic, although less durable perhaps, seems like a better material for babies since its not full of sharp edges and they are so much lighter. They also come in colors, so plain jane silver metal is totally out! I got the clear ones to test out, but I plan to order more if they work well.
 Anywho I made a few for the baby shower and decided to post a tutorial for them, although there are lots of tutes out there for these.
Materials:
Grosgrain ribbon wide enough to just fit through the clip (check this as it varies!!)
Narrower grosgrain ribbon in a coordinating color/pattern
Suspender clips or plastic pacifier clips
Sewing machine and coordinating thread
Pins
Snap pliers/press and snaps OR Velcro dots and a hot glue gun
Step 1) Cut both ribbons to about 8 inches. This will result in a somewhat short paci clip, but it won't pose a strangulation risk to your baby. Bonus :)

Step 2) Lay the narrow ribbon over the top of the fatter ribbon. Pin in place down the middle of the wider ribbon. Stitch across one end to hold the ribbon in place, then stitch down one of the long sides, across the other end, and back up the other long side. Be careful not to shift the ribbons or they will pull and pucker or curl.

Step 3) Snip both raw edges to make the ribbons even. Fold over the raw edge of the ribbon by 1/8"-1/4" and stitch. Fold under again and stitch, encasing the frayed edges. Repeat on the other side so both ends are finished.
Step 4) Thread the ribbon through the loop of the clip. Pull it through about half an inch and stitch. Make sure the clip will be right side up before you sew; the top of the clip should touch the right side of the ribbon as you see.


Step 5) Fold over about one inch of ribbon on the other end. Mark where you want your snaps or Velcro to be and apply, staying close to the finished edge on the one side. My photos show me adding snaps, but also show the kind of velcro I used for the first batch, just in case you wanted to try that route.
I used hot glue to affix Velcro to the ones for my son to augment the adhesive that comes on them because I didn't think it would hold up on its own. With daily use, drool, spit up, and chewing, it lasted about 6 months before I replaced it with the more durable plastic snaps. But I could have just re-glued it and been fine or replaced the Velcro. Just FYI...


Once you have the snaps or velcro done, you have a complete Pacifier clip!

Bottom Line:
Ribbon scraps and a roll bought at the dollar spot: $1
Snaps: really cheap once I bought the press and all. I think its about $5 for 100.
Clips: $0.30
Total cost: less than $1
Total time: about 30 minutes, maybe less. I made three at a time, so its hard to say how long one would take.
Retail cost: about $4 for one of those munchkin clips that I honestly think are too wide anyway. They always seem to bunch up around the pacifier.
Total savings: $3. That's enough to make 3 more! :-)
 Anywho I made a few for the baby shower and decided to post a tutorial for them, although there are lots of tutes out there for these.
Materials:
Grosgrain ribbon wide enough to just fit through the clip (check this as it varies!!)
Narrower grosgrain ribbon in a coordinating color/pattern
Suspender clips or plastic pacifier clips
Sewing machine and coordinating thread
Pins
Snap pliers/press and snaps OR Velcro dots and a hot glue gun
Step 1) Cut both ribbons to about 8 inches. This will result in a somewhat short paci clip, but it won't pose a strangulation risk to your baby. Bonus :)

Step 2) Lay the narrow ribbon over the top of the fatter ribbon. Pin in place down the middle of the wider ribbon. Stitch across one end to hold the ribbon in place, then stitch down one of the long sides, across the other end, and back up the other long side. Be careful not to shift the ribbons or they will pull and pucker or curl.

 |
| across the end |
 |
| down one side |
 |
| across the other end |
 |
| and back up the other side |
 |
| viola! |
Step 3) Snip both raw edges to make the ribbons even. Fold over the raw edge of the ribbon by 1/8"-1/4" and stitch. Fold under again and stitch, encasing the frayed edges. Repeat on the other side so both ends are finished.
 |
| Fold over raw edge |
 |
| stitch |
 |
| Fold over again |
 |
| Stitch again. |


Step 5) Fold over about one inch of ribbon on the other end. Mark where you want your snaps or Velcro to be and apply, staying close to the finished edge on the one side. My photos show me adding snaps, but also show the kind of velcro I used for the first batch, just in case you wanted to try that route.
I used hot glue to affix Velcro to the ones for my son to augment the adhesive that comes on them because I didn't think it would hold up on its own. With daily use, drool, spit up, and chewing, it lasted about 6 months before I replaced it with the more durable plastic snaps. But I could have just re-glued it and been fine or replaced the Velcro. Just FYI...


Bottom Line:
Ribbon scraps and a roll bought at the dollar spot: $1
Snaps: really cheap once I bought the press and all. I think its about $5 for 100.
Clips: $0.30
Total cost: less than $1
Total time: about 30 minutes, maybe less. I made three at a time, so its hard to say how long one would take.
Retail cost: about $4 for one of those munchkin clips that I honestly think are too wide anyway. They always seem to bunch up around the pacifier.
Total savings: $3. That's enough to make 3 more! :-)
Wednesday, June 13, 2012
Home made Clocks: AKA Last minute Father's Day gift
Unfortunately for me, my dad was born June 12th, which lands just before, just after, or sometimes, smack dab ON Father's day. So I am almost always late for BOTH of the most important gift giving days for him. Well, this year was going to be different. It wasn't, as it is now the 13th and his gift is only now made and not yet mailed... but I will make it by Sunday! I hope... so at least I was half on time! All this talk about time... hmm...
Yes, I made him a customized clock. I ran through about a zillion ideas of ways to make a clock just for him (he is an avid clock collector so this is a PERFECT idea for him), and nothing struck me until today, a day late, of course. The idea sprang from this post about a recycled plastic flatware clock. I looked into buying a clock kit, and they were stupidly expensive. So hubby and I went to goodwill and bought the ugliest clock we could find. Hey, no sense in wasting a PRETTY clock when its just gonna get destroyed anyway... :-)
I then cannibalized the pieces and decided to mount them on a photo he took. As I mentioned, my family lives in CA and my dad has this wonderful beachy house a few blocks from the waves. He is also an amateur photographer, and his pics are often quite lovely. I took one of his best shots of the beach for the background. I am terrible at reading analog clocks and my dad has enough other clocks around to actually tell TIME with that I dispensed with the idea of adding numbers, and just went with the clean, spectacular photo. There are about a zillion awesome variations to this project, so post your ideas and results!
Customized clock
Materials needed:
crappy old clock or a clock movement (mechanism) and hands kit from a craft store
large photo or other face you would like (I used an 8x10)
frame to hold the photo with a backing deep enough to fit the mechanism and still lay flat on the wall (alternately you can use the frame of the clock and cut your photo to fit)
pliers, wrench, adjustable wrench, or socket wrench set
white glue
hot glue
awl
scissors
a paper clip
cardboard (optional)
1) If using an old clock, the first thing you will need to do is take it apart. If you purchased the hands and movement, skip this step. Don't worry if you break the frame or the cover, you wont be using them. But do take care not to bend the hands. To take the hands off, bend your paper clip into an "s" shape and use the small hook to gently pull off the second hand. The minute hand and the hour hand may have a small nut that you can unscrew with your fingers, then remove them by using your paper clip. Sorry, I forgot to take photos of this step, but its pretty easy. If you're really scared, buy two cheap clocks in case you break one. :-)
2) Next, you will need to take the movement off the old clock. If you are using the clock frame or if you bought a kit, skip this step. There should be a small nut and washer holding the movement to the clock. Use your tool of choice to remove the nut. I used an adjustable wrench because it was what I had handy, but as it is not on there super tight, even a simple pair of pliers will probably work.
 |
| a REALLY ugly clock! |
 |
| Nut and washer removed successfully. |
 |
| The movement is now liberated and ready for a happier, prettier home! |
3) Next, take the new frame and examine it. Mine had the unfortunate personality flaw of being a front loading frame with plastic crossbars that met in the center. I worked around it, but this is by no means a NORMAL frame. Remove the glass. Take out the cardboard backing. If yours has a plastic cross bar, poke a hole in it with the awl and use one blade of the scissors like a drill to cut a hole in the plastic.


If yours is NOT really weird, use the awl and scissors to cut a hole in the center of the cardboard and the photo. Make sure they line up. They don't have to be perfect since the washer will cover the edges of the hole, but don't make the holes too big or the photo will move around.
4) Take the cardboard backing and glue your photo to it. You may want to cut an additional piece of cardboard the same size and use that as well to make the clock face stiffer, but it is up to you.

5) Place the cardboard and photo into the frame and using the hot glue, glue it in place. Make sure the holes line up, and that the photo is in right side up if there is a hanger on the back (not that I am speaking from experience or anything... oops). (I glued it in as an afterthought so ignore my out of order photos with the movement already installed...)


6) Next, poke the center of the movement through the holes in the frame and photo. Replace the washer and the nut and tighten with your fingers and the tool of choice if needed. Make sure to hold the movement in the back while turning, otherwise the whole mechanism will just spin...


Bottom Line:
Old crappy clock from Goodwill - $1.50
8x10 print from Walmart - $3
Frame from Walmart (should have gone to goodwill but I forgot while I was there) - $3
Total cost: $7.50
Total time: about 1 hour, including disassembly
Cost in store - Who knows? A custom clock? But expensive fancy ones you could replicate go for about $20.
Total Savings: about $12?
Cool Variations:
use something other than a photo for the face of the clock or use a collage.
Omit the frame entirely and just have a cool open concept photo clock on a piece of cardboard
Do not center the clock hands and have them off to the side or hanging over an edge or something.
If you love a frame that isn't deep enough to conceal the movement, glue small blocks of wood to the top and bottom of the frame on the back, drilling a hole in the top one to hang it from, so the clock can still lie flat against the wall.
Tuesday, June 5, 2012
Running a household on a budget
Hubby and I just finished taking the Financial Peace University class by Dave Ramsey. I also just discovered the living on $28,000 series from the peaceful mom blog. Needless to say, I've been thinking a lot about money lately.
Now, I'm going to sound arrogant, but bear with me for just a sec. After going through both the class and the blog series, I was a little bitter because I didn't really learn anything new for my day to day budget. I did learn a lot from Ramsey about insurance and investing, but for my household budget it was all stuff I already did. But I didn't always do that, and I figure what if i knew then what I know now? Maybe we wouldn't have spent the last several years unburying ourselves from a mountain of debt. And I do mean a mountain. I guess I'm just the wrong audience for this stuff because I learned the hard way. I did really enjoy both, don't get me wrong. I just get disappointed when I think I will find some new exciting ways to save, and I come up empty.
So of course, I thought, well maybe I should give my own advice! I love to save money and Hubby and I have made it a kind of hobby to uberbudget and see how much ahead of our schedule we can get. I am a stay at home mom, so we are on one income, but thankfully its not too much of a hardship. Hubby just happens to love a lucrative field, so we are not exactly living on ramen and pork and beans. But as Dave Ramsey says, there is a difference between being broke and poor, and with all the credit card payments and student loan debt, we were pretty broke. I don't want to give you the impression we are swimming in money now, because we are still on a very tight budget, but we do have a comfortable income for being a single income household. That being said, I am still incredibly frugal. :-)
I don't exactly know where to start in sharing my experiences, so I figure I will just add posts as I go that share some of our money saving tips. But for the first post, I think I will share HOW we started budgeting.
I hated my job when I lived apart from my now husband, then fiance. When my lease for my apartment came up for renewal, I didn't think I could realistically stay there another year. Yes, I hated it that much. I was so depressed and so hopeless, it was all I could do to get out of bed each day. Needless to say, it killed my husband to see me so upset. So, we decided to look into moving in together. Two people can live more cheaply together, and we were saving for a wedding so it seemed prudent. I always intended to work, but the job market was just so bad, I went on interview after interview and came up with zip, despite always being in the top few candidates. Now we really had to look at our money. We had fallen in love with the idea of living together, but with only one income, how could we? So we started tracking our spending very carefully, took a look at my husband's income, and categorized all of our spending. We have many categories, such as mortgage, groceries, bad debt (credit cards), student loans, gifts, church (charity, really), and a category of "fun money" for each of us that we use to buy each other gifts, to buy things we want, and generally relieve that pressure from living on a budget. It also includes a slush fund which we nicknamed the "ice cream cone" fund where extra, unbudgeted money goes (such as tax returns, bonuses, interest on savings accounts, gifts, etc) until we decide what to do with it, like pay off debt, donate something to charity, go out to dinner, take a trip, etc. We often leave it there for a while until it accumulates enough to do what we want to. Its also an additional buffer for emergencies or if a budgetary item goes off track because we didn't plan quite right.
Hubby is a whiz with spreadsheets and we use Google docs so we can collaborate on it. Each of the pages on the bottom link to our itemized spending for that month, which deducts from this first page automatically. There are also "plan" spreadsheets for each month so we can account for things like insurance that are not paid monthly, and it also spells out how each paycheck is allocated. For the most part it is the same each month, but for some things it changes, like around Christmas for the gifts budget we save a little extra. The first column is the amount in the "bucket", the second is the "plan" amount, or how much we should have there at that point in time to stay on track to pay those irregular bills, especially key since bills are once a month and we are paid twice a month, and the third is the difference between the two - this tells us whether we are on track or not. Green means we are ahead, light green means we are a little ahead, white is perfectly on track, yellow is a little behind schedule, and red is critically behind. This first sheet is the snapshot of how we are doing at that exact moment. It ROCKS. We can see if we have money to spend on going out, if we have enough to pay our insurance, etc.
We also have spreadsheets further tracking our spending for certain categories, like groceries, baby, and crafts. These are mostly for tracking purposes, not planning, so we can see where we need to cut back or where we are doing well. A lot of our money goes into these categories, and it is easier to control our spending if we know what is going on. I used our baby budget to plan what I would buy for the baby, going from most to least important so we didn't end up with a jogging stroller but no car seat. So far, we have come in way under on most of our items, but it was indispensable during my pregnancy so I could see what we needed and what was a convenience (we still don't have a jogging stroller by the way haha).
So, I am sure this is about as clear as mud, but its our way of making things work, and I LOVE it. Every dime we spend is accounted for, and we plan by the year so we can plan for long term expenses and goals more easily. We even have a plan for buying a new house, although it is a few years off. But we will be able to do it because we can see our progress and we remember that it is there, needing some income allocated to it. Without a plan, it is so easy to forget to save for things, and thus, they never happen. Someday we will add vacations to the list when we can afford it, but for now, this is it!
Now, I'm going to sound arrogant, but bear with me for just a sec. After going through both the class and the blog series, I was a little bitter because I didn't really learn anything new for my day to day budget. I did learn a lot from Ramsey about insurance and investing, but for my household budget it was all stuff I already did. But I didn't always do that, and I figure what if i knew then what I know now? Maybe we wouldn't have spent the last several years unburying ourselves from a mountain of debt. And I do mean a mountain. I guess I'm just the wrong audience for this stuff because I learned the hard way. I did really enjoy both, don't get me wrong. I just get disappointed when I think I will find some new exciting ways to save, and I come up empty.
So of course, I thought, well maybe I should give my own advice! I love to save money and Hubby and I have made it a kind of hobby to uberbudget and see how much ahead of our schedule we can get. I am a stay at home mom, so we are on one income, but thankfully its not too much of a hardship. Hubby just happens to love a lucrative field, so we are not exactly living on ramen and pork and beans. But as Dave Ramsey says, there is a difference between being broke and poor, and with all the credit card payments and student loan debt, we were pretty broke. I don't want to give you the impression we are swimming in money now, because we are still on a very tight budget, but we do have a comfortable income for being a single income household. That being said, I am still incredibly frugal. :-)
I don't exactly know where to start in sharing my experiences, so I figure I will just add posts as I go that share some of our money saving tips. But for the first post, I think I will share HOW we started budgeting.
I hated my job when I lived apart from my now husband, then fiance. When my lease for my apartment came up for renewal, I didn't think I could realistically stay there another year. Yes, I hated it that much. I was so depressed and so hopeless, it was all I could do to get out of bed each day. Needless to say, it killed my husband to see me so upset. So, we decided to look into moving in together. Two people can live more cheaply together, and we were saving for a wedding so it seemed prudent. I always intended to work, but the job market was just so bad, I went on interview after interview and came up with zip, despite always being in the top few candidates. Now we really had to look at our money. We had fallen in love with the idea of living together, but with only one income, how could we? So we started tracking our spending very carefully, took a look at my husband's income, and categorized all of our spending. We have many categories, such as mortgage, groceries, bad debt (credit cards), student loans, gifts, church (charity, really), and a category of "fun money" for each of us that we use to buy each other gifts, to buy things we want, and generally relieve that pressure from living on a budget. It also includes a slush fund which we nicknamed the "ice cream cone" fund where extra, unbudgeted money goes (such as tax returns, bonuses, interest on savings accounts, gifts, etc) until we decide what to do with it, like pay off debt, donate something to charity, go out to dinner, take a trip, etc. We often leave it there for a while until it accumulates enough to do what we want to. Its also an additional buffer for emergencies or if a budgetary item goes off track because we didn't plan quite right.
 |
| Our real budget, minus the numbers |
We also have spreadsheets further tracking our spending for certain categories, like groceries, baby, and crafts. These are mostly for tracking purposes, not planning, so we can see where we need to cut back or where we are doing well. A lot of our money goes into these categories, and it is easier to control our spending if we know what is going on. I used our baby budget to plan what I would buy for the baby, going from most to least important so we didn't end up with a jogging stroller but no car seat. So far, we have come in way under on most of our items, but it was indispensable during my pregnancy so I could see what we needed and what was a convenience (we still don't have a jogging stroller by the way haha).
So, I am sure this is about as clear as mud, but its our way of making things work, and I LOVE it. Every dime we spend is accounted for, and we plan by the year so we can plan for long term expenses and goals more easily. We even have a plan for buying a new house, although it is a few years off. But we will be able to do it because we can see our progress and we remember that it is there, needing some income allocated to it. Without a plan, it is so easy to forget to save for things, and thus, they never happen. Someday we will add vacations to the list when we can afford it, but for now, this is it!
Subscribe to:
Posts (Atom)