Showing posts with label baby. Show all posts

Monday, February 24, 2014

Reusable Nursing pads

This is a super old project that I never posted on because, well, let's just say I am busy...  Hence the not posting for 7 months.  Oops.  Anywho, I loved these little lifesavers and they saved me a bundle since I didn't have to buy nursing pads for the year and couple months that I breastfed.


My breast feeding experience included a lot of leaking. My milk supply is shall we say... Ample. To give you a nice TMI, if I didn't nurse or express frequently enough, I was likely to shoot your eye out. As a result I burned through breast pads pretty quickly. I didn't want to use disposables since I was trying to be eco friendly, and the reusable pads I found didn't quite work.  The store bought ones were itchy, the handmade ones seemed really expensive, and ones that didn't have the drawbacks above couldn't dried in a dryer.  I laugh thinking about hanging up or laying out billions of tiny little fabric rounds.  People already thought they were coasters all the time.  So not working for me.

So, of course, I decided to make my own. I made some burp cloths and swaddle blankets so I had lots of scrap flannel lying around. I didn't trust layers of flannel to be absorbent enough so I cut up towels to layer between two pretty flannel pieces.

Reusable Nursing Pads

1) Make a cardboard template. Find a circle to use, like a coaster (haha) or bowl, or draw one with a compass (or use the string and a pin method). Mine was about 4" in diameter although a bit bigger might be nice for larger breasted mommies.  I am rather small busted, so adjust as you see fit.

2) Use your template to trace circles on your flannel and your old towel.  You can use a sharpie for this as you will be cutting them out, and if you have a serger, you will be trimming off the ends. For each pair you need 4 flannel circles for the outside and 2 terry cloth (towel) circles for the absorbent layer.

3) Cut out the circles and stack them up flannel, towel, flannel. Make sure the pretty side of the flannel is facing out.  Line up the edges the best you can.

4) Serge the edges, going slowly enough to keep the round shape and all the layers even. Make sure the layers don't bunch. If bunching is a problem, baste the layers together in an x before serging. This should help.  If you don't own a serger, you can turn and top stitch.  It will take longer, but is still really cheap and easy!


Some people say to use PUL (a waterproof material) for the backing. I'm a little afraid to use waterproof material because it's not breathable and can encourage yeast growth which causes thrush.

Don't want to make them yourself?  Check out my Etsy shop to buy a few pairs!

Tuesday, June 11, 2013

Things they don't tell new moms

Several of my friends are expecting and due very soon or just had babies.  And lots and lots of us have small children and are going through that insanity all together.  I decided I would dedicate a blog post to non-traditional advice.  Here are some of the most useful things I was told, or I seriously wish someone had told me so I didnt feel like an idiot or like a horrible mom.  These are my top 10 pieces of advice for new moms (dads, too, but this is written with moms in mind).

1) Your kid will roll off the bed, couch, or changing table, eat dirt, hit his or her head, swallow a non-food item, bleed on occasion, and otherwise attempt to maim himself/herself.  This is normal.  This does NOT make you a bad parent or neglectful.  Someone once told me that moms in Africa let their babies touch the fire once so they learn not to touch fire.  This is how they learn, and truly, what doesn't kill them makes them stronger.  Babies are built to learn things the hard way.  And you CAN NOT watch them every second.  See also: running fevers, diaper rashes, and throwing huge tantrums in the middle of the store.

2) You will hate your baby from time to time.  Some people feel it more than others, but at some point you will probably be so exhausted, frustrated, confused, and overwhelmed, you will want to give your child away or maybe even be tempted to do something like throw them out the window (my personal feelings on many an occasion when little man would not sleep for love or money).  This is normal.  You aren't a bad mom.  The thoughts are super scary, but you wont hurt your baby (if you think you will, seek counseling - the feelings are still normal but you could probably use some help).  You are totally capable, and you CAN do this, but you need a break.  Go get a friend, dad, your parents, a neighbor, anyone.  Take a few minutes to yourself, and longer if you can.  If no one else is around, put the baby in a safe place like the carseat (inside only please) or crib and take a break.  Go to a place you cannot hear him or her and breathe.  Don't watch the clock, just chill for a little while until you feel better.  You still need a real break later, but that will help get you through.  When you can, take a long shower, go shopping, or do something without baby for a while and focus on you.  You need breaks, and your baby needs to get used to periods where you are unavailable.  (my mom said she wanted to smother me with a pillow once just so I would stop crying... not really maliciously, but still shocking unless you are living it!)

3) You deserve to have a partner for night feedings.  So many moms who are on maternity or stay at home feel that if dad is getting up to go to work, he must sleep undisturbed all night.  WRONG!  If you are bottle feeding, let dad take a shift overnight.  If you are nursing, try what hubs and I did - he woke up and diapered, then I nursed little man back to sleep and put him back in his cosleeper.  The little extra help kept me from waking up totally, so all of us fell asleep faster.  Do what works for you, but just because he is at work does not make dad unavailable at night.

4) Keep an extra outfit in the diaper bag.  Not for the baby; that goes without saying.  I am talking about YOU.  And as soon as you leave it in the trunk of your car someone else will drive.  And there is nothing worse than smelling like poop from a blowout diaper or like vomit from that one last burp at a fun party that you really don't want to leave because its the first one you've been to in weeks.  Wearing your old gym shirt is better.  I promise.

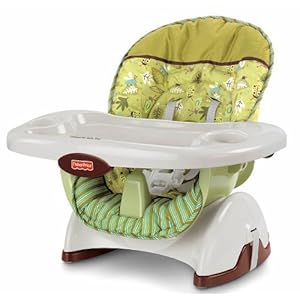
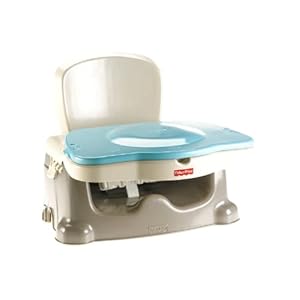
5) You do not need every dang gadget on the face of the planet. Baby manufacturers do not make products to make your life easier.  They exist for one purpose only: to separate you from your money.  Aside from the basics like a crib, carseat, and high chair, stuff that you do need you can probably borrow.  I have a swing up for grabs.  And let other people buy the toys.  If you have any surviving family members they will spoil the heck out of that kid.

6) Ask for help.  You can't possibly do all the laundry, make meals, take care of older kids, blah blah blah, and be superwoman.  Women before us had sisters, mothers, in laws, friends, etc to help them with new babies.  We as modern women need to learn to ask for help.  Chances are all of the above would LOVE a little face time with the new baby while you shower or would love to come over and bring you a lasagna and give a kissy and a snuggle to the bundle of joy.  The flip side of this one is that people are NOT allowed to come see the baby unless they do something for you, ie: bring food, clean something, baby sit, etc.  People will break your door down wanting to visit.  Put those visitors to work!  They probably don't mind and even if they do, that will just ensure they don't come back to bug you.

7)  They will not remember their first birthday.  Or Christmas.  Or Easter, or Valentine's Day, or Groundhog Day, or Arbor day.  Don't panic if you don't pull out all the stops for every holiday.  Sometimes you're just too tired, and that is okay.  A quiet little gathering at home with just you two or three is just fine.  No one will be disappointed.  Promise.  In ten years no one will even remember.

8) No one knows your baby better than you do.  Read all the books you want, listen to the doctors, listen to parents, friends, strangers, but follow your heart.  Your mother's intuition and what you feel is right for you and your baby is almost always the best answer.  I hesitate to say always for fear of the exception trolls, but in my experience, always. Parenting comes with some tough decisions: cosleeping, feeding, discipline, teaching, potty training... Others know what worked for them, what worked for the majority, or what works scientifically, but only you know what works for your family.  With that, ignore any conflicting advice, including the ones listed here as it applies.  Tell pushy advice givers that you will "take that under consideration" to get out of agreeing with them.

9) Your nursery does not need to look like it fell out of the pages of a magazine.  Buy stuff that you can second hand, so long as it is safe, in good condition, and not recalled or anything.  Not everything has to match or follow a theme (or even be gender appropriate colors).  It will be a whole lot easier to dress your baby in a fancy dress that will probably be pooped and spit up on inside of 5 minutes when you only paid $5 and not $50 for it.  It will stress you out much much less when something does get ruined.  Plus, other babies only stay in clothes for about 5 minutes, too, so many used clothes look brand new because they were only worn once!  And trust me, your son doesn't care that he is eating off of bunny rabbit plates and got dried off with a pink towel.  It will not scar him for life.

10) He/She is just a BABY.  Babies don't do naughty or annoying things on purpose.  They don't wait till you are eating to be hungry or wake up 6 times between 1 and 5 AM just to spite you.  It will feel like it.  But when you are at the end of your rope, take a break and tell yourself that he or she is just a helpless little one and that you mean everything to him or her, and that is why he or she wont sleep unless you are right there.  Remember how you looked forward to meeting him or her and relish the sweet moments where you are the center of his or her world.


Well, those are my top 10.  What is your advice for new moms/dads?

Thursday, April 4, 2013

Homemade Sugar Free Applesauce

I started making applesauce for my son because I didn't trust commercial applesauces to actually be healthy and sugar free, and those little jars of baby food are way overpriced for just applesauce.  And then my husband tried it, you know, just licking off the spoon while feeding the baby.  Or something.  And now I am not ALLOWED to buy the store stuff haha.  Admittedly, I sometimes add a little brown sugar to get the apples to release their juices faster and add that caramel flavor, but its really not needed and I love the taste without.  This is a rough recipe because I usually make it "till it looks right" but I absolutely hate it when people say that in recipes, so I have done my best to measure things and time things at least generally.  Feel free to tweak where needed! :-)

Homemade Applesauce

4 Lbs of Apples - a mix of varieties is fine, and even recommended as long as they cook at roughly the same speed.  Choose a bagged bulk apple to save money.  Avoid using flavorless or overly tart apples like red delicious and granny smiths.  Try McIntosh, Pink Lady, Gala, Golden Delicious, or another tasty, firm fleshed variety.
2 t cinnamon
1/2 c raisins
Paring knife or peeler
chef's knife/santoku
Large stockpot or saucepan with a lid
food processor, blender, or potato masher
containers for storage

That's it!

1) Peel your apples using a paring knife or a vegetable peeler.  I prefer a knife because I think it actually goes faster while doing a better job and giving me more control, but I do tend to waste a little more apple.  If using a knife, make sure it is good and sharp to avoid slipping and cutting yourself!  Sharp knives are WAY less dangerous!

2) Once all your apples are peeled, use your chef knife to cut them into thin slices.  Rather than coring them the traditional way (cut into fourths and cut out the core with a paring knife, then slice into tiny wedges) which makes it hard to get even slices, try my way.  Put the apple on the board and place your knife about 1/4-1/2" away from the core.  Slice away that piece.


Put the apple cut side down on the cutting board and slice the same 1/4-1/2" away from the core on each side.

Turn to one side and cut out the last chunk.
I cut into the core which leaves hard pieces in the applesauce. Ick...
Hopefully you will have cleared the core!  If not try out a little farther on the next apple.  Slice each piece into thin slices (about 1/8" or so).  Try to keep your slices even.  If you have to, it is better to cut larger slices than to have uneven slices, because they will all cook at the same rate.  If you are very unsure of slices, cube them up.  Cubes work fine, but takes a little longer to cook.
Had to show off my good slicing!
3) Preheat your saucepan/stockpot on medium.  After all the apples are sliced, toss them in the pan.  They should sizzle just a tiny bit.  Cover the pot.  Stir them every 5 minutes or so, but try to keep them covered to keep in the moisture.  If the apples are sticking to the bottom, add a small amount of water (a Tablespoon or so) to loosen them up.  You may need to add more water if you have less juicy apples, but you would be surprised at how much water the apples release, and you are just diluting flavor when you add water, so hold off unless its absolutely necessary to keep them from burning!

If you don't see any steam, add a little water to the pot.
4) Cook about 15 minutes until the apples are starting to break down.  Add cinnamon and raisins to the pot. Cover and cook another 10-15 minutes until the apples are nicely broken down and the raisins are plump.


5) Dump the apples into a food processor or blender, or leave them in the pan and use a potato masher to smash them up (they may need to be a little more tender for the potato masher... use your judgement.  This is part of that "cook it till it looks right" thing haha).  Blend or process until the apples are in small pieces or completely blended if you want to use as a first food for babies.  I leave it chunky now because my 15 month old can handle it, but when he was first starting solids I added a little water or 100% juice and pureed the heck out of it!  It is delicious warm, or you can refrigerate 5 days or so, or freeze it in portions and thaw when you want it.  Makes roughly 5-6 cups. (10-12 jars of baby food)


Just add spoon.


If you like, you can add other dried fruit, add ginger or nutmeg with the cinnamon, or add some sugar.  Play with it and make it your own!  Hope you like it!

Wednesday, February 20, 2013

Wazoodle

I like great companies. I love small businesses. I feel good about buying US made. I like crafting supplies. I seek out good prices. I demand good customer service. I am impressed by sincerity.


Dear reader, this may not interest you in the least, but I felt obligated to tell you about the new and improved wazoodle. It's a website that sells cloth diapering and other supplies to the general public. Let me take a moment to disclaim: I don't work for them I get no money from them and I get no stuff from them unless I pay for it. Which I do. And will continue to.

Anyway, if you are into making your own cloth diapers or accessories, you may have heard of them. They used to be a Canadian based company, but after scathing reviews because of poor customer service and slower than slow shipping, they went up for sale. It is now run out if New Jersey and the new owners seem so awesome! They have scads of new products, all made by the same factories to keep the product quality high (that was the one good thing about the old wazoodle), but such a better attitude. The prices are great, shipping is much more affordable, and I don't have to feel guilty buying from a foreign company (business? In NJ. Products? Manufactured in the states. Yay!)

I get my PUL there, barrel stoppers, drawstring cord, and various other items. They have a great selection of organic fabric, including tons of bamboo.  It is a great resource for natural diapering options, especially.  Looks like they are carrying KAM plastic snaps and presses, too. I used KAMsnaps.com for that, but who knows?! I may switch! Anyway, this may not affect you at all, but I felt moved to shout to the world that a crappy supplier of great products is now a customer friendly, US company. They deserve a second chance. My newest order is placed. Hooray!

Saturday, January 26, 2013

These are a few of my favorite things... portable highchairs

I probably have more experience with this one than any of my other posts thus far. I don't usually buy more than one of something and use them both a lot, but my family lives in California and we go visit about twice a year. I can hardly handle packing clothes much less pack carseats, strollers, high chairs, diaper pails, etc. and babies need so much gear! So I ended up buying cheapo versions of stuff to keep there. And thus this post was born!

We take our little man everywhere with us, and even at home it is nice to have a strap to any chair kind of high chair that we can toss in the trunk and go.  He is so squirmy when he eats it darn near impossible to hold him while feeding, so this was a must for us.  We can take it to restaurants, grandma's, play dates, you get the idea.  And its nice to have at home, too, so we can have an extra seat when his little friends come and visit.

We have 2 travel high chair seats. One we use at home and was a little over $50. The other is in California and when I couldn't get one like we had at home off Craigslist (even though I tried for 3 days), I bought this cheaper version new for around $20-25.  The first I got on Amazon, and the second I got at Target, although both are available both places...

The first is the Fisher-Price Space Saver High Chair.
This high chair has a plush looking pad, a sturdy looking tray, a reclining seat, and a booster for when the child outgrows the high chair portion.  It does just what it says, and it looks fancy.  The reclining seat is kind of pointless to me, since I never really bottle fed, but maybe for some it would be useful.  It has shoulder straps, so once your kid is in this thing, they aren't falling out!  However, I feel like even in its most upright position it is reclined back too far, making for bad posture.  The tray is impossible to get on and off with one hand, which can be hard when wrangling a child.  It is a HUGE tray and while it is "dishwasher safe" the only way to get it to fit is to lay it flat across the bottom shelf.  No joke.  Also, it does not collapse at all.  If you want to take it with you, its the same size it always is, and while it fits in our trunk (we have a mid sized sedan) a smaller car would probably be out of luck, not to mention it takes up half the trunk space, then, which means the stroller wont fit...  Good thing we rarely use our stroller...  Needless to say, it has some issues with practicality.

Enter our "cheapo" version, the Fisher-Price Healthy Care Deluxe Booster Seat.
This doesn't have shoulder straps, a sexy looking pad, or a giant slide in tray.  After that, its all pros.  The tray snaps on with little pegs, meaning you can do one side, then the other = one handed.  It has a nifty little lift out tray on top of the tray that has a lid, so if you don't finish your cheerios, you can snap a lid on it and take it with without finding a new container for it all.  All three pieces (tray, food tray and lid) snap together pretty snug so they don't go flying apart.  But that's far from the coolest feature. It collapses.  The back folds down into the seat and the tray snaps on over it facing backwards to make this tiny little high chair cube.  And the strap you use to buckle it to the chair bottom can snap over the top of the tray to act like a handle.  Mind.  Blown.  Its like a parent actually used this one!  It also can be used as a booster seat, the seat bottom is adjustable in height and blah blah blah, but the compact portability is the huge selling feature here.  I would totally buy this one again.  I've considered ditching our expensive one to buy a second one of this for at home, but thus far I've felt too guilty about wasting the moolah.

So there you have it.  Cheaper can be better, folks!  Hope you can profit from my experimentation.


Wednesday, July 18, 2012

Baby ren faire costume complete!

I was really proud of myself this year. I had a couple projects to make for ren faire and I wasn't sure I was gonna get them all done in time. Hubby and little man gave me lots of help with housework and "me" time so I could get it all done. And I must say, I was really proud of the results!

Me and Little Man
I officially finished my friend's pouch that he wanted for LAST year, but it didn't get done.  Sigh.  I try- I really do.  Then I worked on Little Man's outfit, and it came together quickly and BEAUTIFULLY, much to my surprise.  I must be getting better at this, because his outfit was almost a no-brainer. And last but not least, I made some upgrades to my outfit.  Mostly it was structural improvement as the weight of the dress was creating too much stress on the seams, but I also made myself a French Hood in the early Elizabethan style.  I was hoping to get to Hubby's pants since he had been wearing the pants from his musketeer costume for the last 2 years with his upper class surcoat, and I had hoped to get to making some hose (basically stockings or long socks) for Hubby and my friend, but alas, their legs must show a little longer.  These were not REALLY on my list, but were just an "It would be awesome if I got to it" addition, so I don't feel too bad.  After all, I have to have something to do next year.... :-)

Group Photo

What is the next big thing then?  Well, my friend asked if he could commission me to make him a Fantastic 4 costume for Halloween.  I have the blue stretch material already... Mwaa ha ha...


Update:  I now have these for sale at my Etsy shop here!

Tuesday, July 3, 2012

Baby Ren Faire Costume Continues

A while back I shared some of my research on period appropriate renaissance faire costumes for children, specifically babies. I am really just doing my best guessing here as I am neither a historian nor an anthropologist, so don't come back and say how wrong I am.  This is just what I have been able to gather together, so yeah... Don't hate :-)  Anyway, disclaimers aside, I finally got started last night!  Its only been 4 months since my first post on that.  Sigh, lag time sucks. But I found a pattern I could adapt, and while this is not exactly what I had in my head, its what I can reasonably make in 2 weeks knowing that it will probably be worn twice at the most.  So I made some concessions on fancy-ness and decided to do something a bit more "mini me" since my husband really liked the idea of our son in the same fabric as him.


I had simplicity 5813 from a baptismal outfit I made for our godson, and I figured it would be perfect for adapting to the ren faire vibe.  I am using the dress (A/B) along with the slip which can be seen in the line art - the sleeveless thing, as well as the cap without a brim.  I am using the dress pattern as the gown and the slip pattern as the shift.  Of course, I had to make a lot of changes to make it period appropriate.

For starters, the dress opens in the back, but I wanted a Spanish surcoat sort of look for whatever reason, so I decided to make it open in the front and closed in the back.  This also follows my husband's doublet style, making it match him that much more. I decided to go with loops for the buttons in the front rather than making a placket, again to match my husband's doublet.  I also wanted long sleeves for the gown, but I decided to make them of another fabric and make them detachable since we are having such an awful heat wave here in Wisconsin.  I also cut the front and back of the bodice twice since I am leaving off the collar and need a way to finish the neck and armhole edges.  I will make one cut the facing and the other the fabric.  If this gets too thick, I may find a lighter fabric to line it, but for now, that's the idea.  For the shift, I decided to keep the extravagant length so it could be worn in future years, since our son cannot walk or crawl yet anyway and it is unlikely to bother him much.  It may be a pain to carry him with all that fabric hanging around, but its my own fault!  I also had to add sleeves to this, so I borrowed the sleeve pattern from the sweater and hopefully it will work out okay.  For the hems, I think I may take up some of the excess with the idea that it can be let down later.  I may not since he isn't crawling or walking like I said, but if it seems like WAY too much fabric, I have options at least.

Now for the I hopes.  I HOPE to make the sleeves detachable, but I also hope to make the sides and shoulders adjustable so he can wear this next year.  I am thinking that I will add eyelets to them both and leave a little pleat of slack in the side of the skirt so when cinched up tight you can't tell, but leave that bit of room to make it adjustable in the future.  It will only be adjustable to a point, of course, but it at least gives me the hope that this can be worn more than once!

Well, that is as far as I have gotten as of today, but I will keep you posted on how it turns out!  And I will learn from my mistakes at Easter and have frequent fittings with the model!

my heap of pattern pieces all cut out.  If little man takes a nap, I know what I am doing this afternoon!


Monday, June 18, 2012

Pacifier Clips

I recently discovered a cool new craft website for supplies: KAMsnaps.com.  Not only is it an inexpensive site, it offers FREE SHIPPING on orders over $28.  Why $28 and not $25 or $30?  Who knows... but its an easy number to hit once you see how much awesomeness there is!  They also do a %5 back rewards program as well as offer incentives for referring friends (you will all cite me as your referring friend so I get free stuff, right?)  I got snap pliers from them for future diapering ventures as well as the plastic snaps to go with, but I also found pacifier clips.  PLASTIC ONES!  That are specifically designed to be pacifier clips!  And they are really cheap compared to Joann's suspender clips which is what I had been using.  At $0.33 a piece instead of $1.50, it is easier than ever to make affordable stuff for yourself or to sell and still make a profit.  Not to mention plastic, although less durable perhaps, seems like a better material for babies since its not full of sharp edges and they are so much lighter.  They also come in colors, so plain jane silver metal is totally out!  I got the clear ones to test out, but I plan to order more if they work well.
Anywho I made a few for the baby shower and decided to post a tutorial for them, although there are lots of tutes out there for these.

Materials:
Grosgrain ribbon wide enough to just fit through the clip (check this as it varies!!)
Narrower grosgrain ribbon in a coordinating color/pattern
Suspender clips or plastic pacifier clips
Sewing machine and coordinating thread
Pins
Snap pliers/press and snaps OR Velcro dots and a hot glue gun

Step 1) Cut both ribbons to about 8 inches. This will result in a somewhat short paci clip, but it won't pose a strangulation risk to your baby. Bonus :)


Step 2) Lay the narrow ribbon over the top of the fatter ribbon. Pin in place down the middle of the wider ribbon. Stitch across one end to hold the ribbon in place, then stitch down one of the long sides, across the other end, and back up the other long side. Be careful not to shift the ribbons or they will pull and pucker or curl.


across the end

down one side

across the other end

and back up the other side

viola!

Step 3) Snip both raw edges to make the ribbons even. Fold over the raw edge of the ribbon by 1/8"-1/4" and stitch. Fold under again and stitch, encasing the frayed edges. Repeat on the other side so both ends are finished.

Fold over raw edge
stitch

Fold over again

Stitch again.
Step 4) Thread the ribbon through the loop of the clip. Pull it through about half an inch and stitch. Make sure the clip will be right side up before you sew; the top of the clip should touch the right side of the ribbon as you see.


Step 5) Fold over about one inch of ribbon on the other end. Mark where you want your snaps or Velcro to be and apply, staying close to the finished edge on the one side. My photos show me adding snaps, but also show the kind of velcro I used for the first batch, just in case you wanted to try that route.
I used hot glue to affix Velcro to the ones for my son to augment the adhesive that comes on them because I didn't think it would hold up on its own. With daily use, drool, spit up, and chewing, it lasted about 6 months before I replaced it with the more durable plastic snaps. But I could have just re-glued it and been fine or replaced the Velcro. Just FYI...


Once you have the snaps or velcro done, you have a complete Pacifier clip!


Bottom Line:
Ribbon scraps and a roll bought at the dollar spot: $1
Snaps: really cheap once I bought the press and all.  I think its about $5 for 100.
Clips: $0.30
Total cost: less than $1

Total time: about 30 minutes, maybe less.  I made three at a time, so its hard to say how long one would take.
Retail cost: about $4 for one of those munchkin clips that I honestly think are too wide anyway. They always seem to bunch up around the pacifier.
Total savings: $3.  That's enough to make 3 more! :-)

Friday, May 25, 2012

Making a baby girl headband

There are zillions of blog posts out on the interwebs about how to make these, so I figured one more wouldn't hurt. :)

I am in the process of making (yes making, not throwing) a baby shower for a somewhat-relative-more-like-a-friend of mine in about 2 weeks. So I am scrambling to get stuff together, being a procrastinator, a perfectionist, a mom of an infant, and a baby shower hostess virgin. I'm super excited, but anything new makes me panic because I am out of my comfort zone. (I made that revelation with my husband at target the other night and he responded "good. You need to get out of your comfort zone." eek. Am I really that bad?) but I am determined for it not to suck, so I am handcrafting a lot of the stuff :). We know it's a girl and the mommy to be LOVES girly stuff so I'm excited!

As aforementioned, I was at target, and of course I hit up the dollar spot.  What thrifty hostess/crafter wouldn't? And I hit pay dirt. I got an idea and supplies. Hooray. I picked up a cloth headband like I used to wear in the 80's to school which apparently isn't taboo anymore. And I thought, why not make a cute baby flower headband with it?! No more "is it a girl or a boy" with a hot pink flower strapped to baby's head! (at least not in Wisconsin. Too traditional haha)!

So here is the DIY: bonus!!! No sewing machine needed!!

Supplies:
Adult sized headband
Large, flat-ish silk flower like a peony or daisy
Thread
Needle
Scissors

1) Measure the head of the baby you are making the headband for.  I used my son as a stand in for the new baby, and made it just a little snug on him so it ought to fit her.  He has a small head, after all.  I didn't actually measure, but if you are looking for a specific size for a baby, there are lots of growth charts out there that give average head circumference for babies of different ages on the internet.  I have used those growth charts for other things, like sizing clothes when I didn't have the baby's measurements.  They aren't perfect, but they should get you in the ballpark.


2) Cut the headband at the seam and lay it out.  Measure the length you want, add half an inch or so for a seam, and cut off the extra on the side that has the seam so you don't have the bulky part to deal with on your finished product.


3) Overlap the ends by about 1/4" (or more if you left enough for your seam allowance) and pin them together.  You can just set one end on top of the other.  Jersey knits do not fray like other fabrics so you don't have to worry about finishing the edges. Easy, right?


4) Using a needle and thread, stitch the two ends closed to make a loop again. If you aren't great at hand sewing, don't worry.  This part will be covered up by the flower.  If you really want, you can use a machine to sew this, but since knits have a bit of stretch to them, it can distort the fabric unless you use a stretch stitch, which I found too much of a pain for 1" of sewing.


5) Trim the excess fabric around the stitching if there is any.  This is not a necessary step, but my edges were a  little jagged and I cleaned them up some.


6) Take your flower.  Remove the stem by gently pulling the flower head off.  There will probably be a plastic piece holding the flower together at the base - do NOT remove it or the flower will fall apart.  You can trim it if you need to, but not so much that it compromises the stability of the flower pieces.  Lift the top layer of petals up and gently move them to the side.  Knot your thread and poke the needle through the bottom layers of petals from top to bottom, so the knot is hidden under the top layer of petals. 


 7) Once through the flower, center the flower over the seam and poke through the headband.  Stitch 4 or 5 times, using small tucks, until the flower is secure in that spot.


8) With the needle and thread on TOP of the flower, wrap the thread closely to the center of the flower, and go back down through the flower on the opposite side, tacking it to the headband in the same way you did for the first spot.  
Wrap your thread close to the center of the flower so it doesn't show.
Center the flower on the other side as well so it doesn't get lopsided.
My flower had 5 spokes on it, so I tacked it in 3 places since directly opposite wasn't an option.  You may want to pick 3 spots or even more depending on the age of the child - a newborn will be a little kinder to it than a 3 year old!  Make it as secure as you think you will need. 

9) End your thread and you are done!  I had my son model for photos... It even makes him look pretty :-)  Try not to torture him when he is 16... 


Bottom Line:
This is a really easy and really quick project.  I think it took me about 15 minutes to slap together and cost only about $2 between the headband and the flower.  Rock on... :-)  These go online on Etsy or Amazon for $15 easy... So you can thank me later.  

Oh, and Tina, if you read this... Ignore how little I spent and how easy it was.  It was super complex and cost a small fortune, but I would do anything for you haha. :-)