Showing posts with label random tip. Show all posts

Thursday, February 28, 2013

Sheer clothing and etiquette

Now that sheer tops are all the rage (again) I feel that I need to send out a PSA. I know this is not in the vein of most of my posts, but fashion is actually really important to me. And since this is my blog I can do whatever I want.


I was at the bank last week and I saw an adorable teller wearing an equally adorable top. I had to restrain myself from calling it 80s for fear of offending her, but that's totally what it was. It was a sheer white top with a collar that turned into a tie. Just like every dress shirt in my mother's closet. Her mantra: If you hang on to anything for 30+ years it will eventually be popular again.

The problem was, she was at work. She couldn't very well show any skin, so she opted for a white spaghetti strap tank underneath. All you could focus on was the tank, which may as well have been outlined in red chalk. It totally stole the focus.

When wearing sheer tops, modesty is still important. We don't want to end up the talk of the town because we skipped the undergarments. Ahem celebrities.

But we also don't want those undergarments to take center stage, unless done purposely like a teal bra with a black top. So how do we keep the shirt the main attraction?

Nude. I don't mean streaking. Wear something underneath that is skin tone. I swear it makes all the difference. You still get covered up, and actually LOOK covered, but you leave the eye drawn to the details of your top, not to the lines of your straps.

The proof is in the pudding: here we have a great turtleneck that I love. I also have one in black. But they are very thin cotton and stuff shows through.  So, what color bra do you wear with a white shirt?  White!


Hello.  Everyone now KNOWS that I chose a white bra.  How lovely.

But the correct answer is, choose a NUDE bra.


MUCH better!  You see, the nude bra is closer in shade to your skin tone, so it blends beautifully.  The white one just emphasizes the contrast between the fabric and your skin, leaving an unsightly outline.  And I am REALLY white, so don't use that as an argument.  This bra isn't even close to my skin color, but its a heck of a lot closer than stark white.  The same principle is true with a black top.  Which may leave you wondering, why do I have so many black and white bras if they can both be replaced by one, nude colored bra?  Goooooood question... ;-)

Saturday, June 30, 2012

Taping your presser foot to sew on PUL

I love Pinterest.  It is an amazing way to share and bookmark ideas.  Or I should say, that is what it is at its best.  Its also another way to spam me, annoy me with pointless and meaningless sayings and memes, and waste my time with things that aren't helpful or useful.  But with a little concerted effort, its a great way to share and and find revolutionary ideas.  Well, this may not be exactly revolutionary, but man did it help me out tonight.

A long time ago in a blog post far far away, I made a diaper pail liner using PUL as well as a wet bag.  PUL is difficult to sew on because it is a plastic-y, sticky material.  The presser foot snags on the fabric rather than gliding over it, creating an endless source of problems ranging from puckers in the stitching, missed stitches, bunched stitches, bent and broken needles, messed up timing, and even damage to your machine.  A way to avoid having this problem is to place something between the presser foot and the fabric, such as tissue paper, or even regular old printer paper.  While this really does help, it doesn't completely fix the problem and can open a whole multitude of its own issues, like getting it torn off and all those little bits stuck under the thread out without damaging your stitching, loose stitches because of the extra material being sewn over, and not being able to see the line you are stitching very clearly.

Enter Pinterest.

I saw a pin about a trick for sewing on vinyl and thought I would give it a try with PUL.  My foray into sewing stuff for my son's cloth diapers led me to use Joann's PUL which met with mixed results.  I had to replace some of the items I made after the PUL self destructed, but other items made with a different bolt of fabric is still going strong!  Anyway, This method recommended taking a small piece of scotch tape and taping the bottom of your presser foot to make it slippery.  I was pretty skeptical, but I figured I would do half the new project with paper and compare the experience and the stitching to the tape.  You do have to make a hole for the needle to avoid gunking up your needle and subsequently your machine and make a slit down the middle in the front for the thread to slide through, but it worked pretty darn well!  The presser foot slid nicely over the fabric, with only a fraction of the friction.  WORLDS BETTER than using paper or tissue paper or any other method I have found thus far.

So now we know.  Scotch tape for sewing on sticky fabrics works! Not only do you not have to deal with paper, you can see what you are doing and it leaves your hands free for removing pins, keeping your fabric aligned, and all those other things you do NORMALLY.  Go Pinterest.

Wednesday, September 14, 2011

Making a small, simple wet bag

After doing so much research on making a wet bag or two for myself, I decided to dive in.  Unwilling to wait for or pay for shipping, I decided to gamble on PUL from Joann's.  It gets mixed reviews as to its quality, and I am a little skeptical about how well it will hold up, but because I can buy it at half off with coupons and not pay exorbitant shipping prices like I would have to online, I figured, why not?

And thus I began my first wet bag.  Since I am kind of making up the design as I go, I decided to try something medium sized and simple for the first attempt.  I wanted it to be useful, but it doesn't have to have all the bells and whistles I ultimately want just yet.

I also realized that for all my other posts, I don't actually give materials lists before I start explaining.  Maybe I should start?

Materials Needed:
about 1/2 yard of PUL or other waterproof, sewable fabric
1 14" zipper
sewing machine with a standard zipper foot
thread
scissors

For my first step, I admittedly screwed up.  I wanted to make a bag that was roughly 14"x18".  Well, I cut a strip of fabric that was 15" wide out of the 60" wide PUL.  Then, almost without thinking, I cut it in half on the fold line from the bolt.  Leaving me with a roughly 15"x30" piece which folded in half and seamed would give me at best a 14"x14" bag.  Oops.  Well, this is my rough draft, right?  If YOU want to make the correct size bag, cut a long rectangle 15"x38".  Note that it will look just a bit different from my photos, though :-).

Since PUL has two sides, the fabric side and the side with the laminate on it, I decided to keep the soft, fabric side out and leave the laminate side to the inside so it didn't stick to or snag on anything.  You can choose to do whatever you please.  I have another piece of PUL with a pattern on it that has writing, so this wouldn't work for that, but like I said, this is my test run.

Now that we established the right side of the fabric from the wrong, fold over 1" of fabric on one short end of the rectangle with wrong sides together.  Stitch close to the raw edge, about 1/4".


Put the zipper foot on your machine.  If it is not already, close the zipper.  With right sides together and raw edges even, stitch the zipper to the other short end of the fabric.  The zipper pull should be facing toward the right side of the fabric, and you should be sewing along the top half of the zipper.  Center the zipper left and right across the fabric if the ends of the zipper tape hang over too much or don't quite meet the ends of the fabric.  This wont matter too much later, but it will look more symmetrical if you center it a little.  Stitch the zipper tape to the fabric close to the zipper teeth.  (Random Tip for sewing around the zipper pull: If you finish off your stitching when you get close to the zipper pull, open the zipper, and then restart your line of stitching an inch or so back to finish it off, you will not have an awkward bulge where the zipper foot has to go around the bulky pull.  This will lend a cleaner look to your finished product.)  Turn the zipper to the outside so the right side is showing next to the right side of the fabric and the raw edge is folded under.  Press if your fabric can handle the heat of an iron (I didn't chance it on my PUL).  If not, just hold it down during the following steps.

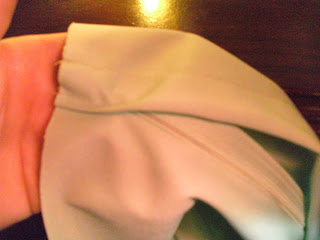
This view the zipper tape is open.  The teeth are toward the bottom of the photo.

Next, with wrong side to right side, lap the folded over short end over the zippered end, making sure that zipper is facing up.  Overlap the edges by 1/4" past the edge of the zipper so the folded over end hides the zipper.  Make sure the raw edges of the fabric (the long sides) are in line with each other. Place a pin just inside the zipper stop on both ends of the zipper. I found it helpful to place a pin on both sides of the zipper stops just to keep the sides from wiggling as I began to stitch.  Stitch from the raw edge of the fabric through all layers to the second pin on both sides (you should stitch PAST the zipper stop).  You should only have about 1" or so of stitching.  This is correct.  Reinforce if you like with another line of stitching over it or 1/4" above.


Your wet bag should now look like a loop.  Turn the loop inside out.  You should now be able to see the wrong side of the fabric and the wrong side of the zipper.  Take the unstitched side of the zipper and pin it to the folded over end of the fabric, keeping the raw edge of the fabric parallel to the edge of the zipper tape, but leaving an even amount of space across between the edges.  This amount of space will vary based on how far you overlapped the folded edge over the zipper on the right side.  Stitch it closed using your zipper foot.


The last step is to sew the side seams.  I debated a lot on how to tackle this part since I want my wet bag to be reasonably leakproof without being too work intensive.  I finally decided to encase the seams, using a french seam.  This is not a standard seam, so if you have not sewn a lot in the past, this may seem weird at first.  Trust me, it will all work out!


Turn the loop right side out again.  Flatten out the loop, matching the raw edges along the sides.  Place the zippered area about 1 1/2" down the "front" of the bag.  With WRONG sides together, stitch a scant 1/4" from the raw edge on both sides.  Keeping this line of stitching as close to the raw edge as possible is critical.  If you sew it too wide, trim it to 1/4" before the next step.


Unzip the bag and turn it inside out.  Carefully turn all the corners and side seams.  Again, press if your fabric can handle it, otherwise, just pin very carefully in the next step.  Pin the fabric along the side seams to the inside of the raw edges, enclosing them on the inside.  This should be roughly 1/4"-3/8" away from the side.  Stitch.  If you are having trouble with the thickness of your fabric being too bulky on the one side, you can use your zipper foot to sew these seams.  Basically, you are creating a pocket to hide that raw edge that we left on the outside.  This is a french seam.  Hooray!  Don't you feel Eurpoean fancy now?  If you have trouble with the PUL sticking to the presser foot or to the feeder foot, try pinning some tissue paper to the seam and sewing through it.  You can just tear it off once the stitching is in.


Turn your bag right side out again.  You are done!


You have successfully made a simple (ish) version of a wet bag.  And guess what?  The design is way better than most of the ones commercially available, so it is less likely to leak.  Well, I hope so at least.  I am testing it out with wet wash clothes.  Fingers crossed.

Bottom Line:
1/2 yard of PUL @ $10/yd with 50% off coupon = $2.50 (since I screwed up I actually will be making 2 from this, but had I followed my original design, I would have used more.)
1- 14" zipper = $2

Time estimate = Approx 2-3 hrs (I took a lot of time on design and did a fair amount of ripping out stitches, so its hard to know exactly.)

Retail cost = $15 on average.  Some small, cheapy drawstring ones are about $7, some are $25.
Total cost to make = $4.50

Savings = approx $10

Not too bad.  And I didn't even make you use a serger for this one!

Monday, August 29, 2011

Pretreating Fabric

Another sewing post.  How predictable of me!  So this covers the ever elusive "can I wash it" question we all ask about our home sewn garments.  The answer is, did you wash the fabric before you sewed?

The answer to that question makes a huge difference in whether or not you can wash the finished garment.  Fabric sold off the bolt isn't like fabric sold as a shirt or a skirt or a towel.  It comes pretty much straight from the mill as is.  So, if it is a bright color or a cotton, you can imagine what could happen!  Also, there are sometimes waxes, chemicals, or other things in the fabric either naturally occurring in the fibers or that are used during manufacture.  Also, it has not been pre shrunk.  This is really the biggie.  Fabrics can shrink more in one direction than the other leaving you with a warped garment.  Needless to say, this is bad.

Of course there are other considerations to make as well.  Does the fabric pill, shed, fray, or do something else totally undesirable in the wash?  (Note: you can find out whether it exhibits this undesirable behavior before you put in the effort of making something awesome if you wash the fabric first.)  You may want to think twice before washing it if the fabric is very delicate or proned to fraying.  If you bind the edges with a serger or if you enclose them in a french seam, that can help, but it may not keep very frazzled fabrics in check forever.  Delicate fabrics may handle hand washing, but just like certain bras and panties, etc in our lives, some stuff just doesn't go in the wash.  Period!  Also, some fabric types should never be washed, like leather.  Some can be washed but with care, and not dried in a dryer, such as wool blends or cotton if you are worried about shrinkage.

Another thing to think about is thread choice.  If you are sewing on silk, use silk thread, not cotton.  You want the thread to behave the same way as the fabric will during washings and other treatments (for example if you want to dye the item later).

Another note: The care instructions on the bolt are helpful, but even more so is the fiber content.  Sometimes, as with ready to wear garments, the manufacturers err on the side of caution and say you cannot wash something totally washable.  My favorite example is polyester satin.  It is TOTALLY washable and I have done so many times.  But if you told someone that their fancy evening dress was washable, they would look at you funny.  I even machine washed a wedding dress once.  Came out JUST FINE!!!  So, instead of trusting the label, trust your knowledge of how fibers behave.  A quick google search can do wonders if you are unsure.

Generally speaking, machine sewing a garment makes it sturdy enough to withstand the washer, so most handmade stuff will fare just fine.  The stitching will usually hold up great (although with extended wear it will need repairs just as any ready to wear clothes would), assuming you don't use a super long stitch length! :-)

Bottom line:  If you prewash/dry all your fabric as you plan to treat the finished garment, you should be okay.  If you are using something with a dark pigment, a fabric you worry will shrink, or something with a strong chemical smell or feel to it, feel free to wash it twice.  It will only protect your final product!

Monday, August 8, 2011

Shirt complete, only a crapload o' stuff to go

So I warned you - ren faire stuff may leak into my baby wrap timeline.  True to form, here is some ren faire update stuff. :-)  At the end I promise to give a quick update to baby things... its like the news at 11:00.  all you want to hear is in the last five mins.  Lucky for you, scroll bars were invented!

So, I am making an italian nobleman's costume for my husband for ren faire.  We are going with a group (hopefully - very few people RSVPed...) and as usual, I am the one making costumes at the last second.  Oh what WOULD I do without procrastination?  I promised my husband a new costume last year since I made myself a court dress (read: fancy) and his musketeer costume, although cute when there were 3 of them, is not only from a totally different CENTURY, but is also no longer coordinating with mine.  At all... So, I told him I would make him a court costume.  Well that wasn't a big deal until I wound up preggers and now cannot wear my court dress.  Copious amounts of boning and pregnancy do not mix.  Now I have to make myself a court dress that will accommodate my big belly as well as make him a fancy over the top outfit.  They take SO much longer than peasant garb, what with all the pieces, trims, frilly details and whatnots.  Oh, did I mention I promised my nephew a pirate costume?  Or my friend chuck a vagabond/ruffian type outfit LAST year that I did not deliver on?  Oops...

So, here we are, 2 weeks out and I have (drum roll please) - One shirt complete.

Uh oh.

Lucky for me I have most of the notions and fabrics and such that I need.  So now, just all the hard work lol.  I have washed more loads of laundry than imaginable to prep the fabric for cutting.  (random tip: always wash/dry your fabric the way you will wash/dry the finished garment so you don't end up with weird shrinkage.  Most fabrics shrink more along one axis than the other which makes for a lovely distorted item if you skip this step)  I wanted to hang dry most of it - try finding a place to hang dry 8 yards of fabric.  yikes!

Anyway, I have the doublet main fabric and interfacing cut as of last night, but have yet to cut the lining.  My sewing fingers are itching to get started, but I must have all the pieces cut first - new personal rule.  It keeps me from cutting corners later in my eagerness to finish something.
So, now to go finish cutting the lining, then to piece the darn thing together.  I also broke a cardinal rule for this (one I frequently break) - I made no muslin (test garment) and then I cut into really expensive fabric.  Fingers crossed everyone!

So all I have left is:
A hat for DH
New pants for DH if I have time
Shirt for nephew
Pants for nephew
vest or coat for nephew
Shirt for chuck (my friend)
Vest for chuck
Sash for chuck (easy yay!)
Pants for chuck
Dress for me? (time permitting)

That is so daunting... I need a nap....

Coming soon: finished Doublet?

Ack!  I almost forgot!  My promised update on baby wrap stuff! I purchased fabric at walmart the other day - I usually don't because the coupons from Joann's and Hancock are so awesome, but I was already there and I wanted to play around with some things.  Go instant gratification.  I did end up getting some quilters cotton - two prints for each style so it can be reversible.  I liked the geometric stuff but then I found jungle themed stuff which is our theme so I had to buy it and its coordinate, too (I also plan to do some nursery stuff with it so I got extra :-)).
I also got some woven gauze (left) for the airy one and a single stretch knit (very very mild stretch - right) for a stretchier version.  Since they seem easy to make, I may try to whip one up this week still.  We shall see.