Diaper pail liner - PUL version
Materials:
16.5" of 60" wide PUL
Thread
Sewing machine
Scissors
~ 45" of cord or shoelace for the drawstring
Step 1: Fold the PUL in half, folding selvage edge to meet selvage edge, with the laminated side (shiny, rubbery side) together. Pin the sides together close to the edges. Measure about 4" down from the open side and pin. Stitch sides together below the pins, a scant 1/4" from the cut edge.


Step 2: Turn the bag inside out (laminated side out). Turn the corners and stitched edges very well. To encase your seams, stitch along the sides about 1/2" from the edge, making sure the 1/4" seam allowance stays between your line of stitching and the outside edge. NOTE: Only stitch below that 4" line from the top of the bag. :-)


Step 3: You should now have an awkward tab at the top, above that 4" pin you put in oh so long ago. CAREFULLY clip the fabric to the seam line. I accidentally clipped too far on one side (easy to do when rushing) and now I have a weak spot that may tear over time. Boo...
 |
| Doing it right the second time... too late to save the first side. |

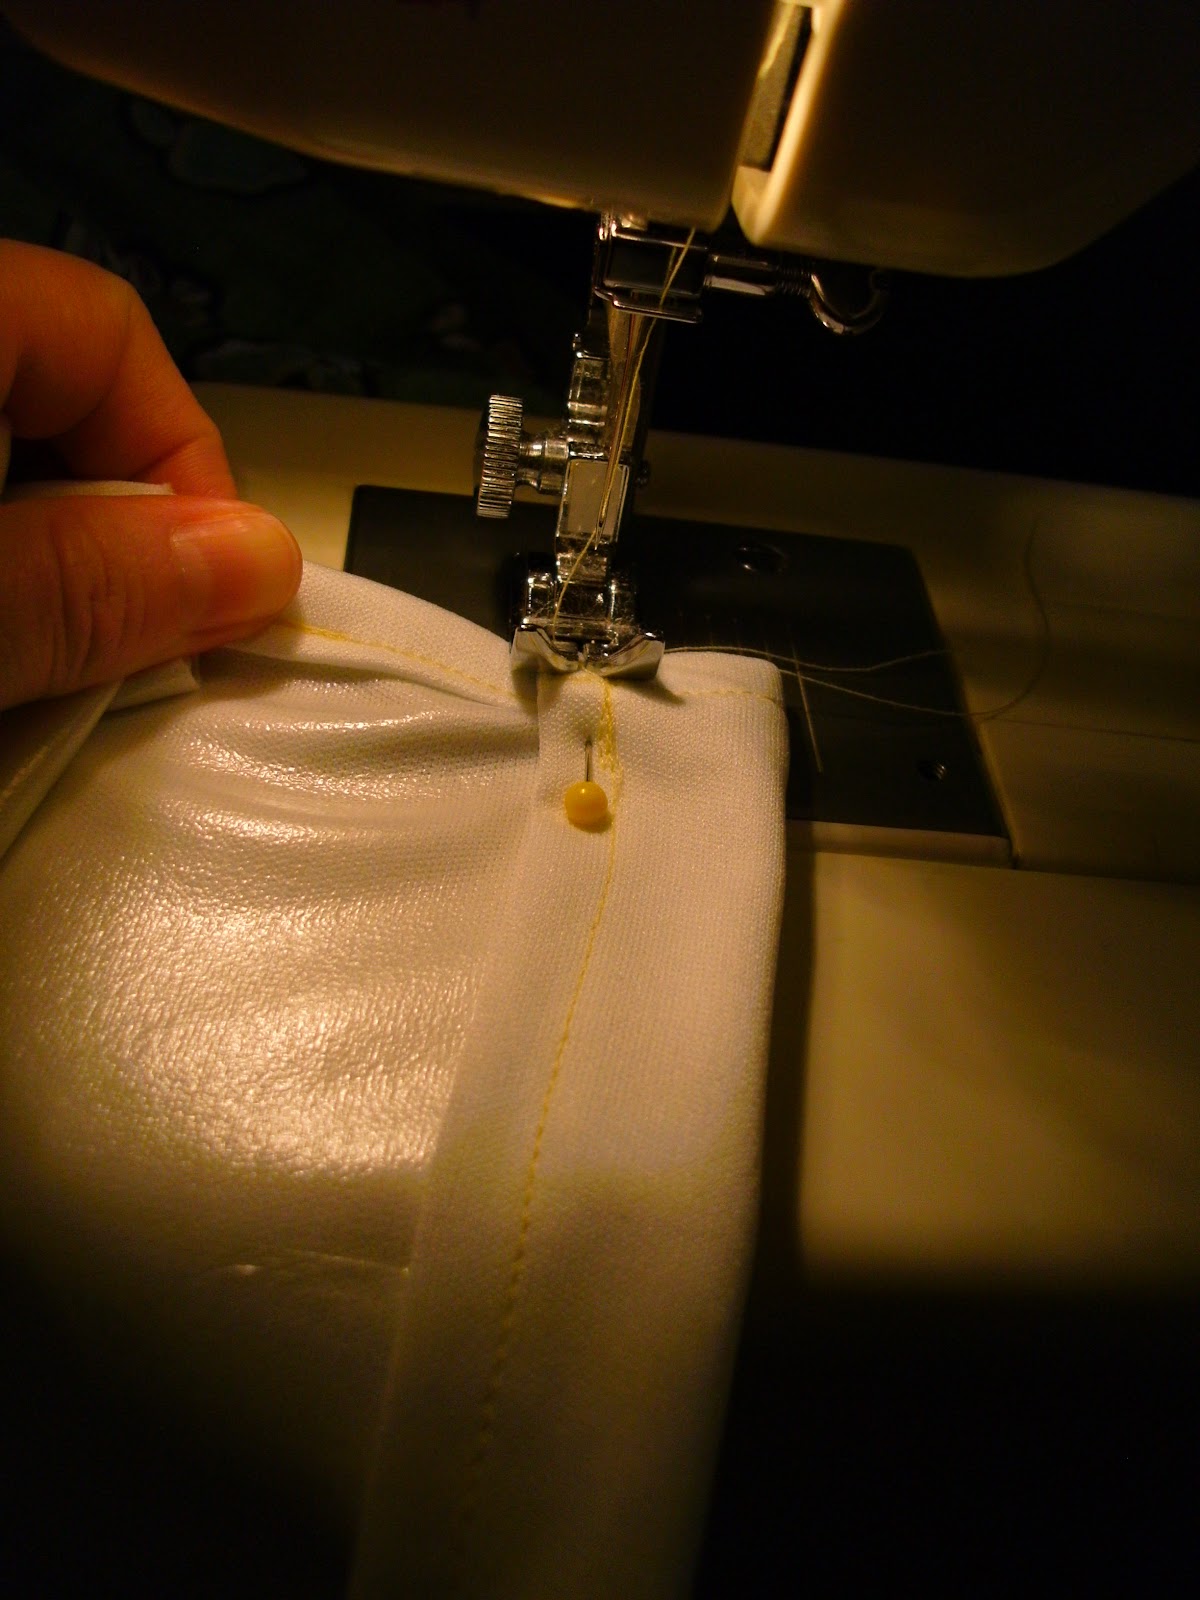
Step 5: Turn under and stitch 1/4" of the top edge of the bag, laminated sides together. Be careful at the sides that you just finished, as the PUL can get bulky and make the stitching slip. Repeat with the other side.

Step 6: Turn the newly finished top edge of the bag over 1" toward the laminated side, or as much as you need to fit your drawstring. Stitch close to the finished edge to create a casing. Repeat on the other side.

Step 6: Almost there! Now to add width to the bag - note that this is the same as with the ripstop bag. Refer to that post for more explanation if this step seems tricky. Laminated side out, crease the bottom edge of the bag. Place in a pin or two along that crease. Match the side seam up with the line created by the pins and pull the front and back sides of the bag out, creating a triangle shape. Measure three inches from the point of the triangle (the corner of the bag) and place a line of pins across to make the bottom of the triangle.
 |
| holding the bottom edge of the bag |
 |
| turn the bag sideways so the bottom edge of the bag is up |
 |
| place pins in 3" down to create the bottom of the triangle |
Stitch across that bottom line of pins. Repeat on the opposite corner. The bottom of your bag should look like this:
 |
| It now has wings!!! and with no red bull... sorry, i am sleep deprived :-) |
Step 7: Thread your drawstring through the casing you made on both sides of the bag. Gather the loose ends on one side and knot them securely. You are Finished!
Bottom Line:
~1/2 yard of PUL - $5
45" of cord - about $1.50?
Total cost = $6.50
Time = ~1.5 hours, maybe more if you have to fight with the PUL... boo.
Retail cost:=$15 for a 2 pack of disposable liner refills, $16-20 for a reusable liner
Total savings: $10-15 for a reusable liner, or ~$320 over the life of the bag for disposable liners
A few things to consider when using PUL... if the laminated side is not feeding through your machine, wrap tissue paper around the seam (top and bottom, or at least on the bottom) and then tear it off once you sew your seam. The paper makes it slide easier, but will not make extra space between your stitches. Also, PUL is like other plastic and rubberized fabrics. Pin holes stay there. Some say that a run in a hot dryer will seal up those holes, but its agreed that making less in the first place is ideal. I know I say to use pins a lot in my post, but in my pictures, you will note that my use is minimal, and often within seam allowances where it will not affect the integrity of the waterproof layer. Back to the dryer bit... as with all fabrics, quality of PUL varies greatly, and consequently so do the care instructions. Some people swear that PUL is fine in the dryer, regardless, and others say line dry only unless you want to destroy your item, regardless. I say, play it safe and machine dry only when necessary (ie: you have nowhere to put your dirty diapers unless it gets dry pronto!). It hangs dry pretty fast, so this shouldn't be too much of an inconvenience. Hope this post helps.
Oh, and for the record, my ripstop bag was still in use up until last night when I finished this bag, and while it did seep some liquid into the bottom of the can, it wasn't terrible. I wonder if better ripstop really would work??
Update: I now have wet bags and pail liners for sale in my Etsy shop.
No comments:
Post a Comment