Showing posts with label diaper pail. Show all posts

Saturday, February 25, 2012

Diaper Pail Liner or Large Wet Bag

MASSIVE EDIT!!!  Ripstop does not work!  I am not sure if it is just the quality sold at joann's that is failing or if it is the idea of ripstop in the first place, but I guess I have to do it again with PUL, as much as I hate working with it... :-(  such a great idea.  Just goes to show - don't believe everything you read on the internet, and not every project works every time :-(

While pregnant, I decided that I wanted to do cloth diapering.  Its a great thing really, for many reasons, but most notably for the kindness to the environment and the kindness to your wallet.  I looked online for a suitable diaper pail that was compatible with cloth diapering.  I found the Diaper Dekor Plus and so far, so good (note: I actually would opt for the largest pail they offer, the XL rather than the Plus.  Cloth diapers are so much bulkier than disposables and the bag fills up pretty quickly).  One of the huge perks of the Diaper Dekor was that the design allowed you to use a reusable diaper pail liner rather than buying their plastic refills all the time, thus saving even more money and more landfill space (not to mention petroleum!).

The diaper dekor in all its glory
A unique design allows for a drop in reusable liner
This tutorial is for a pail liner to fit a diaper dekor plus, so if that is what you need, this is your exact recipe.  However, it can easily be altered to fit the dimensions of other types of pails or for regular garbage cans or laundry hampers to make a simple cloth diaper receptacle.  It can also be used to make a large wet bag to hang from a hook or a knob of some sort, but I would use PUL as the fabric to make it a little sturdier.  I used Ripstop Nylon because it is thinner and easier to maneuver into the pail, easier to sew, and much less expensive.  However, its water resistance depends on the thickness, quality, and coating of the nylon.  I got mine from Joann Fabrics, but I am not sure it is super waterproof as I haven't really tested it other than a quick check in the store.  If you are paranoid, you can just use PUL and deal with the extra bulk and cost.

Diaper Pail Liner
Materials:
one yard of 60" wide Risptop Nylon (or PUL)
approximately 45" of cord to tie up the bag (or a round shoelace)
thread
scissors
tape measure
sewing machine

Step 1:  Cut the yard or fabric in half (along the fold line from the bolt works well as long as you make sure it is centered first).  Also, be sure to check that the fabric really is 60" wide. :-)  You will now have 2 pieces of fabric that measure approximately 30"x36".  Trim the length to about 32".

Step 2:  Along the short (30") side, fold over about 1/2" and stitch.  You don't have to worry about Ripstop fraying and raveling, but I wanted to fold over the raw edge anyway, just for aesthetics.  This will be the top of the bag.


Step 3:  Fold the fabric in half, matching the selvage edge and the cut edge you made along the bolt fold.  Measure 4 " down from the finished edge and put in a pin.  Below the pin, stitch the sides of the bag together with about 1/2" of seam allowance.

 Step 4:  From the pin up, fold over the seam allowance on each side and stitch around in a continuous U shape, pivoting at the corners, and backstitching at the bottom to add some strength.


Step 5:  Fold over 3/4 of an inch of the finished edge at the top of the bag.  Stitch close to the finished edge to create a casing for the cord.

Step 6:  Stitch up the bottom edge of the bag, with about a 3/4" seam allowance.  You can end here and have a perfectly functional bag if the following instructions are too complicated.  However, I would recommend trimming the length of the bag by about 2".

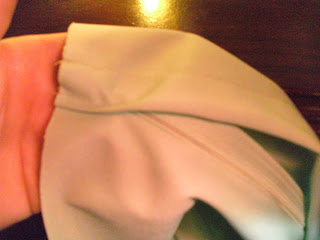
Step 7:  To add some shape to the bag and hopefully add to the capacity, we are going to modify the bottom of the bag.  With the bottom seam facing you, take the seam side of the bag and match it up to the bottom seam, pulling the "front" and "back" of the bag to the sides.  If you pull it taut, it will make a triangle with the bottom seam going down the middle.  It's a little complicated to explain, but easy to do once you can figure it out.  The best I can say is match up the seams and pull the extra fabric out of the way and boom, you've got it!
From the bottom - fold seam to seam.
Once you have the seam side done, repeat with the other side.  Try creasing the side and placing a pin along the crease to make sure you line up the bottom seam exactly with the side.

Another angle to help you visualize :-)
Step 8:  Once you have made your triangle shapes, make sure the sides of the bag are pulled taut to create crisp triangles.  One side at a time, hold the bag with the point of the triangle facing away from you, and the bottom seam up.  Measure 3 inches down from the point of the triangle and pin.  Pin across the width of the fabric triangle and stitch.  Repeat on both sides.  Congrats! You have given your bag a nice flat bottom and about 6" of width!


Step 9:  Thread the shoelace or cord through the casing at the top.  I wanted to have one of those ball thingies that you slide to close bags like this, but I didn't have one.  I totally thought I cannibalized one from something, but no dice.  Sigh.  And I can't seem to figure out what they are called to buy one.  Look out knots, here I come.


Step 10:  To put it in the diaper dekor, open the top and drop the bottom of the bag in the middle.  Roll the top of the bag over the edge and slide it down into that slot.  Tighten up the drawstring and voila! You have yourself a reusable, washable diaper pail liner!

Another big bonus to this is that you can empty your diapers into the wash without touching them and just toss the bag in after.  I used red because I thought it would be fun.  Hopefully its colorfast since its Nylon or we will have a lot of pink diapers for my little boy.  :-)  Make 2 so you have one to use and one to wash.

Bottom Line:
1 yard of Ripstop (good for 2 liners) - $6 (on sale for 25% off at Joann's)
45" of cord - about $1.50?  I had it in my stash so I'm not totally sure... :-)
Total cost = $4.50 per bag ($3 in fabric and $1.50 in cord)

Time = ~1.5 hours, probably less if you aren't stopping to feed a baby and take pictures every so often :-)

Retail cost:=$15 for a 2 pack of disposable liner refills which last for ~366 changes (I averaged their advertised capacity on their website over the 6 diaper sizes they listed, note that this is for disposables, though), $16-20 for a reusable liner

Total savings: $10-15 for a reusable liner, or ~$325 over the life of the bag for disposable liners, using their number of 4500 changes for a baby and the average of 366 changes per set of refills.  And that's only if you have one kid!  Holy cow!!!

I promise I will post more frequently.  My baby has been my #1 priority though, so blogging kinda is taking a back seat.  Hopefully I will get more mommy time as he gets older and that will mean more blog time!


Wednesday, September 14, 2011

Making a small, simple wet bag

After doing so much research on making a wet bag or two for myself, I decided to dive in.  Unwilling to wait for or pay for shipping, I decided to gamble on PUL from Joann's.  It gets mixed reviews as to its quality, and I am a little skeptical about how well it will hold up, but because I can buy it at half off with coupons and not pay exorbitant shipping prices like I would have to online, I figured, why not?

And thus I began my first wet bag.  Since I am kind of making up the design as I go, I decided to try something medium sized and simple for the first attempt.  I wanted it to be useful, but it doesn't have to have all the bells and whistles I ultimately want just yet.

I also realized that for all my other posts, I don't actually give materials lists before I start explaining.  Maybe I should start?

Materials Needed:
about 1/2 yard of PUL or other waterproof, sewable fabric
1 14" zipper
sewing machine with a standard zipper foot
thread
scissors

For my first step, I admittedly screwed up.  I wanted to make a bag that was roughly 14"x18".  Well, I cut a strip of fabric that was 15" wide out of the 60" wide PUL.  Then, almost without thinking, I cut it in half on the fold line from the bolt.  Leaving me with a roughly 15"x30" piece which folded in half and seamed would give me at best a 14"x14" bag.  Oops.  Well, this is my rough draft, right?  If YOU want to make the correct size bag, cut a long rectangle 15"x38".  Note that it will look just a bit different from my photos, though :-).

Since PUL has two sides, the fabric side and the side with the laminate on it, I decided to keep the soft, fabric side out and leave the laminate side to the inside so it didn't stick to or snag on anything.  You can choose to do whatever you please.  I have another piece of PUL with a pattern on it that has writing, so this wouldn't work for that, but like I said, this is my test run.

Now that we established the right side of the fabric from the wrong, fold over 1" of fabric on one short end of the rectangle with wrong sides together.  Stitch close to the raw edge, about 1/4".


Put the zipper foot on your machine.  If it is not already, close the zipper.  With right sides together and raw edges even, stitch the zipper to the other short end of the fabric.  The zipper pull should be facing toward the right side of the fabric, and you should be sewing along the top half of the zipper.  Center the zipper left and right across the fabric if the ends of the zipper tape hang over too much or don't quite meet the ends of the fabric.  This wont matter too much later, but it will look more symmetrical if you center it a little.  Stitch the zipper tape to the fabric close to the zipper teeth.  (Random Tip for sewing around the zipper pull: If you finish off your stitching when you get close to the zipper pull, open the zipper, and then restart your line of stitching an inch or so back to finish it off, you will not have an awkward bulge where the zipper foot has to go around the bulky pull.  This will lend a cleaner look to your finished product.)  Turn the zipper to the outside so the right side is showing next to the right side of the fabric and the raw edge is folded under.  Press if your fabric can handle the heat of an iron (I didn't chance it on my PUL).  If not, just hold it down during the following steps.

This view the zipper tape is open.  The teeth are toward the bottom of the photo.

Next, with wrong side to right side, lap the folded over short end over the zippered end, making sure that zipper is facing up.  Overlap the edges by 1/4" past the edge of the zipper so the folded over end hides the zipper.  Make sure the raw edges of the fabric (the long sides) are in line with each other. Place a pin just inside the zipper stop on both ends of the zipper. I found it helpful to place a pin on both sides of the zipper stops just to keep the sides from wiggling as I began to stitch.  Stitch from the raw edge of the fabric through all layers to the second pin on both sides (you should stitch PAST the zipper stop).  You should only have about 1" or so of stitching.  This is correct.  Reinforce if you like with another line of stitching over it or 1/4" above.


Your wet bag should now look like a loop.  Turn the loop inside out.  You should now be able to see the wrong side of the fabric and the wrong side of the zipper.  Take the unstitched side of the zipper and pin it to the folded over end of the fabric, keeping the raw edge of the fabric parallel to the edge of the zipper tape, but leaving an even amount of space across between the edges.  This amount of space will vary based on how far you overlapped the folded edge over the zipper on the right side.  Stitch it closed using your zipper foot.


The last step is to sew the side seams.  I debated a lot on how to tackle this part since I want my wet bag to be reasonably leakproof without being too work intensive.  I finally decided to encase the seams, using a french seam.  This is not a standard seam, so if you have not sewn a lot in the past, this may seem weird at first.  Trust me, it will all work out!


Turn the loop right side out again.  Flatten out the loop, matching the raw edges along the sides.  Place the zippered area about 1 1/2" down the "front" of the bag.  With WRONG sides together, stitch a scant 1/4" from the raw edge on both sides.  Keeping this line of stitching as close to the raw edge as possible is critical.  If you sew it too wide, trim it to 1/4" before the next step.


Unzip the bag and turn it inside out.  Carefully turn all the corners and side seams.  Again, press if your fabric can handle it, otherwise, just pin very carefully in the next step.  Pin the fabric along the side seams to the inside of the raw edges, enclosing them on the inside.  This should be roughly 1/4"-3/8" away from the side.  Stitch.  If you are having trouble with the thickness of your fabric being too bulky on the one side, you can use your zipper foot to sew these seams.  Basically, you are creating a pocket to hide that raw edge that we left on the outside.  This is a french seam.  Hooray!  Don't you feel Eurpoean fancy now?  If you have trouble with the PUL sticking to the presser foot or to the feeder foot, try pinning some tissue paper to the seam and sewing through it.  You can just tear it off once the stitching is in.


Turn your bag right side out again.  You are done!


You have successfully made a simple (ish) version of a wet bag.  And guess what?  The design is way better than most of the ones commercially available, so it is less likely to leak.  Well, I hope so at least.  I am testing it out with wet wash clothes.  Fingers crossed.

Bottom Line:
1/2 yard of PUL @ $10/yd with 50% off coupon = $2.50 (since I screwed up I actually will be making 2 from this, but had I followed my original design, I would have used more.)
1- 14" zipper = $2

Time estimate = Approx 2-3 hrs (I took a lot of time on design and did a fair amount of ripping out stitches, so its hard to know exactly.)

Retail cost = $15 on average.  Some small, cheapy drawstring ones are about $7, some are $25.
Total cost to make = $4.50

Savings = approx $10

Not too bad.  And I didn't even make you use a serger for this one!

Tuesday, September 6, 2011

Wet Bag research

Diapers.  The inevitable, hated part of child-rearing.  You show someone an adorable infant, complete with drooly grin, tiny baby hands, and that "new baby" smell, and at some point someone will mention, "yeah, but I'm not changing it..."

Hubby and I have decided we would like to cloth diaper.  I haven't yet settled on a brand or style of cloth diaper (mostly because its such a huge financial investment and I demand perfection in every product I buy - a completely unrealistic goal), so I am focusing on the diaper pail/wet bag thing for now.

A friend of mine cloth diapered, but when she was out and about with baby, she used disposables.  Totally understandable.  But for me, who goes out only rarely, and even then only short trips to the grandparents for dinner, church on Sunday, or to the grocery store, I would like to try bringing cloth diapers with me.  For longer trips (a full day/many days) without access to a washer and an easy diaper storage solution, I think I may just murder the environment a little, but for those quick couple-of-hour trips to visit a friend or do a little shopping, I would like to give it a good try.  Of course, this begs the question "What the heck am I supposed to do with a few hours worth of dirty diapers that I can't just toss in the garbage?"  The answer?  Wet bags.

Wet bags are waterproof bags with a zipper or drawstring opening that go in a diaper bag and hold all the messies.  The idea is that they 1) contain wetness, 2) contain odor, and 3) are roomy enough to hold a few diapers, but small enough to be portable.  Some have other bells and whistles like hanging straps to snap to a stroller or something, extra pouches for dry items, either zippered or mesh, coordinating paci carriers and other accessories, a zippered bottom for easy emptying into a washer (especially for larger ones that would be sent to daycare or something), the list goes on and on.

In the course of my research, I found that my favorites fell into two distinct categories: 

1) The smallish bags that could hold about 4 diapers and tucked easily into a diaper bag.  They had things like pouches for clean diapers, wipes, a changing pad, and butt cream so it could be an all in one diaper solution, and straps to wrap around a wrist or stroller handle.  They had one opening only and could be either a zipper or a drawstring (usually elastic) and toggle.  I saw this as the ultimate solution for my travel dilemma, as well as an easy alternative to a whole diaper bag for outings where less is more, like theme parks or zoos.  This could easily get tossed into my purse and keep everything I needed for routine changing within easy reach.

2) The oversized bags that were often marketed as diaper pail liners, if not diaper pail alternatives.  They hold 20 some diapers (often even more), usually have two openings, one at the top for putting them in, and a large opening at the bottom for dumping them into the wash, and have handles or hangers to loop over a doorknob, dresser drawer knob, or some other furniture item.  They are somewhat wider than they are long so they hang at about waist height and don't hit the ground, but still have a large enough volume for about 2 days worth of diapers.  They tended to have more zipper openings than drawstrings as the drawstrings cinch closed too tightly when the bag is full and heavy (assuming it is hung by the drawstring).  Some had open tops that just had elastic around it to keep it from flopping open or to keep it snug in a diaper pail as a liner.  I saw this as my ideal nursery dirty diaper storage solution. I have been hating all the diaper pails I have seen because they are not designed for cloth and often have expensive, non biodegradable liners.  The wet bags can be tossed in to the wash along with the diapers (to avoid touching them again - ick) and offer a simpler, cheaper solution to handling those diapers.  Of course, being eco friendly is super important to me, but I am a cheapskate at heart.  After all, that is what this whole blog is about, right? :-)

Both were perfect to suit my needs, albeit very different needs.  There are certain challenges I need to overcome before I endeavor to make them, though.  (Sorry, I appear to be a fan of numbered lists today):

1) How to make them definitively waterproof.  
Even commercial bags often have complaints about leakage.  Some can be chalked up to leaving liquid in the bag, which it isn't always designed to do.  For example, zippers are not made of waterproof material and may leak, and a drawstring closure may not be tight enough to keep in moisture.  I'd like to make mine leakproof enough to hold rinsed poopy diapers, but not necessarily able to hold water.  Many bags reinforce/enclose seams to prevent leaking and wicking.  I think this is a good strategy.

2) What kind of material to use.
PUL is the obvious choice, but even that leaves some wiggle room.  I have some from a local fabric store, but I have read time and again that this is not "real" PUL.  Also, nylon, polyester, and a few other materials were commonly used.  Some bags had a waterproof inner liner and a soft, pretty outer shell.  This would be good for adding pockets, which may wick moisture if sewn into the same side seams, but also makes the items much more time and materials intensive.  Not sure how to tackle that.

3) Which bells and whistles to include and which to leave off.
I liked the idea of a pocket on the small bag, but maybe I will only make one with pocket(s).  I initially thought of this as something to toss into the larger diaper bag, which would make the extra pocket redundant.  However, as a grab and go mini-diaper bag, it would be handy storage.  I also kind of want a snap strap, but I can't for the life of me think why it would be useful since I wouldn't dangle this from my stroller.  Ever.  But the appeal is there... Also, how to make the large bag hang is a concern of mine.  I don't have a lot of nursery furniture (or space) and while I want it to be easy to access, I don't want it in the way on the front of a drawer or something.  On the door is too far away - I'd have to leave baby alone on the changing table and walk across the room to the door.  Unacceptable...  This may take some real thought.  Or a freestanding structure to hold it, similar to a hamper.  Hmmm...

4) What kind of closure(s) to use.
I am pretty much sold on the zippered small bags, but the large bags have me in a tizzy.  The large bags sometimes had no closure at the top  to ease the dropping in of diapers.  I heard that open bags work well for cloth diapering, but I am hesitant to actually try it after being in my friend's nursery which smells like ammonia.  Maybe a drawstring top?  But then putting diapers in will take 2 hands... I think I will have to invent a solution.  Maybe an "open" top that overlaps to prevent airflow but is easy to drop in dirties?  This also may discourage curious toddler hands from pulling out diapers later on...

At any rate, there are lots of things to think about, but I do believe this will be my next major project.  

Also coming up will be some reusable nursing pads.  I think I started leaking yesterday!  Its crazy and weird and embarrassing, but exciting at the same time.  I had a wet spot on my tee shirt right where my right nipple hit when I got up from spooning hubby.  I wasn't wearing a bra because we were just playing video games in the living room on the fold out couch bed, avoiding the rest of the world for Labor day, and there it was, a small dot of moisture.  Its possible it came from somewhere else, but as I was spooning him, I can't imagine how.  My grandmother likes to tell stories about how she sprayed milk in the shower when pregnant and nursing my father.  (She jokes that she didn't know it was unusual since it was her first child.)  I suppose that means I have a genetic predisposition to leakage.  If there is such a thing (genetic predisposition I mean, not leakage).  Using Nana's method of cutting up maxi pads to stuff in a bra doesn't appeal to me, so I will figure out how to make some.  I'm sure I can double up that research with making diaper soakers as the principle is much the same - soak up liquid with as little thickness as possible to do the job.  Look forward to that...