This is not a how-to post, I know, but I feel like crafters everywhere are struggling with the move to web based shopping. I know it is something that plagues me. I have so many items I need for many of my projects, and inevitably, something is out of stock. Brick and mortar stores used to be the only option, and getting rare or large quantity items was basically impossible. Well, that is not the case so much with the interwebs, but what things are good to buy online and what things aren't? Is it okay to buy cut yards, sight unseen? What about trying to save money? What if I hate what I have ordered? What about coupons, sales, etc? So many questions... I have tried to tackle some of that here, and most of what I say applies to fabric specifically, but applies to other craft supplies, too.
Delving into the true unknown: internet based retailers. There are lots of different flavors out there from amazon and ebay sellers that might actually be that crazy lady down the street selling the crap in her garage to true internet-only retailers without a store counterpart, to the website of common chains like Joann's. Each handles things a little differently, and it is hard to lump them together, but I will do my best to represent all the above.
Pros:
1) Selection and availability. There are so many options out there for things like fabric, where the quantity of items produced could never possibly be held in a store. There are specialty fabrics made out of organic cotton, bamboo, and unbleached or untreated fibers, a variety of prints that would swamp any normal retailer, and uncommonly used notions like hook and eye tape, which I discovered a few months ago is basically unfindable. I love the selection on the internet. You can find darn near anything!
2) Cost. Shopping around can really pay off. Because they do not have the overhead of a brick and mortar store or the hassle of distributors (if you are buying wholesale), online shops can be a whole lot cheaper, and it is so easy to let your keyboard do the shopping. Especially when you consider buying bulk (usually by the bolt or in large quantities of cut yards), the cost of fabric can come down substantially compared to in store purchases. Many chain stores run the same sales online as in store, and you can capitalize on that, too. Also, you can buy things on clearance at drastically reduced prices as they clear warehouses of a particular item that a manufacturer is no longer making or has a defect (usually a minor thing like selvages are messed up or something you can still use). I have done this several times and been SO glad for it!
3) Quantity. For large projects, finding an adequate amount of fabric is tough in stores. Bolts are small, generally under 10 yards each, and rarely do you find a brand new bolt. But online, you can find large, CONTINUOUS bolts of fabric that don't leave you with 9 yards in one piece and three in another. I wanted to make 5 bridesmaids dresses. I ended up getting the fabric at 7 Joann's locations over 4 months of time. An online purchase of a few bolts of fabric would have been VASTLY easier, if only I had known then what I know now.
Cons:
1) Untouchables. The most obvious drawback to buying anything online is that you cannot see what you are buying. This is a major downfall for creative types. Imagine trying to compare two pieces of lace trim without having them in front of you or being able to lay them across the fabric you are working with? Tough call. Many retailers (ones without a brick and mortar store in particular) do a great job combating this with item descriptions and photos, giving examples of projects that are suitable for that kind of fabric and showing a scale when displaying prints to give the buyer an idea of what it looks like in person. Some even describe the drape and feel of the fabric and/or include a thread count or gram weight when referring to the fabrics. A select few offer free swatches, and many others offer swatches for a fee that usually includes shipping cost, generally about $1 or so each.
2) Shipping. Shipping costs can often eat up any sale or price incentive you found to buying online. Because fabric is both bulky and heavy, it can be a bear to ship. Some stores offer free shipping for orders over a certain dollar amount or flat rate shipping promotions, but that forces the shoppers hand on how much to buy and when, and if you want to take advantage of something on sale or clearance, well that pretty much NEVER lines up with a free shipping deal. Also, the ecological impact of shipping has been cited many times in the argument for buying locally. Now if it isn't manufactured locally, well, that kind of opens a whole new can of worms, but I am not really willing to get into that here... :-) And of course, if it has to be shipped, you cannot have it immediately for a short deadline.
3) Couponing and promo codes. Remember the crafter's creed, Never Pay Full Price! Some stores never offer sales or coupons (most notably for me, dharma trading co.) which means you can never bring down your materials cost. Others (like joann.com) only allow one coupon or promo code per transaction, which means you can't use a free shipping code with a percent off code. What gives?!
4) Yardage increments. Most sellers online will not sell less than 1 yard, and will only cut in increments of 1 yd. This is hardly an issue for me, since garments almost always use more than 1 yd, but sometimes getting 6 instead of 5 1/8 is a little annoying, especially for those REALLY expensive items like faux furs or silks. I am sure this is horrible for quilters, though, who commonly need only a fat quarter of something for a project.
5) Returns. What do I do if I hate it? Probably the scariest con when combined with #1, not being able to touch the item before you buy. Return policies vary widely from store to store, as does the quality of the merchandise. The biggest problem I have with returns is that the .com affiliates of the brick and mortar stores are actually separate entities entirely and I cannot return items to a store (such as joann's and joann.com). That yanks the security net right out from under me. (Why they chose that business model is beyond me). I recently bought from hancockfabrics.com and they sent me 4 yards of defective flannel. Even though it was their fault the fabric was defective, I had to pay shipping if I wanted to return it. Shipping was around $11, and the cost of the fabric was about $14, so I opted to keep it so I didn't have to spend $11 and still have no fabric for my project. I'm certainly not happy with the return policy there!
Bottom line: Buying craft supplies online is a great way to save money, price compare, and find exactly what you are looking for. However, protect yourself the best you can as a consumer.
1) Do copious research on their return policies BEFORE you buy. Some will not accept returns at all (especially for cut yardage), some will under certain circumstances but you pay shipping, some are great about returning items, and there is every other shade of grey in between.
2) Have a good idea of what you want before you buy, and if you can, scope it out in person somewhere. If you are unsure about the look and feel or drape of a fabric, try going to a store and handling similar items. You can always order a swatch, but make sure you allow yourself enough time to have the swatch shipped and then order the item. And keep in mind that dye lots may change the appearance slightly from the swatch you receive.
3) Sign up for email coupons for chain stores and newsletters for the online-only retailers to keep up on sales and shipping promotions as well as new products. Always take a look at the clearance bin before you place your order - you just may find something to love.
4) Only buy from reputable sources you trust. There are lots of shops out there on the interwebs and not all of them are good. If a site is questionable, place a small order to "try them out" before going $300 deep on that gorgeous satin you think you want. Try not to learn costly lessons if you can avoid them!
Happy online shopping!
Wednesday, November 16, 2011

Monday, November 7, 2011
Baby block and Martha Stewart
Back story: Some friends of ours recently gave birth to a new baby boy. They asked hubby and me to be godparents for the little bundle. Needless to say, we were ecstatic! When I was a baby, my Nana made me this awesome cross stitched picture that hung on my wall my whole childhood. It had my full name, my birth date and time, and my weight at birth. I loved that thing, because who else knew the exact time they were born? I am sure records like that are filed away for every baby, but I had an easily accessible record of it that I looked at all the time. In that spirit, I decided to make a record for our godson. But cross stitching requires me to find a pattern, and I really wanted something unique. Enter Martha Stewart.
Disclaimer: I loathe Martha Stewart. She is irritating and self righteous and never shuts up. As off-putting as she is, however, I love the creativity of the guests on her show. If she ever actually let them talk, we may learn how to do something! I cannot stand watching the show, but I recently discovered that all the projects they do on the show they have written instructions for on the website. It even has video clips from the show so you can see it being done! Which means I can FAST FORWARD through Martha, or even choose not to watch her at all, while still getting all the great craft tutorials! Hooray! A while back she had a guest who made baby blocks out of a block of wood, paint, paper, and mod podge. Hers came out all vintage-y and in my opinion, hideous. I loved the idea, however, and decided that was perfect for my baptism project.
In case you were unaware, blocks have 6 sides, so I needed 6 sides worth of content for the block. I was certain I wanted 1. Baby's Full Name, 2. Baby's Birth Date (would have put time, too but the parents didn't know), and 3. Baby's Weight and Length at Birth. I also had a few ideas for optional panels like 4. Baby's Parents' Full Names and Big Brother's Full Name, 5. Baby's Baptism Date (Since this is a godparent gift)
6. Godparents' names, 7. Bible verse for Baptism, 8. Birthplace, 9. Photo of him at birth or family photo.
So I have a lot of ideas... Maybe I should make 2 blocks...
Items Needed:
1 (or 2!) Small Wooden Blocks - you can make them out of a 4x4 if you want, or buy at Michaels
Fine Sandpaper
Paint in a color(s) of your choice
Paint Brushes
Optional (you will need at least some of these, but which is up to you):
Paint Pens
Stickers
Scrapbooking or other decorative paper
Shellac spray
Mod Podge
Step 1:
Sand the edges and corners of the wooden block lightly with the sandpaper. This helps keep sharp pointy things away from baby. Rough up sides just a little if very smooth so paint will stick well. Wipe off all sawdust with a rag (or on your jeans as I did...).
Step 2:
Paint the block. You can paint each side a different color or paint the whole thing one color, or any combo thereof. Just be aware that this step will take some time because you must let the block dry before painting the bottom. You can skip this step or use a stain if you prefer the natural look of wood. Just use shellac to topcoat to protect the wood.
Step 3:
Decorate the block however you like. Use stickers, paper, draw with the paint pens, do what you feel! I used a printer to print out all the info in a pretty font on some scrapbook paper which I cut to size. I also cut out his initial in cool paper to put on the "top" of the block. However, I had ideas to put on stickers, cutouts of animals, use paint pens to "doodle" on the sides, and many other things.
Step 4:
Coat the block with a clear shellac or mod podge to seal it. You can choose not to put a topcoat on the block depending on what you have decided to do to it (if all you did was paint, it probably doesn't need a top coat). Just make sure whatever is used is NON TOXIC. Although these aren't meant as toys necessarily, they will probably end up in baby's mouth just like everything else and not every sealant is safe for them (shellac and mod podge are both non toxic). Make sure the surface you dry your block on is not made of paper or cardboard or it will end up with bits of paper stuck to it. I put mine on the mod podge container to dry. As with the paint, you can't do all sides at once so leave some extra time.
Bottom Line:
1 4"x4" (or any size, really) wooden block (from Michael's) = $3.50
small bottle of craft paint (I reused from the fabric painting project) = ~$2
2 sheets of scrapbook paper (didn't use it all, also leftovers) = $.40
Pack of Paint pens = $5
Fine grain sandpaper = $2
Mod podge (I used what I already had) = $6
Shellac spray = $5
Total time = less than 2 hours, not including dry time
Total cost (will depend on which of the above things you use) = about $20 startup, but for just materials you need, about $5.
I loved this project and totally want to do more. I think I will try ordering some smaller blocks from a shop I found on Etsy. Those look easier to handle by little hands. I want to do non personalized ones with alphabet themes or bright colors for learning. Maybe I will make some to sell at an upcoming craft fair?
Disclaimer: I loathe Martha Stewart. She is irritating and self righteous and never shuts up. As off-putting as she is, however, I love the creativity of the guests on her show. If she ever actually let them talk, we may learn how to do something! I cannot stand watching the show, but I recently discovered that all the projects they do on the show they have written instructions for on the website. It even has video clips from the show so you can see it being done! Which means I can FAST FORWARD through Martha, or even choose not to watch her at all, while still getting all the great craft tutorials! Hooray! A while back she had a guest who made baby blocks out of a block of wood, paint, paper, and mod podge. Hers came out all vintage-y and in my opinion, hideous. I loved the idea, however, and decided that was perfect for my baptism project.
In case you were unaware, blocks have 6 sides, so I needed 6 sides worth of content for the block. I was certain I wanted 1. Baby's Full Name, 2. Baby's Birth Date (would have put time, too but the parents didn't know), and 3. Baby's Weight and Length at Birth. I also had a few ideas for optional panels like 4. Baby's Parents' Full Names and Big Brother's Full Name, 5. Baby's Baptism Date (Since this is a godparent gift)
6. Godparents' names, 7. Bible verse for Baptism, 8. Birthplace, 9. Photo of him at birth or family photo.
So I have a lot of ideas... Maybe I should make 2 blocks...
Items Needed:
1 (or 2!) Small Wooden Blocks - you can make them out of a 4x4 if you want, or buy at Michaels
Fine Sandpaper
Paint in a color(s) of your choice
Paint Brushes
Optional (you will need at least some of these, but which is up to you):
Paint Pens
Stickers
Scrapbooking or other decorative paper
Shellac spray
Mod Podge
Step 1:
Sand the edges and corners of the wooden block lightly with the sandpaper. This helps keep sharp pointy things away from baby. Rough up sides just a little if very smooth so paint will stick well. Wipe off all sawdust with a rag (or on your jeans as I did...).
Step 2:
Paint the block. You can paint each side a different color or paint the whole thing one color, or any combo thereof. Just be aware that this step will take some time because you must let the block dry before painting the bottom. You can skip this step or use a stain if you prefer the natural look of wood. Just use shellac to topcoat to protect the wood.
Step 3:
Decorate the block however you like. Use stickers, paper, draw with the paint pens, do what you feel! I used a printer to print out all the info in a pretty font on some scrapbook paper which I cut to size. I also cut out his initial in cool paper to put on the "top" of the block. However, I had ideas to put on stickers, cutouts of animals, use paint pens to "doodle" on the sides, and many other things.
Step 4:
Coat the block with a clear shellac or mod podge to seal it. You can choose not to put a topcoat on the block depending on what you have decided to do to it (if all you did was paint, it probably doesn't need a top coat). Just make sure whatever is used is NON TOXIC. Although these aren't meant as toys necessarily, they will probably end up in baby's mouth just like everything else and not every sealant is safe for them (shellac and mod podge are both non toxic). Make sure the surface you dry your block on is not made of paper or cardboard or it will end up with bits of paper stuck to it. I put mine on the mod podge container to dry. As with the paint, you can't do all sides at once so leave some extra time.
 |
| upside down and NOT touching the paper! Its on the mod podge lid. I later realized I had to put the lid back on the container, which I did with some difficulty... :-) |
Bottom Line:
1 4"x4" (or any size, really) wooden block (from Michael's) = $3.50
small bottle of craft paint (I reused from the fabric painting project) = ~$2
2 sheets of scrapbook paper (didn't use it all, also leftovers) = $.40
Pack of Paint pens = $5
Fine grain sandpaper = $2
Mod podge (I used what I already had) = $6
Shellac spray = $5
Total time = less than 2 hours, not including dry time
Total cost (will depend on which of the above things you use) = about $20 startup, but for just materials you need, about $5.
I loved this project and totally want to do more. I think I will try ordering some smaller blocks from a shop I found on Etsy. Those look easier to handle by little hands. I want to do non personalized ones with alphabet themes or bright colors for learning. Maybe I will make some to sell at an upcoming craft fair?
Monday, October 31, 2011
Simple Halloween Costume
I'm Pregnant. About 7 months along now. Halloween is hands down my favorite holiday. Unfortunately for me, "Mean Girls" had it right - all Halloween is, for youngish women at least, is an excuse to wear a slutty outfit and some animal ears. For years, I have not been above that. I've been a sexy kitty, a playboy bunny, a tiger, catwoman... And then some non animal things like a sexy vampire, or reusing my ren faire costume. Don't worry, it was still sexy. Corsets shove your boobs up. :-)
It looks like I will have to leave the sexy to the other women in the world this year. I am too round to be classified as "sexy" I think.
I hate buying commercial costumes because they are so cheaply made and cost so much, but it doesn't matter this year anyway. There is no such thing as a maternity costume. Apparently my only option while preggers is to buy a plus sized costume. Well, my belly may be round, but the rest of me is far from plus size and I doubt that is a viable option for me. I did scope Target.com for some ideas about what to be, and I found a cute little number that will be empire waisted enough to flow over the curves. A greek/roman goddess. Yay for feminine and pretty and still a little sexy!
Since a pattern wont fit me without major modifications, I decided to wing it. Its a simple enough silhouette, so I should be able to make it work, right? Feel free to make it short and save on fabric.
Self-Faced Greek/Roman Goddess Dress Costume
You will need:
about 4-5 yards of white cotton fabric, either 45 or 60 inches wide is fine
a belt, pretty sash, chain, or ribbon to cinch the waist
a top (or dress) with a cowl neckline that fits you well
dressmaker's pencil, chalk, or fabric pen with disappearing ink for tracing lines
a good pair of shears - you will be cutting through 4 layers of fabric
sewing machine and thread
serger (optional)
Step 1: Lay out your fabric. To make your outfit the most symmetrical possible, fold it in half long ways (if you bought it on a standard bolt, you can use the center fold line from that). Place your top on the fabric. The midline of the top should match up with the center fold of the fabric. Leave some extra fabric sticking out above the top for the self facing. For how much extra to leave, see step 5.
Step 2: Trace around the outside of the top. Leave a seam allowance of about 5/8" while you trace around, except for the top of the neckline which should stay straight across.
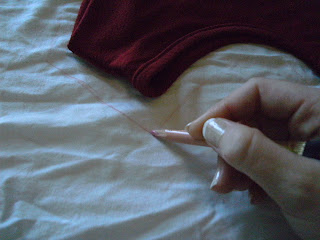
Step 3: Measure how much skirt length you will need. Measure from where the shirt ends on you to where you want the skirt to end and add just a little bit for a hem. I made mine floor length and needed to add 35". Mark the length and use a straight edge to draw a line across the whole width of the fabric.

 Step 4: Now you get to freehand the silhouette of the skirt. Connect the line from tracing the top to the hemline. Depending on how full you want the skirt and how wide your fabric is, you may want to run it all the way out to the selvage edge, but you may want to make it a little more tapered, depending on your preference. I ran mine out all the way to the selvage edge. I also didn't follow the line of the top very well since it doesn't actually fit me, but you get the idea.
Step 5: Now that you have your outline drawn, you are ready to cut! To create the self facing top, you will need to fold under the top edge of the fabric at the neckline so you are cutting an extra layer. This actually means that you are cutting through 4 layers of fabric since it is already folded in half. Make sure there is enough overlap to reach just below the armhole edges.

 When you open out the facing, it will look like this:


Step 10: Match up front and back side seams of dress and stitch along seam allowance from armhole edge to hem. Make sure you catch the piece of facing that overlaps and stitch that along with the side seams to hold it down.

Step 11: Try on dress. If needed, trim the hem a little so it falls where you want it to fall, and to make it even. The hem may not be perfectly straight since we did not curve the lower edge, but it should be close enough. If it really bugs you, feel free to tinker! :-) Hem the lower edge and you are done!
Step 12: Put dress on and use the belt or ribbon or whatever to tie around your waist or just under the bust for an empire waist. Adjust the fullness of the neckline to suit you and admire your hard work!


 Bottom Line:
5 yards fabric at $2/yd = $10 (Use muslin or bargain bin fabric for this! I used some stash fabric I have had since 2005. No cost to me! YAY!)
Total cost: $10
Total time: about 3 hours, including figuring out how to cut and assemble. Should be less for you!
My neckline was a little too loose when I bent over, but I don't think hubby minded looking down my dress all day. My armholes were a little snug, too, so I went back and made them a little larger. If you don't have a cowl neck top to copy, just make a straight line across the top and try using the armhole outline from another sleeveless top. Copy the general shape of my layout and you should be okay. This isn't high fashion quality sewing... its meant to be an alternative to a bedsheet with eyes cut out!
A few general notes: the self facing may seem like a pain to cut and sew, but it will prevent you from having to bind all your edges, which I absolutely hate doing, as well as allow for a second layer of fabric along the bust which adds to modesty. You choose which you prefer and roll with it. If you are tracing a stretchy top, beware! If it has to stretch to fit you, leave some extra in there otherwise the non stretchy cotton will not fit! Also, whcn choosing fabric, don't pick something so cheap that it is see thru! Good Luck!
Happy Halloween!
It looks like I will have to leave the sexy to the other women in the world this year. I am too round to be classified as "sexy" I think.
I hate buying commercial costumes because they are so cheaply made and cost so much, but it doesn't matter this year anyway. There is no such thing as a maternity costume. Apparently my only option while preggers is to buy a plus sized costume. Well, my belly may be round, but the rest of me is far from plus size and I doubt that is a viable option for me. I did scope Target.com for some ideas about what to be, and I found a cute little number that will be empire waisted enough to flow over the curves. A greek/roman goddess. Yay for feminine and pretty and still a little sexy!
Since a pattern wont fit me without major modifications, I decided to wing it. Its a simple enough silhouette, so I should be able to make it work, right? Feel free to make it short and save on fabric.
Self-Faced Greek/Roman Goddess Dress Costume
You will need:
about 4-5 yards of white cotton fabric, either 45 or 60 inches wide is fine
a belt, pretty sash, chain, or ribbon to cinch the waist
a top (or dress) with a cowl neckline that fits you well
dressmaker's pencil, chalk, or fabric pen with disappearing ink for tracing lines
a good pair of shears - you will be cutting through 4 layers of fabric
sewing machine and thread
serger (optional)
Step 1: Lay out your fabric. To make your outfit the most symmetrical possible, fold it in half long ways (if you bought it on a standard bolt, you can use the center fold line from that). Place your top on the fabric. The midline of the top should match up with the center fold of the fabric. Leave some extra fabric sticking out above the top for the self facing. For how much extra to leave, see step 5.
 |
| Mine is not centered over the fabric because this is a non maternity top and I needed it to go round the belly! |

Step 3: Measure how much skirt length you will need. Measure from where the shirt ends on you to where you want the skirt to end and add just a little bit for a hem. I made mine floor length and needed to add 35". Mark the length and use a straight edge to draw a line across the whole width of the fabric.


Step 5: Now that you have your outline drawn, you are ready to cut! To create the self facing top, you will need to fold under the top edge of the fabric at the neckline so you are cutting an extra layer. This actually means that you are cutting through 4 layers of fabric since it is already folded in half. Make sure there is enough overlap to reach just below the armhole edges.

Cut along your traced lines.


Step 6: Use your cutout as a template for the back of the dress. I made mine a lot narrower since I am pregnant and it saves on fabric not to have so much extra width, but you can just reuse the same shape. Cut an exact replica on the fold again so you have 2 of the same piece.

Step 7: Now we get to the sewing part! Unfold the two pieces. Finish the top edge of the facing for both. Either run it through a serger or create a narrow hem so the edge does not fray. It doesn't have to be beautiful as it will be turned to the inside, but you don't want the facing falling apart.
Step 8: With right sides together, fold the facing toward the dress along the neck edge. Pin the facing and the dress together along the armhole edges. Stitch the armhole edges together at the 5/8" seam allowance. Stitch again, close to the stitching inside the seam allowance and trim the seam. Repeat for both sides and for front and back. Turn the facing right side out.
 |
| I pinned the extra down the side, but do not stitch there. Only stitch the curved armhole edge! |
 |
| double stitch to reinforce and then trim so you can turn the facing in. If it still wont turn, clip the curve. |
Step 9: Along the shoulder seams there will now be a kind of "pocket". To stitch the shoulder seams, you will have to fold the seam allowance of the back piece into the pocket and slip the seam allowance of the front piece into the opening. Make sure the shoulder widths of the two pieces are even by sliding the pieces together or apart as needed, then top stitch them together. Repeat for both sides.
 |
| Edges are not yet even, slide them around until they match up! |


Step 11: Try on dress. If needed, trim the hem a little so it falls where you want it to fall, and to make it even. The hem may not be perfectly straight since we did not curve the lower edge, but it should be close enough. If it really bugs you, feel free to tinker! :-) Hem the lower edge and you are done!
Step 12: Put dress on and use the belt or ribbon or whatever to tie around your waist or just under the bust for an empire waist. Adjust the fullness of the neckline to suit you and admire your hard work!
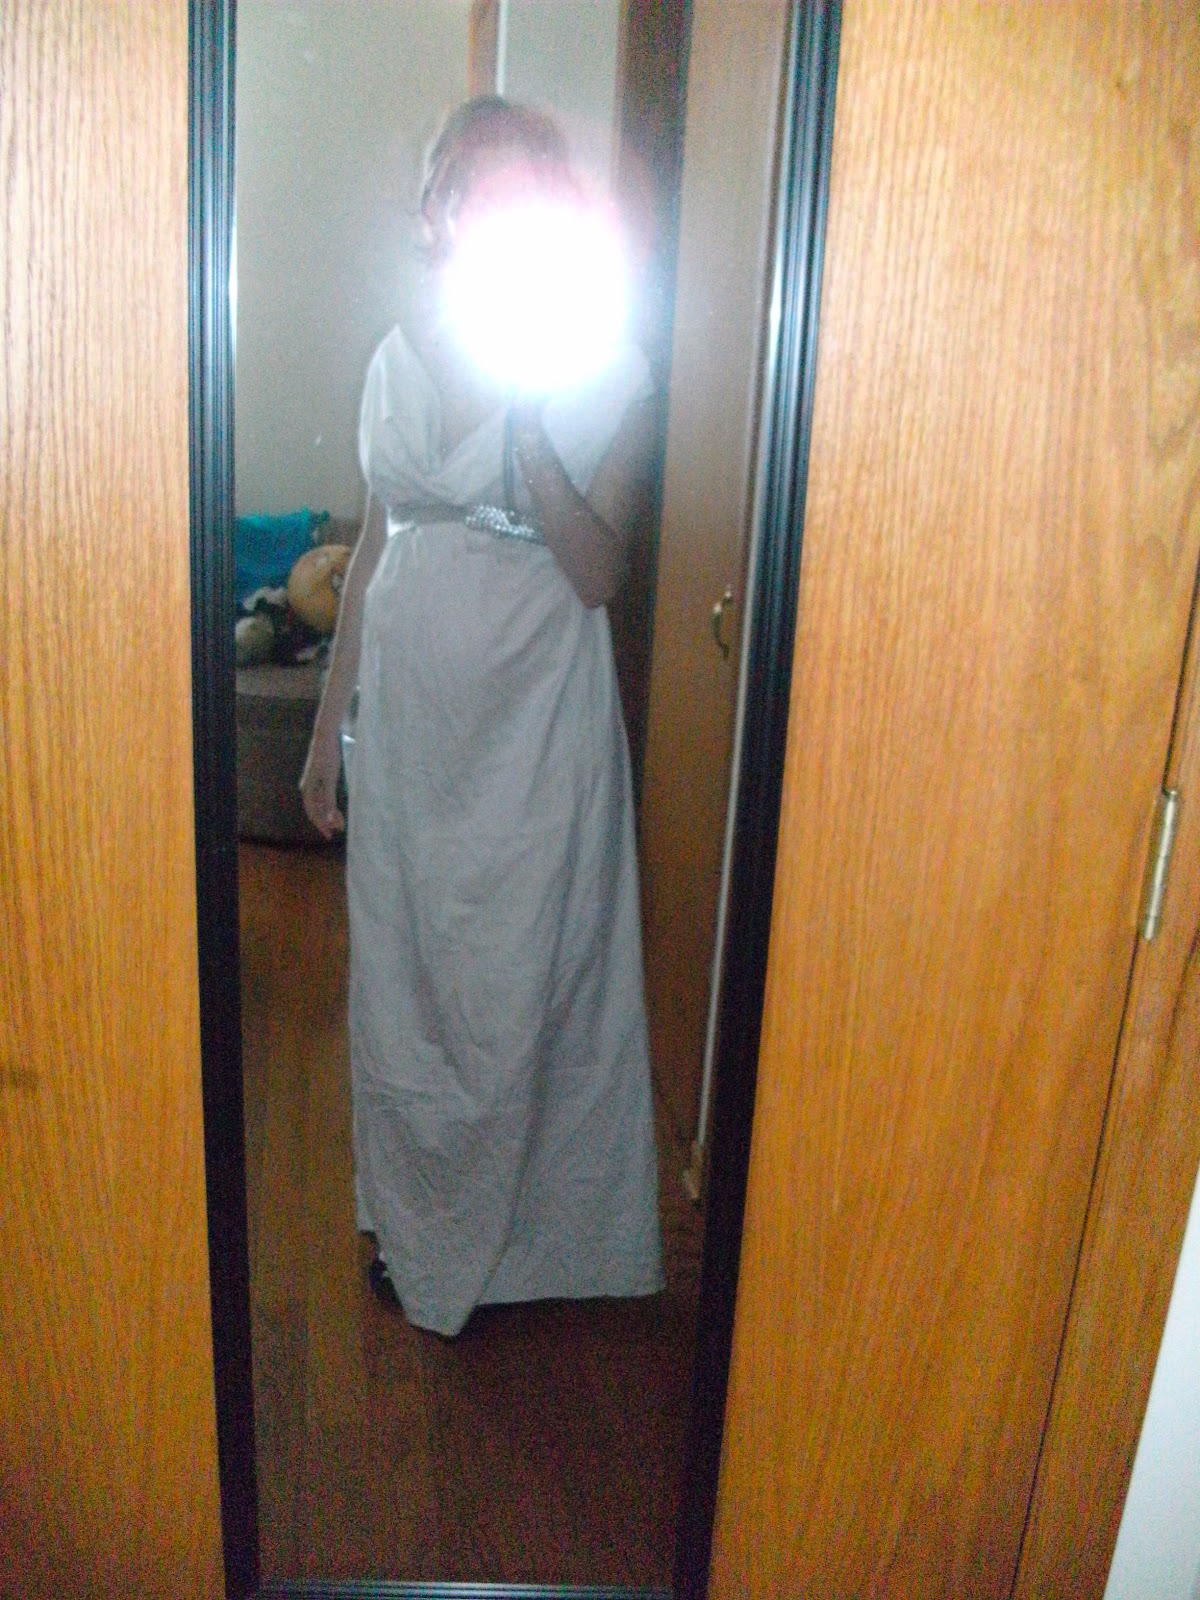


5 yards fabric at $2/yd = $10 (Use muslin or bargain bin fabric for this! I used some stash fabric I have had since 2005. No cost to me! YAY!)
Total cost: $10
Total time: about 3 hours, including figuring out how to cut and assemble. Should be less for you!
My neckline was a little too loose when I bent over, but I don't think hubby minded looking down my dress all day. My armholes were a little snug, too, so I went back and made them a little larger. If you don't have a cowl neck top to copy, just make a straight line across the top and try using the armhole outline from another sleeveless top. Copy the general shape of my layout and you should be okay. This isn't high fashion quality sewing... its meant to be an alternative to a bedsheet with eyes cut out!
A few general notes: the self facing may seem like a pain to cut and sew, but it will prevent you from having to bind all your edges, which I absolutely hate doing, as well as allow for a second layer of fabric along the bust which adds to modesty. You choose which you prefer and roll with it. If you are tracing a stretchy top, beware! If it has to stretch to fit you, leave some extra in there otherwise the non stretchy cotton will not fit! Also, whcn choosing fabric, don't pick something so cheap that it is see thru! Good Luck!
Happy Halloween!
Sunday, October 30, 2011
Giant Soft Pretzel Skeleton
I used to be a massage therapist (seems like another life, really). In my course of study, I learned all the bones of the body. Well, I actually learned them in high school and then learned way MORE about them in massage school, but that makes me sound like too much of a nerd... So when hubby came home a few weeks ago and asked if I could make him a snack to take to his office Halloween party, I immediately longed for an anatomically correct skeleton. I am so tired of seeing incorrectly formed skeletons casually on display. And I love eating and making soft pretzels. It seemed like a match made in heaven!
I am not a total idiot, and I know that I will have to make some compromises on the anatomical accuracy. For example, I am not going to make a hyoid bone. (Look it up.) Or a crapload of tarsals and carpals. No one would recognize them in dough form anyway... :-) But I can do better than the leg bone is connected to the other leg bone. The skeleton at least deserves to have a tibia and a fibula and a femur separated by a patella, right?
To make the skeleton somewhat proportional, Hubby and I looked up some art charts to see what the ratios are between body parts. We found that 8 heads is about right for height, and the shoulders are about 3 head heights across (although not anatomically correct, the 8 head height looks better to the human eye, so we ran with that. In reality its more like 6.5-7 heads, or so I read). We wanted to fit the skeleton on 2 large cookie sheets that were 16" long each, so we used 4" as our "head height" and then used that as the basis for everything else. I drew up a quick sketch of what the bones should look like so I had something to follow, and went to town on the pretzel dough!


Soft Pretzels
2 1/4 t yeast (one packet/envelope)
1 1/2 c water at about 110 degrees
1 t salt
1T sugar
4c flour
1 egg
coarse salt
extra flour for kneading and dusting
Combine yeast, water, salt, and sugar in a small bowl or measuring cup. Allow the yeast to activate (bubbles should form). Add yeast mixture to flour and knead. Add flour until dough is not sticky, but still is a little tacky. Knead until dough is silky. Put dough in a bowl or leave on counter, cover it with plastic wrap or a kitchen towel, and allow it to rest for 10-15 minutes. If you do not let the dough rest, it will be harder to roll out and will spring back on itself a LOT, so don't skip this step unless you want to fight with your shapes. It will puff up a little from the yeast, but knead it a little and it will deflate again.
For the regular bones, I rolled the dough into ropes and cut it up, then shaped it as I wanted. To roll the dough into ropes, start with your hands in the middle and roll them outwards away from one another. If the dough is not tacky, it will not stick to the counter and will not roll nicely. If this is the case, dampen your hands and continue to roll it. Make sure you do NOT flour the surface you are rolling on or it will not work, either. :-) My counter still had flour on it from kneading, so don't be confused!


Brush the pieces with egg, sprinkle with salt (if you want salt) and bake at 425 for 12-15 minutes. You may want to bake the larger bones together and the smaller bones together on separate sheets and then rearrange them later, so you do not over or underbake certain ones. Keep in mind that your bones will puff a little in the oven so you may want to space them a little farther than you will in the fully assembled skeleton, and you may want to adjust your dough shapes to make sure the puffing doesn't affect the overall look.
I wanted to make a spicy cheese dip to go with this, but I was too sick this weekend to mess with it. I am sending hubby with mustard instead. All in all, this took a whole afternoon, but it was totally worth it because it was so fun and looked so cool! We had a bit of dough left, so I baked that up and snacked on it while making dinner.
Of course, you could just make pretzels and forget the whole skeleton thing... They still taste just as good!
I am not a total idiot, and I know that I will have to make some compromises on the anatomical accuracy. For example, I am not going to make a hyoid bone. (Look it up.) Or a crapload of tarsals and carpals. No one would recognize them in dough form anyway... :-) But I can do better than the leg bone is connected to the other leg bone. The skeleton at least deserves to have a tibia and a fibula and a femur separated by a patella, right?
To make the skeleton somewhat proportional, Hubby and I looked up some art charts to see what the ratios are between body parts. We found that 8 heads is about right for height, and the shoulders are about 3 head heights across (although not anatomically correct, the 8 head height looks better to the human eye, so we ran with that. In reality its more like 6.5-7 heads, or so I read). We wanted to fit the skeleton on 2 large cookie sheets that were 16" long each, so we used 4" as our "head height" and then used that as the basis for everything else. I drew up a quick sketch of what the bones should look like so I had something to follow, and went to town on the pretzel dough!


 |
| my foot looks lame, but I ran out of room and can't really draw worth a darn... |
2 1/4 t yeast (one packet/envelope)
1 1/2 c water at about 110 degrees
1 t salt
1T sugar
4c flour
1 egg
coarse salt
extra flour for kneading and dusting
Combine yeast, water, salt, and sugar in a small bowl or measuring cup. Allow the yeast to activate (bubbles should form). Add yeast mixture to flour and knead. Add flour until dough is not sticky, but still is a little tacky. Knead until dough is silky. Put dough in a bowl or leave on counter, cover it with plastic wrap or a kitchen towel, and allow it to rest for 10-15 minutes. If you do not let the dough rest, it will be harder to roll out and will spring back on itself a LOT, so don't skip this step unless you want to fight with your shapes. It will puff up a little from the yeast, but knead it a little and it will deflate again.
 |
| Kneading dough is therapeutic! |


Some of the bones, like the femur and humerus, I left very thick and created knobby "dog bone" ends by splitting the ends with a knife about 1 cm in and shaping each bit into a knobby ball. The other bones I made of varying thicknesses as was appropriate and shaped them as needed. Tip: use a butter knife to cut off the tapered ends after you roll the dough into ropes to keep more uniform thickness to your pieces.
For the solid bones of the hip and skull, I rolled the dough out with a rolling pin and cut out the shape with a butter knife. Once it was on the cookie sheet I smoothed the shapes a little with my hands.
 |
| I traced one hip bone to make the other so they looked kind of symmetrical. |
 |
For the patella, the "carpals" and "tarsals" I pulled a piece of dough out, rolled it in my hands, and flattened it into an appropriately shaped disc.
|
 |
| most of the upper skeleton and the hips |
 |
| hands! |
 |
| feet... only marginally better than my drawing... if even that. |
 |
| Much puffier now than before baking. But much more beautifully golden! |
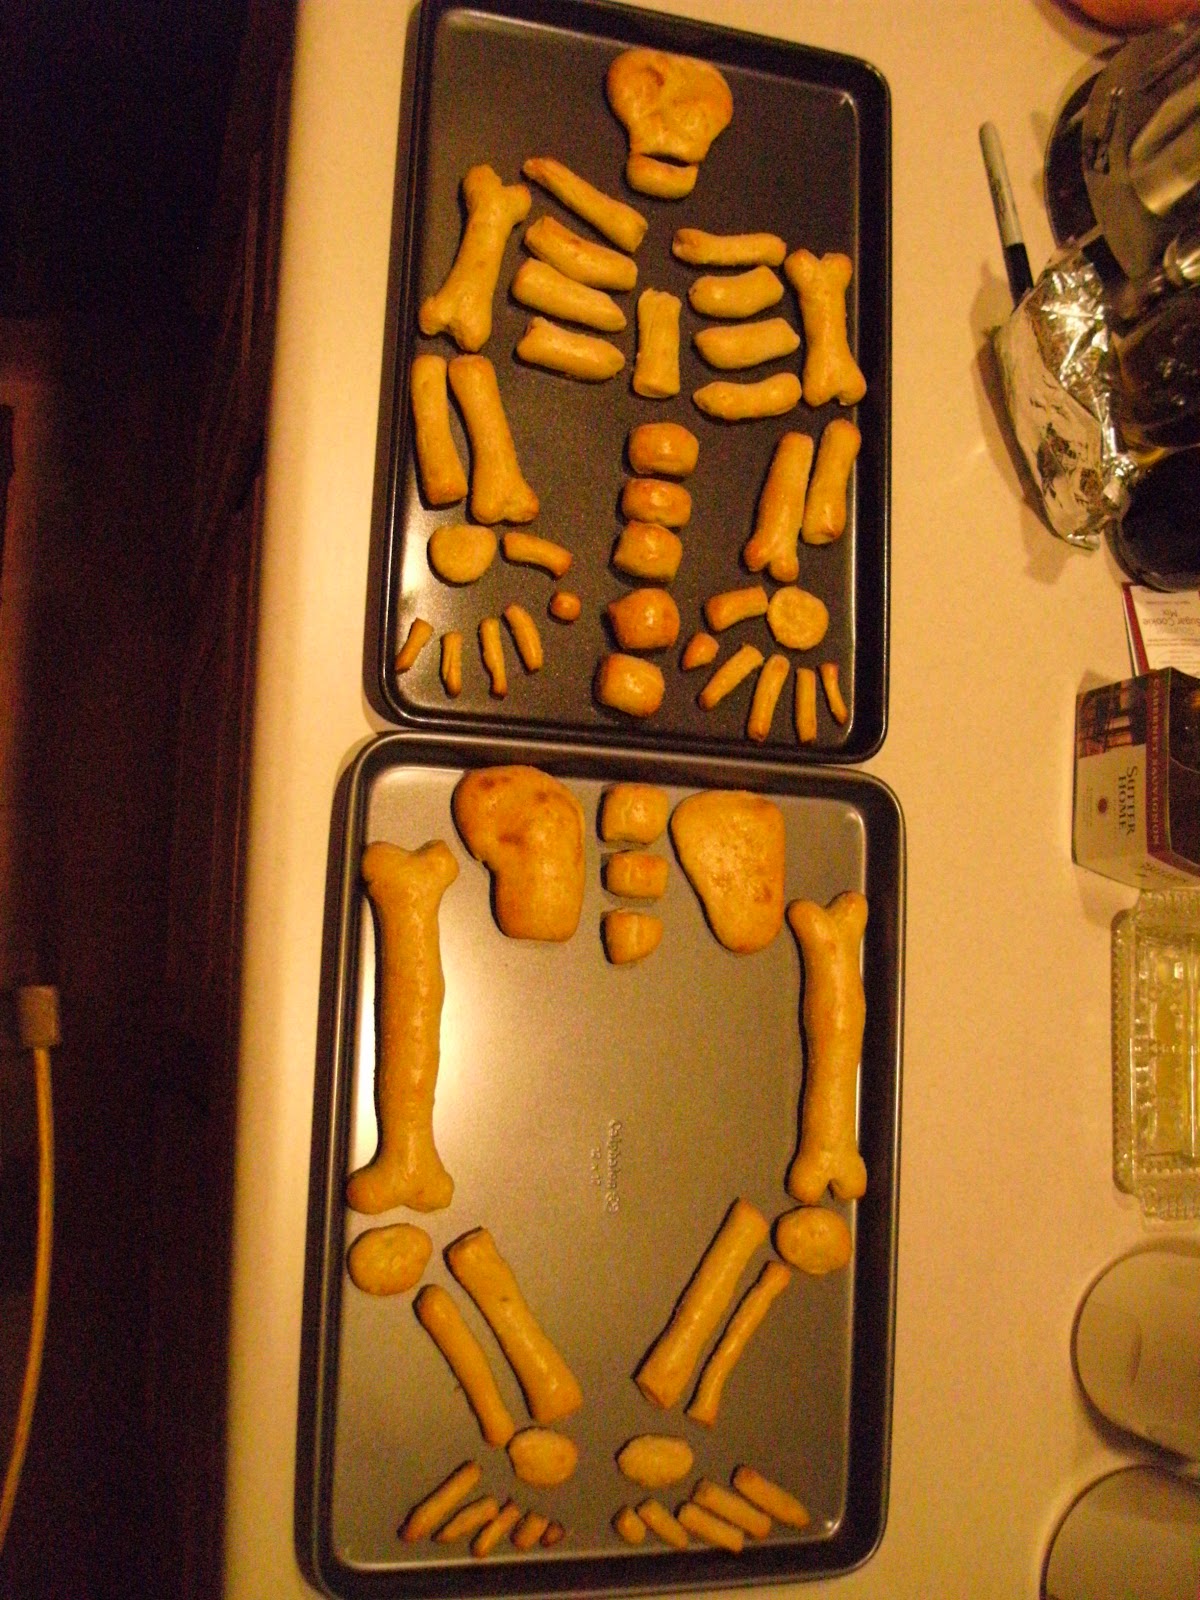 |
| Originally I wanted the hips on the top sheet, but the hands took up too much space so I added some vertebrae and moved it to the bottom. The feet STILL look lame. Oh well. I tried. |
Of course, you could just make pretzels and forget the whole skeleton thing... They still taste just as good!
Subscribe to:
Posts (Atom)