Showing posts with label PUL. Show all posts

Wednesday, February 20, 2013

Wazoodle

I like great companies. I love small businesses. I feel good about buying US made. I like crafting supplies. I seek out good prices. I demand good customer service. I am impressed by sincerity.


Dear reader, this may not interest you in the least, but I felt obligated to tell you about the new and improved wazoodle. It's a website that sells cloth diapering and other supplies to the general public. Let me take a moment to disclaim: I don't work for them I get no money from them and I get no stuff from them unless I pay for it. Which I do. And will continue to.

Anyway, if you are into making your own cloth diapers or accessories, you may have heard of them. They used to be a Canadian based company, but after scathing reviews because of poor customer service and slower than slow shipping, they went up for sale. It is now run out if New Jersey and the new owners seem so awesome! They have scads of new products, all made by the same factories to keep the product quality high (that was the one good thing about the old wazoodle), but such a better attitude. The prices are great, shipping is much more affordable, and I don't have to feel guilty buying from a foreign company (business? In NJ. Products? Manufactured in the states. Yay!)

I get my PUL there, barrel stoppers, drawstring cord, and various other items. They have a great selection of organic fabric, including tons of bamboo.  It is a great resource for natural diapering options, especially.  Looks like they are carrying KAM plastic snaps and presses, too. I used KAMsnaps.com for that, but who knows?! I may switch! Anyway, this may not affect you at all, but I felt moved to shout to the world that a crappy supplier of great products is now a customer friendly, US company. They deserve a second chance. My newest order is placed. Hooray!

Saturday, June 30, 2012

Taping your presser foot to sew on PUL

I love Pinterest.  It is an amazing way to share and bookmark ideas.  Or I should say, that is what it is at its best.  Its also another way to spam me, annoy me with pointless and meaningless sayings and memes, and waste my time with things that aren't helpful or useful.  But with a little concerted effort, its a great way to share and and find revolutionary ideas.  Well, this may not be exactly revolutionary, but man did it help me out tonight.

A long time ago in a blog post far far away, I made a diaper pail liner using PUL as well as a wet bag.  PUL is difficult to sew on because it is a plastic-y, sticky material.  The presser foot snags on the fabric rather than gliding over it, creating an endless source of problems ranging from puckers in the stitching, missed stitches, bunched stitches, bent and broken needles, messed up timing, and even damage to your machine.  A way to avoid having this problem is to place something between the presser foot and the fabric, such as tissue paper, or even regular old printer paper.  While this really does help, it doesn't completely fix the problem and can open a whole multitude of its own issues, like getting it torn off and all those little bits stuck under the thread out without damaging your stitching, loose stitches because of the extra material being sewn over, and not being able to see the line you are stitching very clearly.

Enter Pinterest.

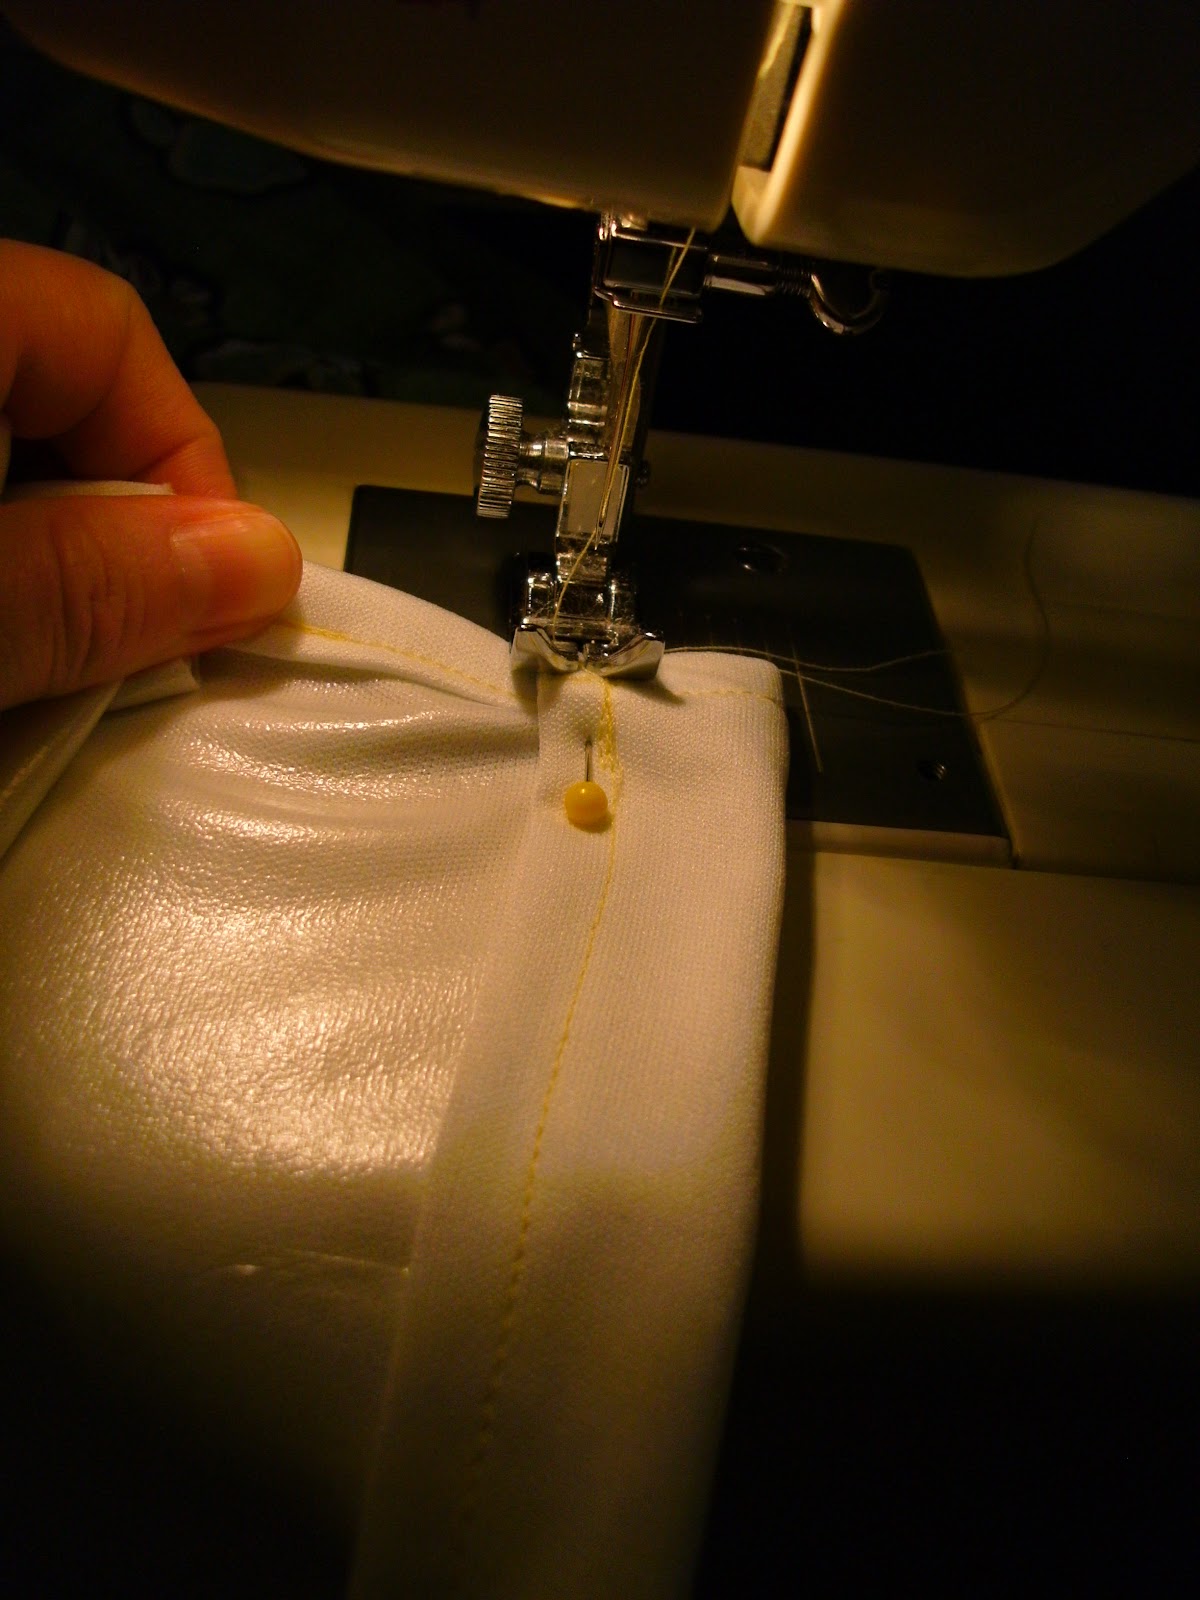
I saw a pin about a trick for sewing on vinyl and thought I would give it a try with PUL.  My foray into sewing stuff for my son's cloth diapers led me to use Joann's PUL which met with mixed results.  I had to replace some of the items I made after the PUL self destructed, but other items made with a different bolt of fabric is still going strong!  Anyway, This method recommended taking a small piece of scotch tape and taping the bottom of your presser foot to make it slippery.  I was pretty skeptical, but I figured I would do half the new project with paper and compare the experience and the stitching to the tape.  You do have to make a hole for the needle to avoid gunking up your needle and subsequently your machine and make a slit down the middle in the front for the thread to slide through, but it worked pretty darn well!  The presser foot slid nicely over the fabric, with only a fraction of the friction.  WORLDS BETTER than using paper or tissue paper or any other method I have found thus far.

So now we know.  Scotch tape for sewing on sticky fabrics works! Not only do you not have to deal with paper, you can see what you are doing and it leaves your hands free for removing pins, keeping your fabric aligned, and all those other things you do NORMALLY.  Go Pinterest.

Monday, March 5, 2012

Diaper Pail Liner Revisited - the PUL version

Okay, so ripstop wasn't awesome.  So I revisited my design knowing that there are upsides and downsides to working with PUL.  I used only 16.5" of 60" wide PUL and folded the length in half and stitched up the sides so there wasn't a bottom seam to seep through.  I also enclosed my side seams to avoid the same.  Hopefully its not just a lot of effort that wont make any difference... sigh.  I never know when I am being clever and when I am just being overly complicated.  :-(

Diaper pail liner - PUL version

Materials:
16.5" of 60" wide PUL
Thread
Sewing machine
Scissors
~ 45" of cord or shoelace for the drawstring

Step 1: Fold the PUL in half, folding selvage edge to meet selvage edge, with the laminated side (shiny, rubbery side) together.  Pin the sides together close to the edges.  Measure about 4" down from the open side and pin.  Stitch sides together below the pins, a scant 1/4" from the cut edge.


Step 2:  Turn the bag inside out (laminated side out).  Turn the corners and stitched edges very well.  To encase your seams, stitch along the sides about 1/2" from the edge, making sure the 1/4" seam allowance stays between your line of stitching and the outside edge.  NOTE: Only stitch below that 4" line from the top of the bag. :-)

Step 3:  You should now have an awkward tab at the top, above that 4" pin you put in oh so long ago.  CAREFULLY clip the fabric to the seam line.  I accidentally clipped too far on one side (easy to do when rushing) and now I have a weak spot that may tear over time.  Boo...

Doing it right the second time... too late to save the first side.
Step 4: Now to finish that top 4 inches.  Fold the cut edge of the fabric to the seam line, laminated sides together.  Fold again, enclosing the raw edge.  Stitch, keeping close to the inside edge of the fold.


Step 5:  Turn under and stitch 1/4" of the top edge of the bag, laminated sides together.  Be careful at the sides that you just finished, as the PUL can get bulky and make the stitching slip.  Repeat with the other side.


Step 6:  Turn the newly finished top edge of the bag over 1" toward the laminated side, or as much as you need to fit your drawstring.  Stitch close to the finished edge to create a casing.  Repeat on the other side.


Step 6:  Almost there!  Now to add width to the bag - note that this is the same as with the ripstop bag.  Refer to that post for more explanation if this step seems tricky.  Laminated side out, crease the bottom edge of the bag.  Place in a pin or two along that crease.  Match the side seam up with the line created by the pins and pull the front and back sides of the bag out, creating a triangle shape.  Measure three inches from the point of the triangle (the corner of the bag) and place a line of pins across to make the bottom of the triangle.
holding the bottom edge of the bag
turn the bag sideways so the bottom edge of the bag is up
place pins in 3" down to create the bottom of the triangle
Stitch across that bottom line of pins.  Repeat on the opposite corner.  The bottom of your bag should look like this:
It now has wings!!!  and with no red bull... sorry, i am sleep deprived :-)

Step 7:  Thread your drawstring through the casing you made on both sides of the bag.  Gather the loose ends on one side and knot them securely.  You are Finished!

Bottom Line:
~1/2 yard of PUL - $5
45" of cord - about $1.50?  
Total cost = $6.50

Time = ~1.5 hours, maybe more if you have to fight with the PUL... boo.

Retail cost:=$15 for a 2 pack of disposable liner refills, $16-20 for a reusable liner

Total savings: $10-15 for a reusable liner, or ~$320 over the life of the bag for disposable liners

A few things to consider when using PUL... if the laminated side is not feeding through your machine, wrap tissue paper around the seam (top and bottom, or at least on the bottom) and then tear it off once you sew your seam.  The paper makes it slide easier, but will not make extra space between your stitches.  Also, PUL is like other plastic and rubberized fabrics.  Pin holes stay there.  Some say that a run in a hot dryer will seal up those holes, but its agreed that making less in the first place is ideal.  I know I say to use pins a lot in my post, but in my pictures, you will note that my use is minimal, and often within seam allowances where it will not affect the integrity of the waterproof layer.  Back to the dryer bit... as with all fabrics, quality of PUL varies greatly, and consequently so do the care instructions.  Some people swear that PUL is fine in the dryer, regardless, and others say line dry only unless you want to destroy your item, regardless.  I say, play it safe and machine dry only when necessary (ie: you have nowhere to put your dirty diapers unless it gets dry pronto!).  It hangs dry pretty fast, so this shouldn't be too much of an inconvenience.  Hope this post helps.

Oh, and for the record, my ripstop bag was still in use up until last night when I finished this bag, and while it did seep some liquid into the bottom of the can, it wasn't terrible.  I wonder if better ripstop really would work??

Update: I now have wet bags and pail liners for sale in my Etsy shop.

Wednesday, September 14, 2011

Making a small, simple wet bag

After doing so much research on making a wet bag or two for myself, I decided to dive in.  Unwilling to wait for or pay for shipping, I decided to gamble on PUL from Joann's.  It gets mixed reviews as to its quality, and I am a little skeptical about how well it will hold up, but because I can buy it at half off with coupons and not pay exorbitant shipping prices like I would have to online, I figured, why not?

And thus I began my first wet bag.  Since I am kind of making up the design as I go, I decided to try something medium sized and simple for the first attempt.  I wanted it to be useful, but it doesn't have to have all the bells and whistles I ultimately want just yet.

I also realized that for all my other posts, I don't actually give materials lists before I start explaining.  Maybe I should start?

Materials Needed:
about 1/2 yard of PUL or other waterproof, sewable fabric
1 14" zipper
sewing machine with a standard zipper foot
thread
scissors

For my first step, I admittedly screwed up.  I wanted to make a bag that was roughly 14"x18".  Well, I cut a strip of fabric that was 15" wide out of the 60" wide PUL.  Then, almost without thinking, I cut it in half on the fold line from the bolt.  Leaving me with a roughly 15"x30" piece which folded in half and seamed would give me at best a 14"x14" bag.  Oops.  Well, this is my rough draft, right?  If YOU want to make the correct size bag, cut a long rectangle 15"x38".  Note that it will look just a bit different from my photos, though :-).

Since PUL has two sides, the fabric side and the side with the laminate on it, I decided to keep the soft, fabric side out and leave the laminate side to the inside so it didn't stick to or snag on anything.  You can choose to do whatever you please.  I have another piece of PUL with a pattern on it that has writing, so this wouldn't work for that, but like I said, this is my test run.

Now that we established the right side of the fabric from the wrong, fold over 1" of fabric on one short end of the rectangle with wrong sides together.  Stitch close to the raw edge, about 1/4".


Put the zipper foot on your machine.  If it is not already, close the zipper.  With right sides together and raw edges even, stitch the zipper to the other short end of the fabric.  The zipper pull should be facing toward the right side of the fabric, and you should be sewing along the top half of the zipper.  Center the zipper left and right across the fabric if the ends of the zipper tape hang over too much or don't quite meet the ends of the fabric.  This wont matter too much later, but it will look more symmetrical if you center it a little.  Stitch the zipper tape to the fabric close to the zipper teeth.  (Random Tip for sewing around the zipper pull: If you finish off your stitching when you get close to the zipper pull, open the zipper, and then restart your line of stitching an inch or so back to finish it off, you will not have an awkward bulge where the zipper foot has to go around the bulky pull.  This will lend a cleaner look to your finished product.)  Turn the zipper to the outside so the right side is showing next to the right side of the fabric and the raw edge is folded under.  Press if your fabric can handle the heat of an iron (I didn't chance it on my PUL).  If not, just hold it down during the following steps.

This view the zipper tape is open.  The teeth are toward the bottom of the photo.

Next, with wrong side to right side, lap the folded over short end over the zippered end, making sure that zipper is facing up.  Overlap the edges by 1/4" past the edge of the zipper so the folded over end hides the zipper.  Make sure the raw edges of the fabric (the long sides) are in line with each other. Place a pin just inside the zipper stop on both ends of the zipper. I found it helpful to place a pin on both sides of the zipper stops just to keep the sides from wiggling as I began to stitch.  Stitch from the raw edge of the fabric through all layers to the second pin on both sides (you should stitch PAST the zipper stop).  You should only have about 1" or so of stitching.  This is correct.  Reinforce if you like with another line of stitching over it or 1/4" above.


Your wet bag should now look like a loop.  Turn the loop inside out.  You should now be able to see the wrong side of the fabric and the wrong side of the zipper.  Take the unstitched side of the zipper and pin it to the folded over end of the fabric, keeping the raw edge of the fabric parallel to the edge of the zipper tape, but leaving an even amount of space across between the edges.  This amount of space will vary based on how far you overlapped the folded edge over the zipper on the right side.  Stitch it closed using your zipper foot.


The last step is to sew the side seams.  I debated a lot on how to tackle this part since I want my wet bag to be reasonably leakproof without being too work intensive.  I finally decided to encase the seams, using a french seam.  This is not a standard seam, so if you have not sewn a lot in the past, this may seem weird at first.  Trust me, it will all work out!


Turn the loop right side out again.  Flatten out the loop, matching the raw edges along the sides.  Place the zippered area about 1 1/2" down the "front" of the bag.  With WRONG sides together, stitch a scant 1/4" from the raw edge on both sides.  Keeping this line of stitching as close to the raw edge as possible is critical.  If you sew it too wide, trim it to 1/4" before the next step.


Unzip the bag and turn it inside out.  Carefully turn all the corners and side seams.  Again, press if your fabric can handle it, otherwise, just pin very carefully in the next step.  Pin the fabric along the side seams to the inside of the raw edges, enclosing them on the inside.  This should be roughly 1/4"-3/8" away from the side.  Stitch.  If you are having trouble with the thickness of your fabric being too bulky on the one side, you can use your zipper foot to sew these seams.  Basically, you are creating a pocket to hide that raw edge that we left on the outside.  This is a french seam.  Hooray!  Don't you feel Eurpoean fancy now?  If you have trouble with the PUL sticking to the presser foot or to the feeder foot, try pinning some tissue paper to the seam and sewing through it.  You can just tear it off once the stitching is in.


Turn your bag right side out again.  You are done!


You have successfully made a simple (ish) version of a wet bag.  And guess what?  The design is way better than most of the ones commercially available, so it is less likely to leak.  Well, I hope so at least.  I am testing it out with wet wash clothes.  Fingers crossed.

Bottom Line:
1/2 yard of PUL @ $10/yd with 50% off coupon = $2.50 (since I screwed up I actually will be making 2 from this, but had I followed my original design, I would have used more.)
1- 14" zipper = $2

Time estimate = Approx 2-3 hrs (I took a lot of time on design and did a fair amount of ripping out stitches, so its hard to know exactly.)

Retail cost = $15 on average.  Some small, cheapy drawstring ones are about $7, some are $25.
Total cost to make = $4.50

Savings = approx $10

Not too bad.  And I didn't even make you use a serger for this one!