Sunday, March 11, 2012

Swaddle Blankets Big Enough to be Useful

Receiving blankets.  What a great thought. My friend loves to wrap her hand-knit stuffed animals in them.  She also uses them to wrap baby gifts instead of using paper.  A great THOUGHT.  She does not (yet) have kids, but once she has her little bundle home, she will realize like the rest of us just how unrealistic these teensie blankets are.  They are so good in theory, but are simply too small (at least in my experience) to do much with.  Wouldn't it be great if they were big enough to actually swaddle your little one? And in a pinch change him/her on it? And use for a mat for tummy time?

Well, I am here to solve that problem. :-) And a bonus - it's probably the easiest tutorial yet. It involves cutting and then hemming (or serging if you prefer). That's it. I promise!

XL Swaddle (or other) blanket
1 1/4 yd of 45" wide flannel fabric (I actually recommend getting 1 1/2 yds to make sure cuts are straight. You can use those scraps on future posts- I have plans!!!) don't forget to wash it first for shrinkage!!
Thread
Good scissors
Sewing machine OR serger

Step 1: Make one cut edge of your fabric straight by cutting along the pattern or following a thread across or drawing a line with a square and straight edge. Fold the straight cut edge to the selvage edge making a triangle. Cut along the bottom selvage edge to remove the excess fabric, making sure you are cutting as straight as possible.


Step 2: Heat your iron to high heat and put on the steam setting. Quickly iron the piece just to get major wrinkles out, focusing on the edges. Fold over one edge by 1/4". Press. Fold over again by 1/2". Press. Repeat on all 4 sides, unfolding the corners of the pressed parts so you can evenly fold each side.


Step 3: Now what to do with those crazy corners you say? We are going to use a "fancy" technique to miter the edges. I don't know what it's really called since I'm largely self taught... Sorry :). This will keep any loose threads from coming out and is a useful skill for more complex projects where appearance really matters. You can skip this step, but I suggest you practice it :)

With the pressing totally unfolded, trim the corner below the first intersecting fold. I used disappearing marker to draw over my fold lines so you can see better in the photo.  The intersecting lines will make a diamond.  You will be cutting off everything below the bottom corner of the diamond, straight across.


Fold the trimmed corner up at the top corner of the diamond. Again, see photo.


Refold one raw edge and press. Then refold the other side and press again.


Turn up one hem at a time, pressing after each, and making sure the edges come to an even angle. Make sure your corner comes to a nice sharp point.


Repeat this process for each corner.

Step 4: Stitch around the edges, close to the inner fold of the hem, pivoting at the corners and using one continuous thread. To pivot at the corners, sew up to the angled part of the corner, making sure your needle is down and advancing it with your hand wheel as needed. Lift your presser foot and turn the fabric 90 degrees. Put your presser foot back down and stitch to the next corner and repeat! Again, not so important for this project but a good skill to hone when the attractiveness of your stitching matters!
begin stitching close to the inner fold.

make sure the needle is down before lifting the presser foot.  This keeps your fabric in place.

Lift the presser foot, rotate the fabric, and then put the foot down again.  Resume your stitching!
 Congrats! You are the proud new owner of a large swaddle blanket!  They measure about 45" by 45" and are AWESOME for larger babies and older children.

Bottom Line:
1 1/2 yd of flannel = $8 (it was expensive fabric, but I had to have it...)
Total cost = $8 (but you have scraps for an upcoming project - yay!)

Time: about 1.5 hrs, maybe less.  I didn't actually keep track of this one... Oops. :-(

Retail cost: kind of not possible to find, but the a&a blankets made of muslin are about $9 each

Total savings: $1. Rather unimpressive... :-(

Well the savings may not be that great, but its exactly what I wanted, and that is worth the cost.  Besides, its still a savings, and every little bit counts.  I also have some leftovers to do more with - I will confess I got more than just the yard and a half needed for this project, but I had other ideas in mind... :-)  Don't worry.  I will post them soon.  

Oh, and if you don't want to bother with hemming, just serge around the edges.  Round off the corners with a cup and then you can just serge around the whole thing.  That makes it a lot faster.

Monday, March 5, 2012

Diaper Pail Liner Revisited - the PUL version

Okay, so ripstop wasn't awesome.  So I revisited my design knowing that there are upsides and downsides to working with PUL.  I used only 16.5" of 60" wide PUL and folded the length in half and stitched up the sides so there wasn't a bottom seam to seep through.  I also enclosed my side seams to avoid the same.  Hopefully its not just a lot of effort that wont make any difference... sigh.  I never know when I am being clever and when I am just being overly complicated.  :-(

Diaper pail liner - PUL version

Materials:
16.5" of 60" wide PUL
Thread
Sewing machine
Scissors
~ 45" of cord or shoelace for the drawstring

Step 1: Fold the PUL in half, folding selvage edge to meet selvage edge, with the laminated side (shiny, rubbery side) together.  Pin the sides together close to the edges.  Measure about 4" down from the open side and pin.  Stitch sides together below the pins, a scant 1/4" from the cut edge.


Step 2:  Turn the bag inside out (laminated side out).  Turn the corners and stitched edges very well.  To encase your seams, stitch along the sides about 1/2" from the edge, making sure the 1/4" seam allowance stays between your line of stitching and the outside edge.  NOTE: Only stitch below that 4" line from the top of the bag. :-)

Step 3:  You should now have an awkward tab at the top, above that 4" pin you put in oh so long ago.  CAREFULLY clip the fabric to the seam line.  I accidentally clipped too far on one side (easy to do when rushing) and now I have a weak spot that may tear over time.  Boo...

Doing it right the second time... too late to save the first side.
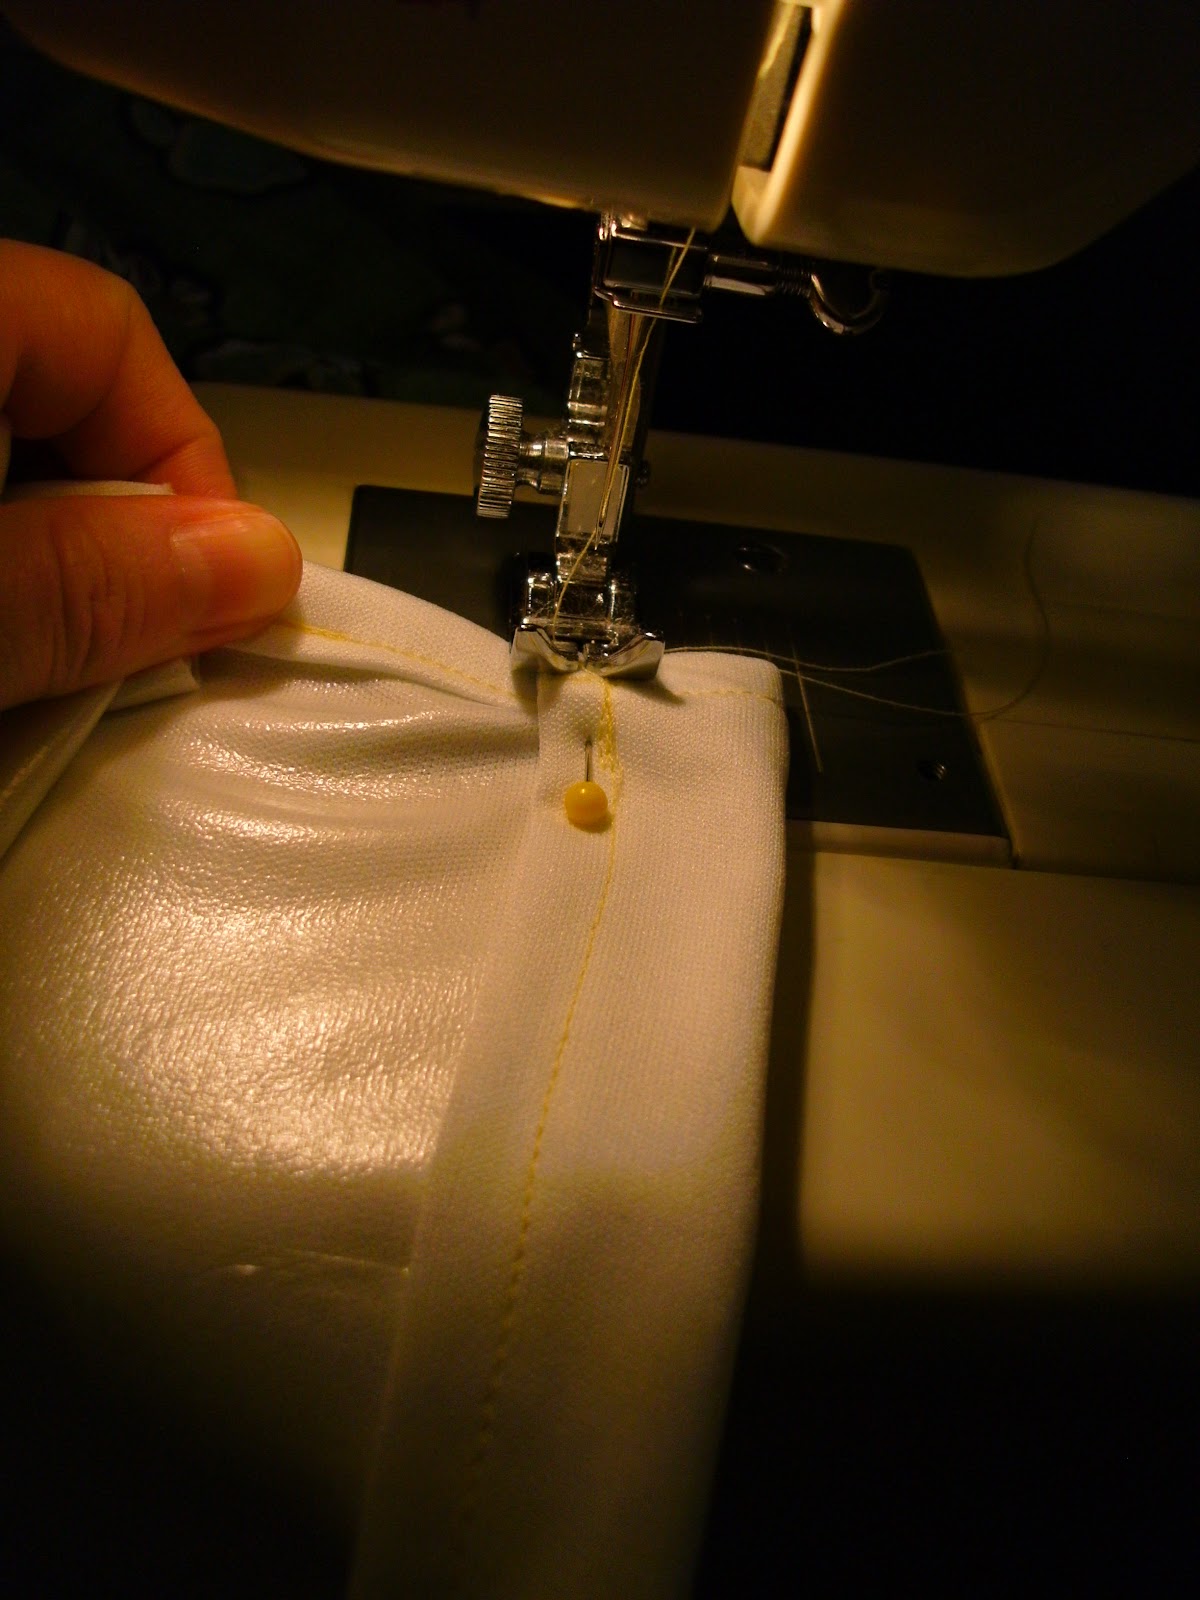
Step 4: Now to finish that top 4 inches.  Fold the cut edge of the fabric to the seam line, laminated sides together.  Fold again, enclosing the raw edge.  Stitch, keeping close to the inside edge of the fold.


Step 5:  Turn under and stitch 1/4" of the top edge of the bag, laminated sides together.  Be careful at the sides that you just finished, as the PUL can get bulky and make the stitching slip.  Repeat with the other side.


Step 6:  Turn the newly finished top edge of the bag over 1" toward the laminated side, or as much as you need to fit your drawstring.  Stitch close to the finished edge to create a casing.  Repeat on the other side.


Step 6:  Almost there!  Now to add width to the bag - note that this is the same as with the ripstop bag.  Refer to that post for more explanation if this step seems tricky.  Laminated side out, crease the bottom edge of the bag.  Place in a pin or two along that crease.  Match the side seam up with the line created by the pins and pull the front and back sides of the bag out, creating a triangle shape.  Measure three inches from the point of the triangle (the corner of the bag) and place a line of pins across to make the bottom of the triangle.
holding the bottom edge of the bag
turn the bag sideways so the bottom edge of the bag is up
place pins in 3" down to create the bottom of the triangle
Stitch across that bottom line of pins.  Repeat on the opposite corner.  The bottom of your bag should look like this:
It now has wings!!!  and with no red bull... sorry, i am sleep deprived :-)

Step 7:  Thread your drawstring through the casing you made on both sides of the bag.  Gather the loose ends on one side and knot them securely.  You are Finished!

Bottom Line:
~1/2 yard of PUL - $5
45" of cord - about $1.50?  
Total cost = $6.50

Time = ~1.5 hours, maybe more if you have to fight with the PUL... boo.

Retail cost:=$15 for a 2 pack of disposable liner refills, $16-20 for a reusable liner

Total savings: $10-15 for a reusable liner, or ~$320 over the life of the bag for disposable liners

A few things to consider when using PUL... if the laminated side is not feeding through your machine, wrap tissue paper around the seam (top and bottom, or at least on the bottom) and then tear it off once you sew your seam.  The paper makes it slide easier, but will not make extra space between your stitches.  Also, PUL is like other plastic and rubberized fabrics.  Pin holes stay there.  Some say that a run in a hot dryer will seal up those holes, but its agreed that making less in the first place is ideal.  I know I say to use pins a lot in my post, but in my pictures, you will note that my use is minimal, and often within seam allowances where it will not affect the integrity of the waterproof layer.  Back to the dryer bit... as with all fabrics, quality of PUL varies greatly, and consequently so do the care instructions.  Some people swear that PUL is fine in the dryer, regardless, and others say line dry only unless you want to destroy your item, regardless.  I say, play it safe and machine dry only when necessary (ie: you have nowhere to put your dirty diapers unless it gets dry pronto!).  It hangs dry pretty fast, so this shouldn't be too much of an inconvenience.  Hope this post helps.

Oh, and for the record, my ripstop bag was still in use up until last night when I finished this bag, and while it did seep some liquid into the bottom of the can, it wasn't terrible.  I wonder if better ripstop really would work??

Update: I now have wet bags and pail liners for sale in my Etsy shop.

Saturday, February 25, 2012

Diaper Pail Liner or Large Wet Bag

MASSIVE EDIT!!!  Ripstop does not work!  I am not sure if it is just the quality sold at joann's that is failing or if it is the idea of ripstop in the first place, but I guess I have to do it again with PUL, as much as I hate working with it... :-(  such a great idea.  Just goes to show - don't believe everything you read on the internet, and not every project works every time :-(

While pregnant, I decided that I wanted to do cloth diapering.  Its a great thing really, for many reasons, but most notably for the kindness to the environment and the kindness to your wallet.  I looked online for a suitable diaper pail that was compatible with cloth diapering.  I found the Diaper Dekor Plus and so far, so good (note: I actually would opt for the largest pail they offer, the XL rather than the Plus.  Cloth diapers are so much bulkier than disposables and the bag fills up pretty quickly).  One of the huge perks of the Diaper Dekor was that the design allowed you to use a reusable diaper pail liner rather than buying their plastic refills all the time, thus saving even more money and more landfill space (not to mention petroleum!).

The diaper dekor in all its glory
A unique design allows for a drop in reusable liner
This tutorial is for a pail liner to fit a diaper dekor plus, so if that is what you need, this is your exact recipe.  However, it can easily be altered to fit the dimensions of other types of pails or for regular garbage cans or laundry hampers to make a simple cloth diaper receptacle.  It can also be used to make a large wet bag to hang from a hook or a knob of some sort, but I would use PUL as the fabric to make it a little sturdier.  I used Ripstop Nylon because it is thinner and easier to maneuver into the pail, easier to sew, and much less expensive.  However, its water resistance depends on the thickness, quality, and coating of the nylon.  I got mine from Joann Fabrics, but I am not sure it is super waterproof as I haven't really tested it other than a quick check in the store.  If you are paranoid, you can just use PUL and deal with the extra bulk and cost.

Diaper Pail Liner
Materials:
one yard of 60" wide Risptop Nylon (or PUL)
approximately 45" of cord to tie up the bag (or a round shoelace)
thread
scissors
tape measure
sewing machine

Step 1:  Cut the yard or fabric in half (along the fold line from the bolt works well as long as you make sure it is centered first).  Also, be sure to check that the fabric really is 60" wide. :-)  You will now have 2 pieces of fabric that measure approximately 30"x36".  Trim the length to about 32".

Step 2:  Along the short (30") side, fold over about 1/2" and stitch.  You don't have to worry about Ripstop fraying and raveling, but I wanted to fold over the raw edge anyway, just for aesthetics.  This will be the top of the bag.


Step 3:  Fold the fabric in half, matching the selvage edge and the cut edge you made along the bolt fold.  Measure 4 " down from the finished edge and put in a pin.  Below the pin, stitch the sides of the bag together with about 1/2" of seam allowance.

 Step 4:  From the pin up, fold over the seam allowance on each side and stitch around in a continuous U shape, pivoting at the corners, and backstitching at the bottom to add some strength.


Step 5:  Fold over 3/4 of an inch of the finished edge at the top of the bag.  Stitch close to the finished edge to create a casing for the cord.

Step 6:  Stitch up the bottom edge of the bag, with about a 3/4" seam allowance.  You can end here and have a perfectly functional bag if the following instructions are too complicated.  However, I would recommend trimming the length of the bag by about 2".

Step 7:  To add some shape to the bag and hopefully add to the capacity, we are going to modify the bottom of the bag.  With the bottom seam facing you, take the seam side of the bag and match it up to the bottom seam, pulling the "front" and "back" of the bag to the sides.  If you pull it taut, it will make a triangle with the bottom seam going down the middle.  It's a little complicated to explain, but easy to do once you can figure it out.  The best I can say is match up the seams and pull the extra fabric out of the way and boom, you've got it!
From the bottom - fold seam to seam.
Once you have the seam side done, repeat with the other side.  Try creasing the side and placing a pin along the crease to make sure you line up the bottom seam exactly with the side.

Another angle to help you visualize :-)
Step 8:  Once you have made your triangle shapes, make sure the sides of the bag are pulled taut to create crisp triangles.  One side at a time, hold the bag with the point of the triangle facing away from you, and the bottom seam up.  Measure 3 inches down from the point of the triangle and pin.  Pin across the width of the fabric triangle and stitch.  Repeat on both sides.  Congrats! You have given your bag a nice flat bottom and about 6" of width!


Step 9:  Thread the shoelace or cord through the casing at the top.  I wanted to have one of those ball thingies that you slide to close bags like this, but I didn't have one.  I totally thought I cannibalized one from something, but no dice.  Sigh.  And I can't seem to figure out what they are called to buy one.  Look out knots, here I come.


Step 10:  To put it in the diaper dekor, open the top and drop the bottom of the bag in the middle.  Roll the top of the bag over the edge and slide it down into that slot.  Tighten up the drawstring and voila! You have yourself a reusable, washable diaper pail liner!

Another big bonus to this is that you can empty your diapers into the wash without touching them and just toss the bag in after.  I used red because I thought it would be fun.  Hopefully its colorfast since its Nylon or we will have a lot of pink diapers for my little boy.  :-)  Make 2 so you have one to use and one to wash.

Bottom Line:
1 yard of Ripstop (good for 2 liners) - $6 (on sale for 25% off at Joann's)
45" of cord - about $1.50?  I had it in my stash so I'm not totally sure... :-)
Total cost = $4.50 per bag ($3 in fabric and $1.50 in cord)

Time = ~1.5 hours, probably less if you aren't stopping to feed a baby and take pictures every so often :-)

Retail cost:=$15 for a 2 pack of disposable liner refills which last for ~366 changes (I averaged their advertised capacity on their website over the 6 diaper sizes they listed, note that this is for disposables, though), $16-20 for a reusable liner

Total savings: $10-15 for a reusable liner, or ~$325 over the life of the bag for disposable liners, using their number of 4500 changes for a baby and the average of 366 changes per set of refills.  And that's only if you have one kid!  Holy cow!!!

I promise I will post more frequently.  My baby has been my #1 priority though, so blogging kinda is taking a back seat.  Hopefully I will get more mommy time as he gets older and that will mean more blog time!


Friday, January 13, 2012

New Baby!!

So the reason I haven't posted in ages is that our little one arrived!  Julian was born Dec 14 (early! hooray!) and we have been in love ever since.  I will post some of the stuff I am working on soon, but until then, happy crafting!