I am in the process of making (yes making, not throwing) a baby shower for a somewhat-relative-more-like-a-friend of mine in about 2 weeks. So I am scrambling to get stuff together, being a procrastinator, a perfectionist, a mom of an infant, and a baby shower hostess virgin. I'm super excited, but anything new makes me panic because I am out of my comfort zone. (I made that revelation with my husband at target the other night and he responded "good. You need to get out of your comfort zone." eek. Am I really that bad?) but I am determined for it not to suck, so I am handcrafting a lot of the stuff :). We know it's a girl and the mommy to be LOVES girly stuff so I'm excited!
As aforementioned, I was at target, and of course I hit up the dollar spot. What thrifty hostess/crafter wouldn't? And I hit pay dirt. I got an idea and supplies. Hooray. I picked up a cloth headband like I used to wear in the 80's to school which apparently isn't taboo anymore. And I thought, why not make a cute baby flower headband with it?! No more "is it a girl or a boy" with a hot pink flower strapped to baby's head! (at least not in Wisconsin. Too traditional haha)!
So here is the DIY: bonus!!! No sewing machine needed!!
Supplies:
Adult sized headband
Large, flat-ish silk flower like a peony or daisy
Thread
Needle
Scissors
1) Measure the head of the baby you are making the headband for. I used my son as a stand in for the new baby, and made it just a little snug on him so it ought to fit her. He has a small head, after all. I didn't actually measure, but if you are looking for a specific size for a baby, there are lots of growth charts out there that give average head circumference for babies of different ages on the internet. I have used those growth charts for other things, like sizing clothes when I didn't have the baby's measurements. They aren't perfect, but they should get you in the ballpark.
2) Cut the headband at the seam and lay it out. Measure the length you want, add half an inch or so for a seam, and cut off the extra on the side that has the seam so you don't have the bulky part to deal with on your finished product.
3) Overlap the ends by about 1/4" (or more if you left enough for your seam allowance) and pin them together. You can just set one end on top of the other. Jersey knits do not fray like other fabrics so you don't have to worry about finishing the edges. Easy, right?
4) Using a needle and thread, stitch the two ends closed to make a loop again. If you aren't great at hand sewing, don't worry. This part will be covered up by the flower. If you really want, you can use a machine to sew this, but since knits have a bit of stretch to them, it can distort the fabric unless you use a stretch stitch, which I found too much of a pain for 1" of sewing.
5) Trim the excess fabric around the stitching if there is any. This is not a necessary step, but my edges were a little jagged and I cleaned them up some.
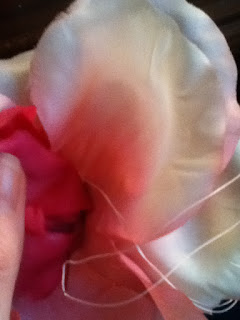
6) Take your flower. Remove the stem by gently pulling the flower head off. There will probably be a plastic piece holding the flower together at the base - do NOT remove it or the flower will fall apart. You can trim it if you need to, but not so much that it compromises the stability of the flower pieces. Lift the top layer of petals up and gently move them to the side. Knot your thread and poke the needle through the bottom layers of petals from top to bottom, so the knot is hidden under the top layer of petals.
8) With the needle and thread on TOP of the flower, wrap the thread closely to the center of the flower, and go back down through the flower on the opposite side, tacking it to the headband in the same way you did for the first spot.
 |
| Wrap your thread close to the center of the flower so it doesn't show. |
 |
| Center the flower on the other side as well so it doesn't get lopsided. |
9) End your thread and you are done! I had my son model for photos... It even makes him look pretty :-) Try not to torture him when he is 16...
Bottom Line:
This is a really easy and really quick project. I think it took me about 15 minutes to slap together and cost only about $2 between the headband and the flower. Rock on... :-) These go online on Etsy or Amazon for $15 easy... So you can thank me later.
Oh, and Tina, if you read this... Ignore how little I spent and how easy it was. It was super complex and cost a small fortune, but I would do anything for you haha. :-)


No comments:
Post a Comment